Using the Main Application Screen
Launching Dispatcher Phoenix the First Time
After successfully installing Dispatcher Phoenix, follow these steps to launch the application:
-
Double-click on the Dispatcher Phoenix icon. The application will load and prompt you for your login credentials.
-
Enter your login credentials.
Important!
-
When logging in with Microsoft Entra ID, Workflow Services Manager must be set up first to accommodate it. Once it is set up, you will be able to type your Entra ID into the User Name field.
-
When using a Microsoft login, it will be available in the drop-down menu.
Application Elements
The main window contains the following elements:
-
Tool bar
-
Workflow list
-
Preview area
-
Activity panes
Tool Bar
On the main application screen, the tool bar at the top of the screen contains icons and pull-down menus that will help you use the application.
Icons
The toolbar icons include:

| Icons | Description |
|---|---|
| New Workflow - Opens the Workflow Builder, allowing you to create a new workflow. | |
| Edit Workflow - Opens the Workflow Builder for the highlighted workflow. | |
| Copy Workflow - Copies the selected workflow. | |
| Paste Workflow - Pastes the workflow, which was previously copied to the clipboard, back into the Workflow List. | |
| Delete Workflow - Deletes the selected workflow. | |
| Start/Resume Workflow - Starts running the selected workflow or resumes running of a paused workflow. | |
| Pause Workflow - Pauses the active workflow. | |
| Stop Workflow - Stops the selected workflow. | |
| Schedule Workflow - Opens a panel to define a schedule for the selected workflow. | |
| Toggle Shared Status - Clicking on this icon when one or more workflows are selected designates the workflow(s) as ‘shared,’ meaning that anyone else who has access to the computer can use that running workflow. Shared status can be toggled on or off. Once shared, a Shared icon will appear next to the workflow in the Workflow List. | |
| Import Workflow - Imports an existing workflow. | |
| Export Workflow - Exports and saves a workflow as a *.wfxp file. | |
| Online Samples - Launches a Web page that contains sample workflows for you to view and download. | |
 |
Show/Hide Workflow List - Shows or hides the Workflow Lists in the upper left part of the screen. |
 |
Show/Hide Workflow Preview - Shows or hides the Workflow preview. |
 |
Show/Hide Workflow Activity - Shows or hides the Activity Panes. |
| MFP Simulator - Launches the Dispatcher Phoenix MFP Simulator Tool. |
Tools Menu
The Tools menu in the upper right corner of the screen provides access to many of the application functions and tools. Options include:
-
Toggle Shared Status - Clicking on this menu item when one or more workflows are selected designates the workflow(s) as ‘shared,’ meaning that anyone else who has access to the computer can use that running workflow. Shared status can be toggled on or off. Once shared, a Shared icon will appear next to the workflow in the Workflow List.
-
Pause running workflow(s) - Pauses all of the workflow(s).
-
Resume paused workflow(s) - Resumes the paused workflow(s).
-
Export Workflow… - Exports the selected workflow.
-
Import Workflow… - Imports an existing Dispatcher Phoenix workflow.
-
Import Sample Workflow… – Imports one of the available sample workflows.
-
Reinstall Sample Workflow… - Reinstalls all sample workflows that come with the application.
-
Online Samples… - Enables you to view and download sample workflows.
-
Documentation Library – Launches a page on the SEC website that gives you online access to reference material on the application.
-
Language - Opens up the Language Manager so that you can choose your preferred language.
-
Log Viewer… - Enables you to view the log files for any workflow.
-
Switch to Compact Mode - Reduces the view to show the Workflow List and menu icons only.
-
Enable Animations - Select whether or not to show animations while the workflow runs.
-
Animation Speed - Set the speed of workflow animations to real-time or slower.
-
MFP Registration Tool… - Launches the MFP Registration Tool.
-
MFP Simulator… - Launches the interactive Dispatcher Phoenix MFP Simulator tool.
-
Barcode Generator - Launches the Barcode Generator Tool.
-
Bubble Sheet Generator… - Launches the Bubble Sheet Generator Tool.
-
Index Form Builder… - Launches the Index Form Builder Tool.
-
Dispatcher Phoenix Web… - Launches Dispatcher Phoenix Web (from a Dispatcher Suite installation only).
-
Dispatcher Paragon… - Launches Dispatcher Paragon (from a Dispatcher Suite installation only).
-
Options… - Allows an administrator to configure settings for the application.
Shared Workflows
Specifically designed for Active Directory users running workflows, shared workflows allow multiple users to have access to the same workflow from the MFP control panel. With this functionality, a “Scan To Home” feature can be used where documents go directly to a user’s specific Active Directory folder.
Shared workflows are identified on the control panel and also within Dispatcher Phoenix with the following icon: ![]()
Note: A shared workflow’s state cannot be modified by other users.
When logged into Windows as a different user, shared workflows will be listed with a grayed-out icon next to them.
You can also assign workflows to specific users using the Dispatcher Phoenix Web’s Sharing app. When a workflow is shared with a specific user, the following icon will appear next to it in the workflow list: ![]()
MFP Registration
Using the MFP Registration Tool, you can register MFPs to be used by Dispatcher Phoenix for workflows. The Dispatcher Phoenix Web interface also includes a Devices Tool for discovering, registering, and editing devices. Go here for more information on the web-based Devices Tool.
After launching this tool, you can do the following:
-
Click the Add MFP button to enter the specific device information of the MFP that you are interested in (using the Add MFP window).
-
Click the Find MFP button to start an automatic search for all available MFPs on the network (using the MFP Explorer tool).
-
Click the Defaults button to configure the location of the bEST Application Server, user authentication options, and additional info. These settings will be default settings for all registered MFPs.
-
Click the Edit MFP button to configure MFP, user authentication settings, and additional info for a specific MFP. These settings will be applied only to the selected MFP.
-
Click the Register MFP button to register the selected MFP or Unregister MFP to unregister the MFP.
-
Click the Delete MFP button to remove the selected MFP(s) from the list. Only unregistered MFPs may be deleted. To delete a registered MFP, you must unregister it first.
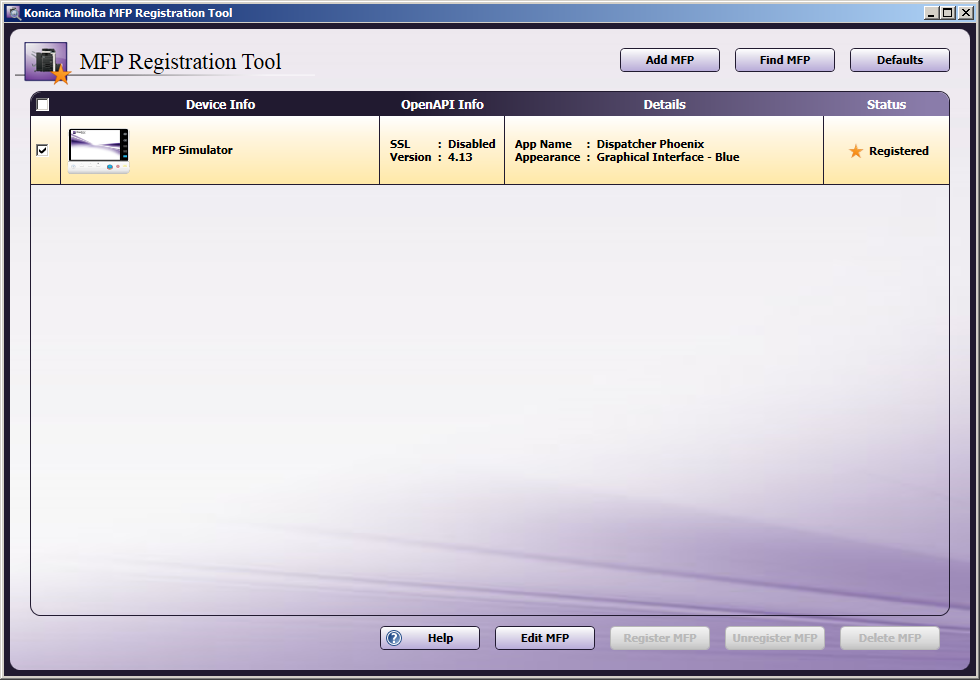
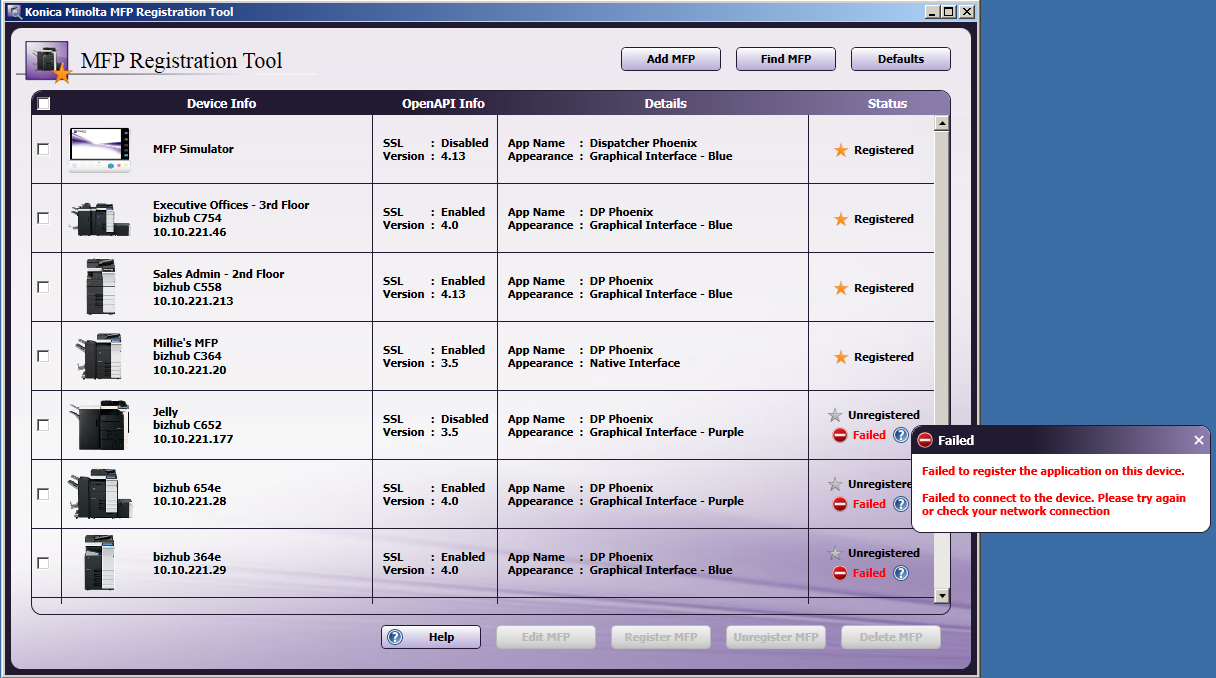
Once the MFP Registration Tool has been populated (either manually or automatically), the window will resemble the following illustration:

- Device Info - This column shows the model and IP address of the MFP, as well as any optional names for the printer.
- OpenAPI Info - This column shows whether SSL is enabled or disabled, as well as the OpenAPI version on the MFP.
- Details - This column shows the name of the application that is registered, as well as the panel appearance on the MFP.
- Status - This column shows whether the MFP is registered or unregistered, as well as the status of the registration process.
Register/Unregister MFPs
Check the box(es) next to the MFP(s) that you would like to register or check the All box (located above the first column) to select all listed MFPs; then click on the Register MFP button.
Once done, the Status will change to Registered. To unregister the MFP, select the device from the list; then select the Unregister MFP button.
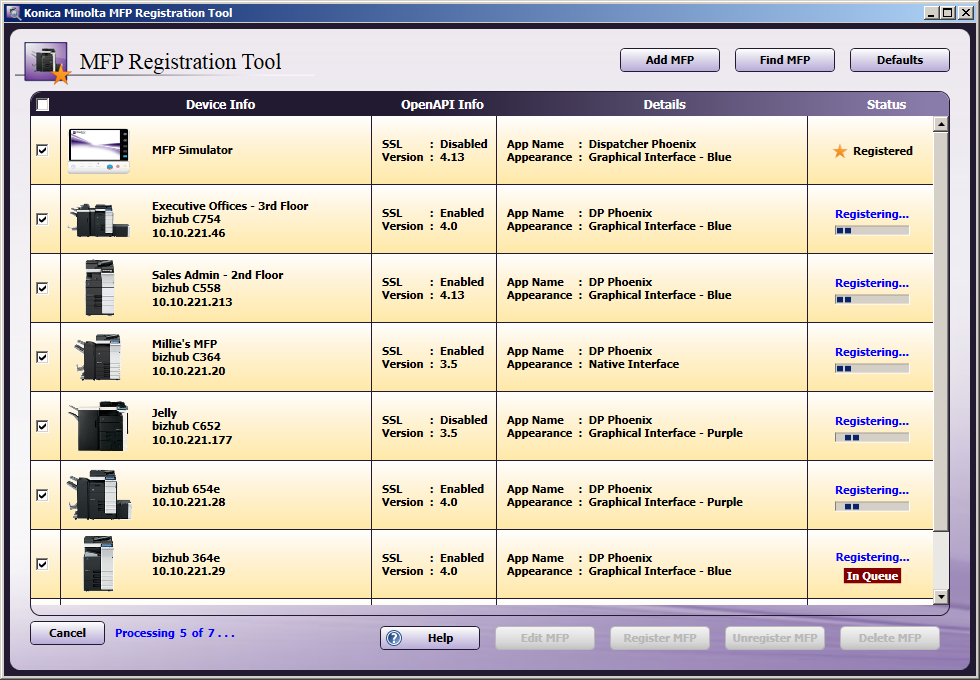
If you are registering a large number of MFPs at once (e.g., 100 MFPs), the MFPs will be registered concurrently, five at a time, with the rest put in a queue. A registration bar will appear to indicate which MFPs are currently being registered. If you cancel the registration process by clicking on the Cancel button on the bottom of the window, all remaining MFPs will be removed from the queue and all current processing MFPs will continue to process. See the following illustration for an example of the “Registering…” and “In Queue” statuses:
If registration fails, a “Failed” message will appear in the Status column. Click the Help icon to view a detailed message about why registration failed, as in the following illustration:
Note: If the “Automatically register as Native UI if Graphical UI is not supported on MFP” option is not enabled (when adding an MFP) and the MFP does not have the i-Option installed or licensed, it cannot be registered with a ‘Graphical User Interface’ panel appearance defined.
Edit MFPs
To edit the settings of an individual MFP, select it from the list (or click on its check box); then click on the Edit MFP button. The Edit MFP window will appear, as in the following illustration:
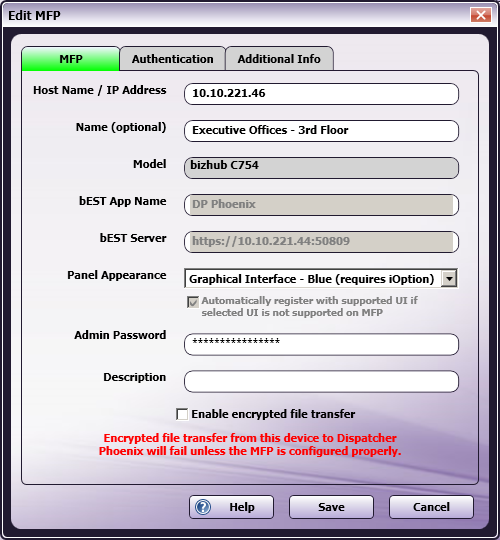
On this window, you can change the MFP and user authentication settings for the individual MFP.
Note: Any changes made to this window are saved but not applied to or validated against the MFP until the MFP is registered (or unregistered and then registered again).
Changing the Panel Appearance: To change the defined panel setting appearance from graphical to native or vice versa, you must first unregister the device. If you are switching between the graphical interfaces (blue and purple), then you do not have to unregister the device.
Security: For certain MFPs, an Enable encrypted file transfer box will also appear on the Edit MFP window to enable you to encrypt your documents. Once the box is checked, you must configure the MFP as well. At the MFP, do the following:
-
Select the Utility/Counter key on the MFP panel.
-
Press the Administrator Settings button on the Utilities screen. The Password screen will appear, as in the following illustration:

-
Enter the administrative password; then press the OK button.
-
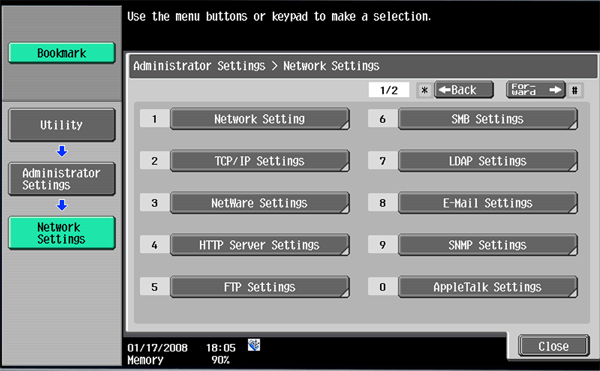
On the Administrator Settings screen, press the Network Settings button. The Network Settings screen will appear. Press the Forward button, as indicated in the following illustration:
-
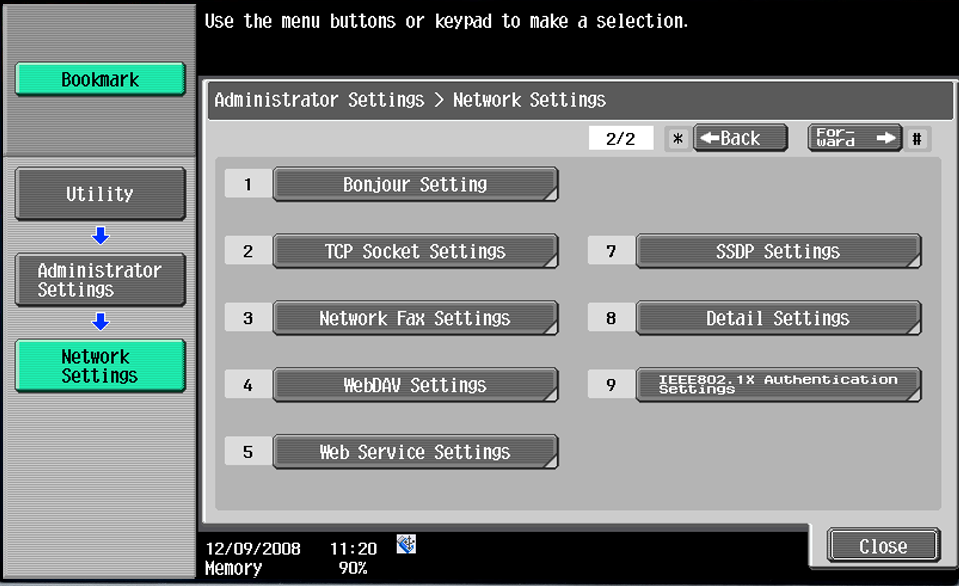
On the second Network Settings screen, select the WebDAV Settings button, as in the following illustration:
-
On the WebDAV Settings screen, select the WebDAV Settings Client Settings button; then press the Forward button two times.
-
At this point, you will see a button for Chunk Transmission. This option must be enabled.
-
Select the OK button when you are done.
Manually Adding An MFP
If you know the information for a specific MFP that you would like to register, select the Add MFP button.
MFP Tab
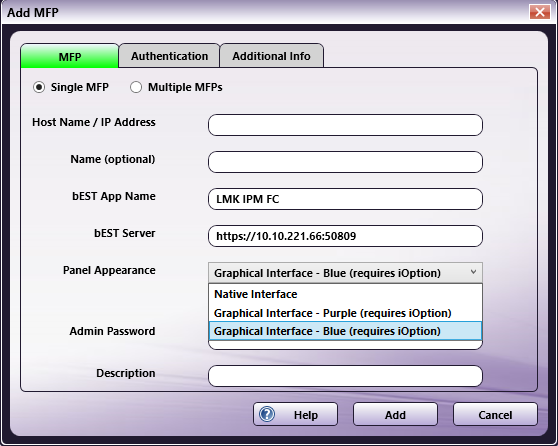
To add a single MFP, do the following:
-
In the Host Name / IP Address field, enter either the Host Name or IP Address for the MFP device.
-
In the Name (optional) field, enter a descriptive name for the MFP. This name is separate from the model name. This name will correspond with the Device Name in Dispatcher Paragon (if applicable).
-
In the bEST App Name field, enter a unique name for your application as it will appear on the MFP panel.
Since the bEST App Name will be displayed on the MFP panel, as will the names used by any other user with access to the MFP, the name must be unique among all users. If a name is already in use by another installation of Dispatcher Phoenix, you will be prompted to either change the name or take over the registration.
Should you choose to take over the registration, your application will be run when the named panel button is pressed, not that of the original user’s. Care should be taken when taking over a registration as the other user is not notified of this change.
You will not be presented with the takeover option if the application name used is being supplied by another software program (such as DocuBreeze or PageScope Enterprise Suite) which uses application names on the panel. Your only option will be to change the name of your application.
Additionally, upon takeover, the original user will lose the ability to use the application on the MFP and will receive an error message when attempting to unregister the device. The user can forcefully change the status to unregistered. This will allow them to re-register the device in order to put it to use again. There is also the option to say No to the forced unregistration. If the user believes that this notification may be in error, due perhaps, to the MFP being busy processing at that moment and unable to receive outside commands, they may select the No button and retry the registration.
Important! If an MFP is unregistered, all workflows using that node/device will stop working.
-
In the bEST Server field, the URL for the bEST server is displayed by default. You can customize this URL for advanced networking situations (e.g., bEST Server is registered on a different server, bEST Server is embedded into IIS, Dispatcher Phoenix is installed on a VM with NAT networking, etc.)
-
From the Panel Appearance drop-down list, choose a panel appearance for the application. The options include Native Interface and Graphical Interface (Requires iOptions).
-
To avoid registration failure over panel appearance options, you can check the Automatically register as Native UI if Graphical UI is not supported on MFP box. With this option enabled, the MFP will be automatically registered as a Native UI if it is does not have Graphical UI support (and the Graphical User Interface option is specified for that MFP).
-
In the Admin Password field, enter the password required for administrative access to the MFP.
-
In the Description field, enter a description of the MFP. Not required, but it can make the MFP easier to recognize when there are multiples.
-
Once all of the information is entered, select the Add button and the MFP device will appear in a list on the MFP Registration Tool screen.
To perform a bulk import of MFPs, select the Multiple MFPs radio button. Do the following:
-
Select the Import… button to add a list of MFPs. Note the imported file must be in CSV format and must include the Host / IP Address, bEST App Name and Admin password. The MFPs included in the imported file will appear in the Add MFP window.
-
Use the checkbox next to each MFP to select it.
-
Select the Add button to add and register the MFP devices.
 Since the bEST App Name will be displayed on the MFP panel, as will the names used by any other user with access to the MFP, the name must be unique among all users. If a name is already in use by another installation of Dispatcher Phoenix, you will be prompted to either change the name or take over the registration.
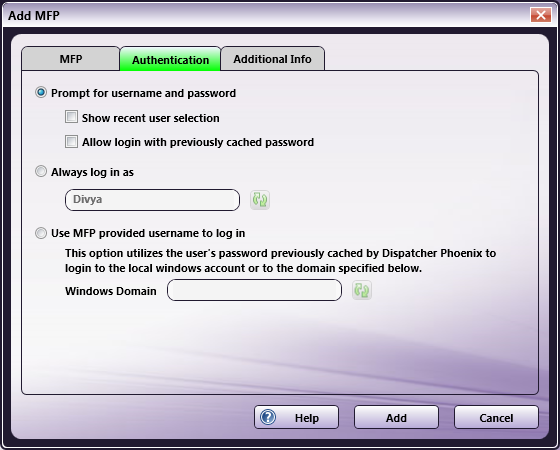
Authentication Tab
When defining a new MFP, you can also specify the authentication procedure for accessing workflows. By default, the user has to manually log in with a user name and password on the MFP control panel screen before accessing workflows.
-
Prompt for username and password - This is the default setting and requires the user to enter a username and password on the MFP control panel screen before accessing their workflow(s). With this setting, the following options are also available:
-
Show recent user selection - With this option enabled, the user will be able to choose a user name from a drop-down list of the last 1000 users who have logged in, eliminating the need to manually enter this information; however, the password will still need to be entered.
-
Allow login with previously cached password - With this option enabled, the user will be able to log in without entering a password. The previously entered password will be used.
Note: If the password is changed and the MFP is restarted, the cached password will then be lost.
-
-
Always log in as - To minimize set up and quickly access your workflows on the control panel, you can choose to use your Windows log in name every time when accessing workflows. This option eliminates the need to manually enter a user name and password on the MFP control panel screen. With this option enabled, only the actively running workflows for that particular user will be displayed, and jobs scanned from the panel will run as that user. This field is pre-populated with the user name and domain name (if available) of the current user. The Refresh button next to the field allows you to reset the value to the currently logged-in user.
Note: If this field does not automatically populate, please enter the user name manually.
-
Use MFP provided user name to log in - This single sign-on option is designed to work with MFP or Active Directory authentication. Optimal for shared workflows, this option will automatically log into Dispatcher Phoenix as the user logged into the MFP. With this option enabled, the Windows Domain field may be pre-populated with the current domain of the logged-in system, or the field may be left blank. Note that first-time use requires manually entering a password. See Appendix C for detailed information on how to connect your PC to a domain and set up the external authentication server in the MFP.
The Refresh button next to the field allows you to reset the value to the current domain.
Important! If you attempt to use the native interface without first having logged into Dispatcher Phoenix, the MFP will not prompt you for for a password, meaning it will not be possible to log in. For this reason, it is recommended that you use the graphical interface.
Note: If this field does not automatically populate, please enter the domain name manually.
Notes:
- Any authentication changes made on this tab will only apply to newly defined MFPs, not existing MFPs.
- If you change your Windows user name and password, you will not be able to access your workflows.
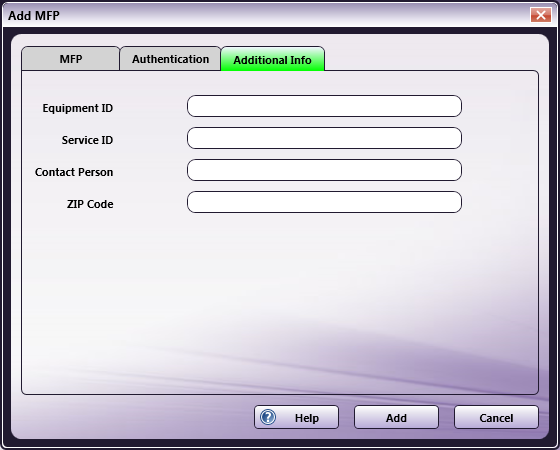
Additional Info Tab
On the Additional Info tab, you can enter additional information about the equipment. The values in this field do not affect functionality or performance and is just for your own note keeping.
Note: The Additional Info tab is only available within installations of Dispatcher Suite.
-
Equipment ID - Enter identification information for the equipment.
-
Service ID - Enter identification information for service.
-
Contact Person - Enter information about the contact person.
-
ZIP Code - Enter information about the ZIP Code.
-
Select the Save button when you are done.
Switching Panel Appearance Themes in Dispatcher Suite
Dispatcher Phoenix includes multiple panel appearance themes to customize your workflow. The panel appearance can be switched between a native interface, and two graphical interfaces (blue and purple).
To change the panel appearance, do the following:
-
Launch Dispatcher Phoenix Client.
-
From the Tools menu, select MFP Registration Tool.
-
On the MFP Registration Tool, double click on the MFP where you would like to change the theme.
-
From the pop-up dialog, choose your desired interface for the panels appearance.
Dispatcher Suite
- Native Interface
- Graphical Interface - Purple (requires iOption)
- Graphical Interface - Blue (requires iOption)
Note: The Graphical Interface - Blue option is only available on Dispatcher Suite installations.
Graphical Interface
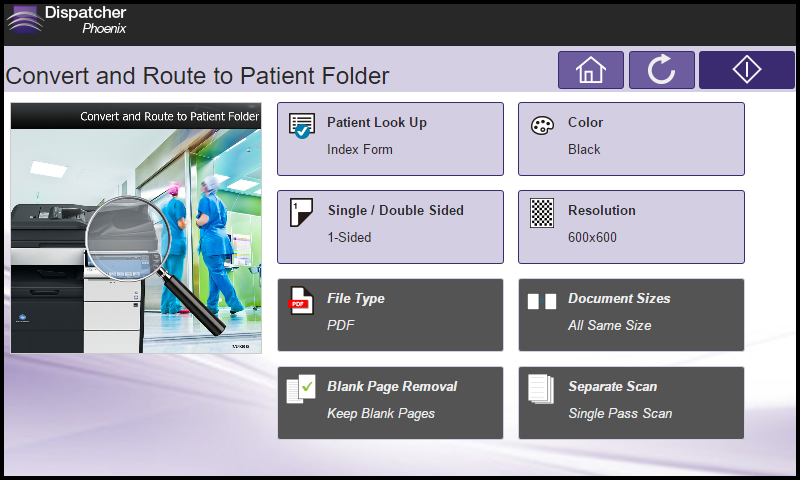
Graphical Interface - Blue
MFP Explorer Tool
To make MFP setup easier and more accurate, Dispatcher Phoenix includes an MFP Explorer tool. When launched from the MFP Registration Tool, the MFP Explorer will immediately search the currently configured network for any MFP devices. All results are displayed in the window, as in the following illustration:
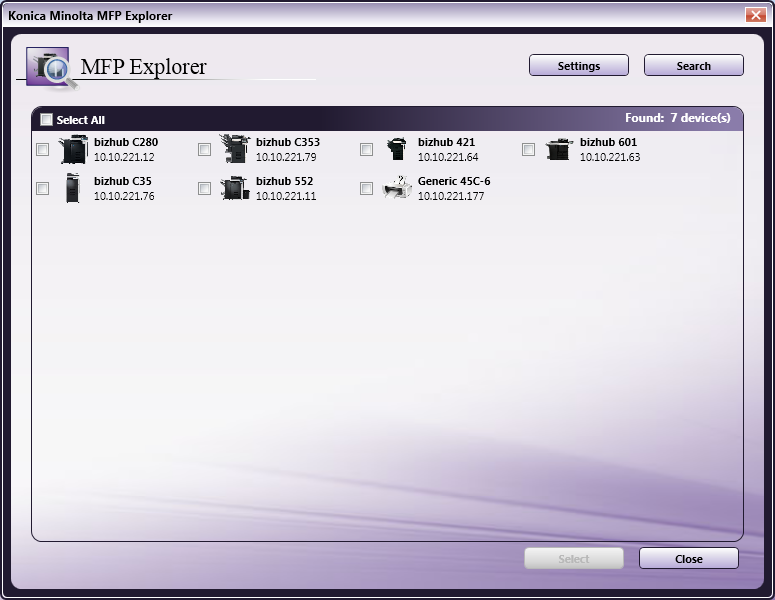
Note: MFPs paired with Fiery Controllers are represented by generic printer icons.
On the MFP Explorer Tool, you can do the following:
-
Check the boxes of the MFP(s) that you are interested in, or check the Select All box to select all MFPs listed; then click on the Select button to return to the MFP Registration tool.
-
Click on the Settings button to change the settings for the current network being searched. When you click this button, additional fields appear.
You can do the following:
-
Choose the SNMP Version using the V1 and V3 radio buttons.
-
Modify the default broadcast address in the SNMP Broadcast field. The SNMP Broadcast tells the MFP Explorer on which network subnet to search for MFP devices. By default, this is set to 255.255.255.255, which will search on any and all accessible subnets. You may enter a more specific subnet to narrow the search.
-
Modify the default value for the search timeout in the Timeout field. The Timeout field may be set to limit the amount of time the MFP Explorer will spend discovering MFPs on the network. If there are a small number of MFPs on your network, this number should be left low. However, if there are a large number of MFPs, it is recommended that this number be increased. By default, the Timeout is set at 6 seconds with a maximum value of 300 seconds (5 minutes).
-
Modify the default passphrase for the SNMP community string in the SNMP Community (V1) field. The SNMP Community is similar to a passphrase given to each MFP. By default, Konica Minolta MFP devices have this phrase set to “public.” If the MFP devices on your network have had this value changed, you may enter that passphrase here.
-
Select the Restore Defaults to revert any changes made to their default values.
-
Select the Save button to save your changes.
-
-
Click on the Search button to begin the automatic search again.
Using The Defaults Window
The MFP Explorer’s Defaults button (upper right corner of window) brings up the bEST Server Defaults window to configure the location of the bEST Application Server and user authentication options.
The bEST service, installed locally on your PC with Dispatcher Phoenix, allows you to use this technology with compatible MFP devices on your network. By entering your IP address or Server Host Name, you let the MFP know where to find the service. This is especially important in the case of multiple IP addresses on a computer to tell the MFP which one to use.
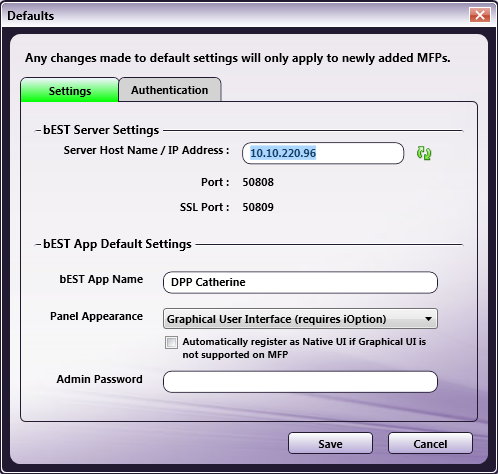
To set the location of the bEST Application Server, enter your IP address or Server Host Name in the Server Host Name / IP Address field. By default, the field is populated with the IP address of your computer. The Refresh button next to the field allows you to revert the value back to the current IP address of your computer.
In addition, you can specify default settings for your bEST applications on this window by doing the following:
-
In the bEST App Name field, enter the name that you want to appear on the control panel to identify your applications.
-
From the Panel Appearance drop-down list, choose how the workflow will appear on the control panel.
-
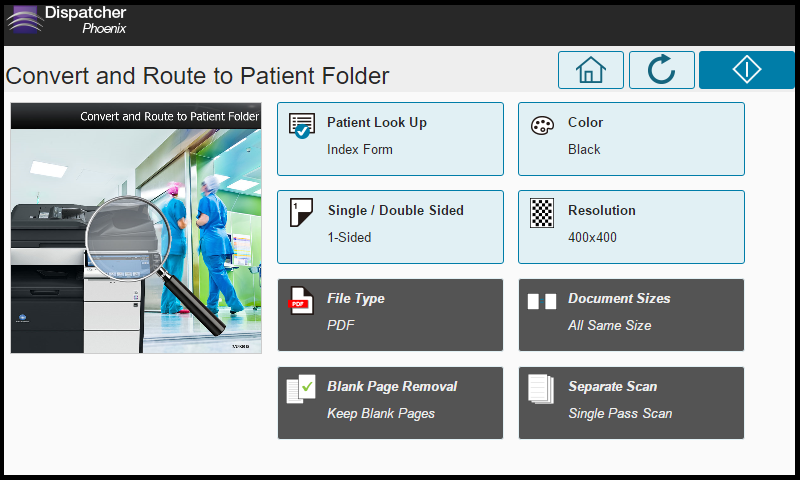
The Graphical User Interface options will display the details of the scan settings for the workflow, along with a thumbnail image of the workflow itself. This is the default setting. Options are Graphical Interface - Purple and Graphical Interface - Blue.
-
The Native MFP User Interface lists the workflow in a non-graphical, text-based manner; select this option for those devices that do not have the i-Option licensed and installed.
-
To avoid registration failure over panel appearance options, you can check the Automatically register as Native UI if Graphical UI is not supported on MFP box. With this option enabled, the MFP will be automatically registered as a Native UI if it is does not have Graphical UI support (and the Graphical User Interface option is specified for that MFP).
-
In the Admin Password field, enter a password that will be used automatically the next time you register a bEST application. A valid password is only required when first registering the app on the MFP.
-
Select the Save button when you are done.
Note: Any changes made on this tab will ONLY apply to newly defined MFPs, not existing MFPs.
Default User Authentication Settings
You can change the user authentication settings for your workflows.
Options Window
The Options window, designed for administrators-only to configure various settings in the application, can be accessed from the Tools menu. On this window, you can configure the following:
-
General settings
-
Software Updates
-
Usage threshold settings
-
Log level settings
-
DP Mobile settings
-
LPR Service settings OPTIONAL
-
Database settings
-
SMTP Service settings OPTIONAL
-
Worldox Configuration settings OPTIONAL – Only available if the Worldox Connector is installed.
Note: The LPR Service configuration option is only displayed if the LPR In node has been installed as an add-in. |
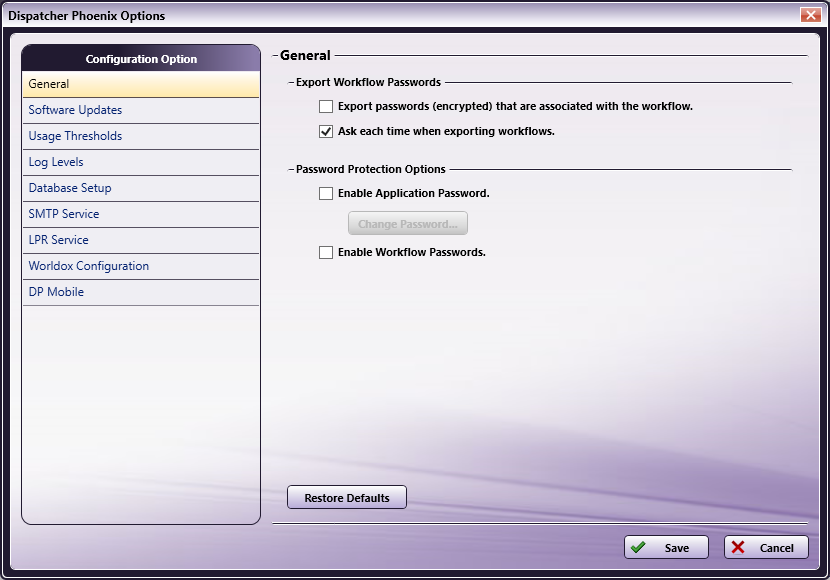
General Settings
When the Options window is first opened, the General configuration options are displayed, as in the following illustration:
Do the following:
-
To always export any passwords with a workflow during a workflow export operation, check the Export all existing passwords with workflow box.
-
If you do not want the Export Workflow Passwords message to appear each time you export a workflow, uncheck the Ask each time when exporting workflows box.
-
To enable password protection for the launch of the application, check the Enable Application Password box. The Set Password pop-up window will appear, allowing you to enter and confirm a password. You will be asked to provide that password the next time the application is launched.
If you uncheck this box, you will be prompted to enter the password before the setting can be disabled.
-
To change the password that has been set, select the Change Password button. This button will appear grayed out until a password has been specified. The Change Password pop-up window will appear, allowing you to enter a new password.
-
To enable password protection for workflows, check the Enable Workflow Passwords box. When this setting is enabled, a Password Protection option is available from the workflow’s context menu (accessed when you right-click on a workflow in the Workflow List).
-
To restore any changes made and go back to the default settings, select the Restore Defaults button.
-
Select the Save button when you are done.
Software Updates Settings
Using the Software Update Settings, you can change the way Dispatcher Phoenix checks for and downloads updates. By design, Dispatcher Phoenix will only check for updates when the client is launched.
To modify software updates settings, click Software Updates under Configuration Option. The Software Updates settings resemble the following illustration:
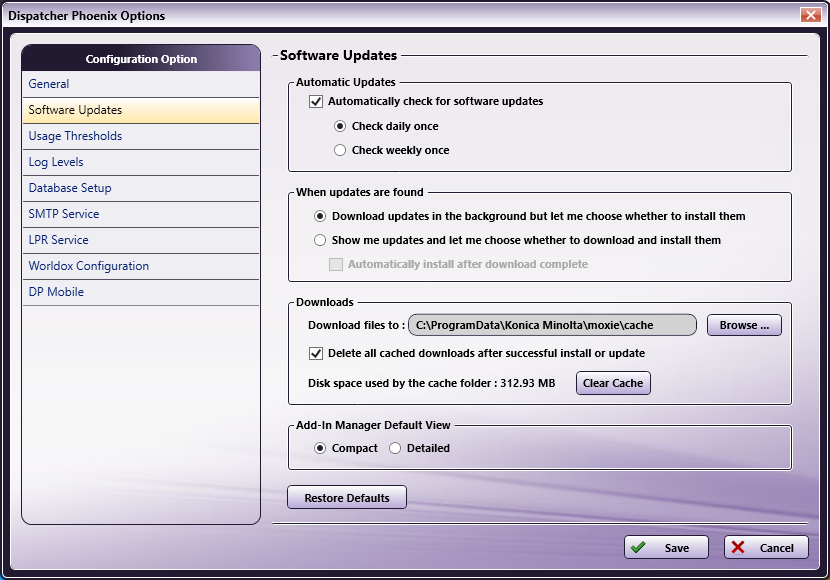
Automatic Updates
-
By default, the application will automatically check for software updates when the client is launched. If you disable automatic updates, it is your responsibility to check for updates regularly (by clicking the Check for Updates item from the Help menu of the main application screen).
-
If you want the application to check for updates every day when the client is launched, select the Check daily once radio button; alternatively, to check weekly instead of daily, select the Check weekly once radio button.
When updates are found
-
By default, the application will download updates automatically and then alert you when the updates are ready to be installed. This is the Download updates in the background but let me choose whether to install them option. With this option, the Add-In Manager will be visible in the system tray.
-
To check for updates automatically but have Dispatcher Phoenix alert you when it is time for both download and installation, select the Check for updates but let me choose whether to download and install them radio button. If you select this option, you can also choose to install the updates immediately after download is complete by checking the Automatically install after download complete box.
Downloads
-
To modify the default folder to which the updates are downloaded, click the Browse… button and choose another location for downloads. This can be useful for slower network connections; one person can download updates to a common location on the network to which other users can point to as an easy way to update without downloading.
-
By default, cached downloaded files are automatically deleted after install/update has completed. To disable this feature, uncheck the Delete all cached downloads after successful install or update box; to clear the cache manually, click on the Clear Cache button.
Add-In Manager Default View
To configure the appearance of the Add-In Manager, choose one of the following:
-
Compact - The default view shows a progress bar along with a product feature slideshow
-
Detailed - This view displays detailed progress messages along with the progress bar.
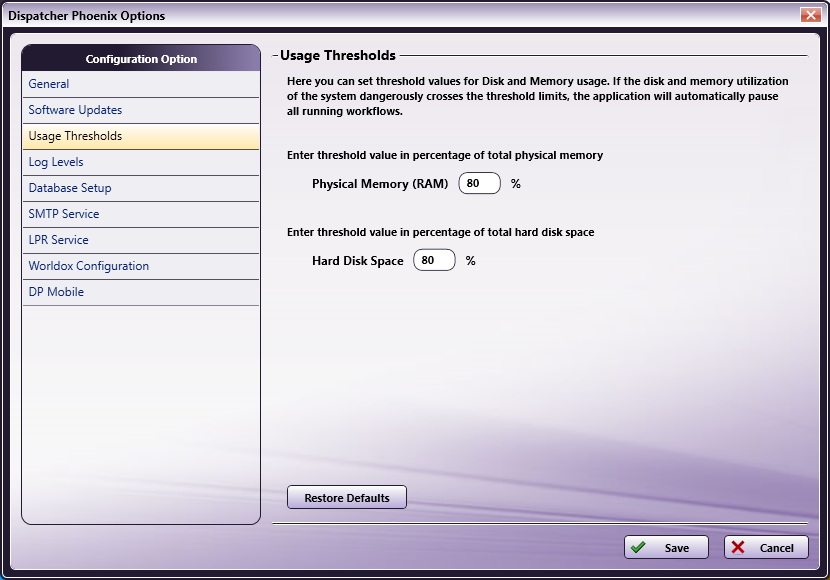
Usage Thresholds
To prevent any kind of performance disruption of the application, an administrator can specify threshold values for the amount of physical memory and/or hard disk space that can be used. Once these specified limits have been exceeded, all running workflows will pause and a warning message will appear.
To specify threshold values, click Usage Threshold under Configuration Option. The Usage Threshold settings resemble the following illustration:
Do the following:
-
Enter a percentage value in the Physical Memory (RAM) field to specify a threshold value for total physical memory.
-
Enter a percentage value in the Hard Disk Space field to specify a threshold value for total hard disk space.
-
To restore any changes made and go back to the default settings, select the Restore Defaults button.
-
Select the Save button when you are done.
Important! Dispatcher Phoenix monitors the memory usage (by default, every minute) and disk space utilization (by default, every 30 minutes) for the entire system, not only the portion being used by Dispatcher Phoenix. It is possible for a system to exceed the specified memory usage and disk space utilization in between the periodic checks. If a periodic check reveals that the system has exceeded the specified parameters, it will send an alert and automatically pause workflows, preventing new documents from being processed; documents currently being processed will continue through the workflow. A system administrator will need to restart any affected workflows once the memory usage and disk space utilization have been returned to expected parameters.
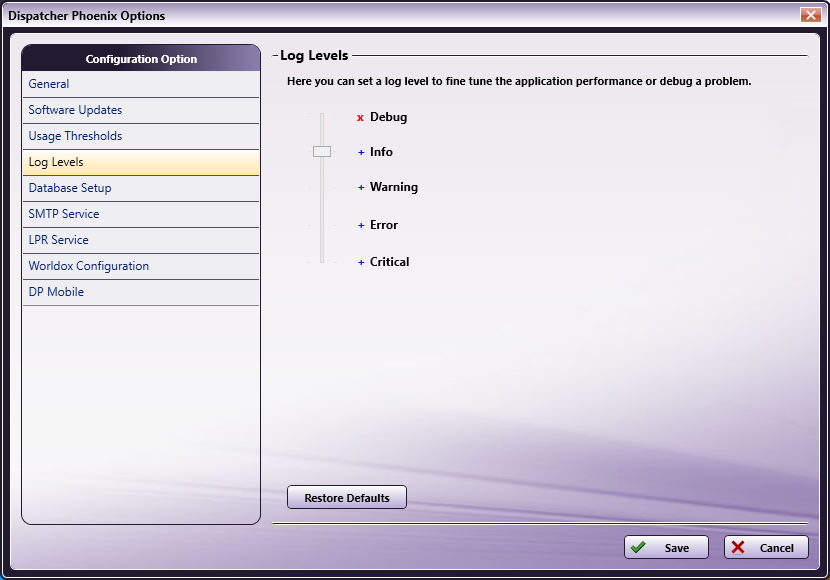
Log Level
An administrator can specify what level of messages should be reported when a workflow is running. This configuration can be useful when debugging issues within the application. To specify threshold values, click Log Levels under Configuration Option. The Log Levels settings resemble the following illustration:
Do the following:
-
Slide the control up and down to set the log levels:
-
A + (blue plus sign) indicates that it will be included in the log.
-
An x (red x sign) indicates that it won’t be included in the log.
-
-
To restore any changes made and go back to the default settings, select the Restore Defaults button. The default log levels are: Critical, Error, and Warning.
-
Select the Save button when you are done.
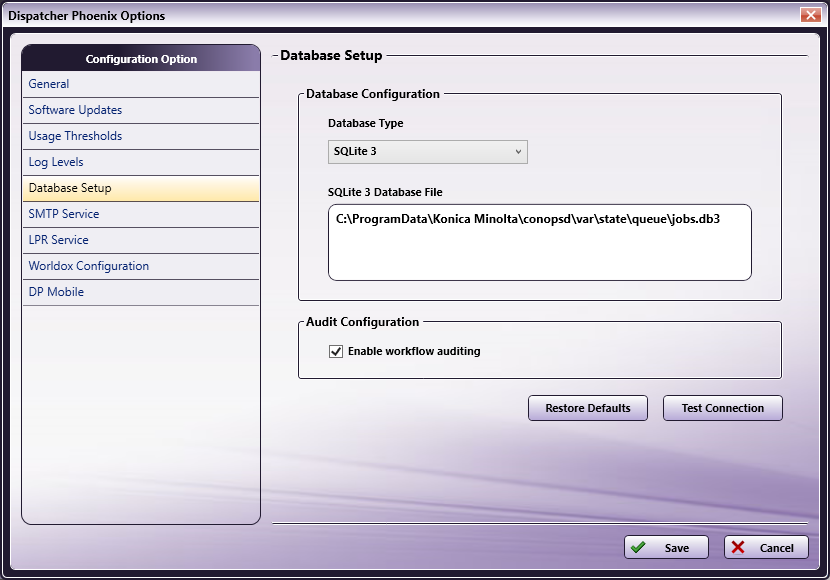
Database Setup
By default, Dispatcher Phoenix comes installed with a SQLite 3 database file “C:\ProgramData\Konica Minolta\conospd\var\state\queue\jobs.db3” You will need to install SQLite 3 to open database files. If you want to use another, more robust server, click Database Setup under Configuration Option. The Database Setup settings resemble the following illustration:
To switch to a Microsoft SQL Server, do the following:
-
Choose the Microsoft SQL Server option from the Database Type drop-down menu.
Note: You must have an instance of this database installed on your system.
-
Enter connection details for that database in the ODBC Connection String box.
-
Select the Test Connection button to test your connection string.
-
Select the Restore Defaults button to go back to the default database settings.
-
Select the Save button when you are done.
Note: The default SQLite database is recommended for single server systems only. Using SQLite in a clustered environment is not recommended since it does not offer redundancy or failover capabilities.
SMTP Service (Optional)
If the SMTP In node is installed, this option appears, allowing an administrator user to configure the settings of the SMTP Service that supplies files to the SMTP In node. The SMTP Service must be installed in order for the SMTP In node to function properly, and it must be configured to point to a machine where the SMTP In node is installed.
An administrator can view and/or configure the SMTP Service’s settings by clicking on SMTP Service under Configuration Option. The SMTP Service settings resemble the following illustration:
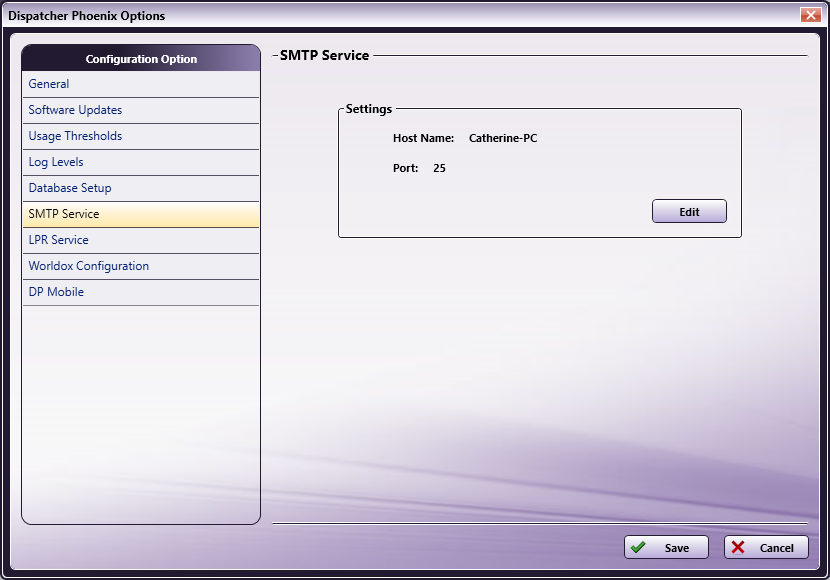
The Host Name, if specified, will appear along with the port number currently being used by the SMTP Service. The default port number is 25. To change these settings, select the Edit button. The SMTP Manager window appears.
LPR Service (Optional)
If the LPR In node is installed, this option appears, allowing an administrator to configure the settings of the LPR Service, including starting and stopping the service.
To view the current LPR settings, click LPR Service under Configuration Option. The LPR Service settings resemble the following illustration:
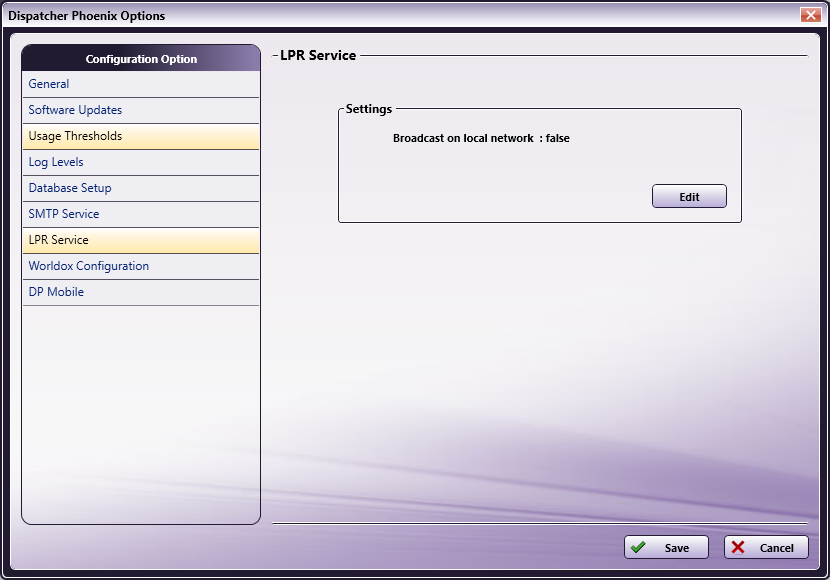
To change these settings, select the Edit button to launch the LPR Manager.
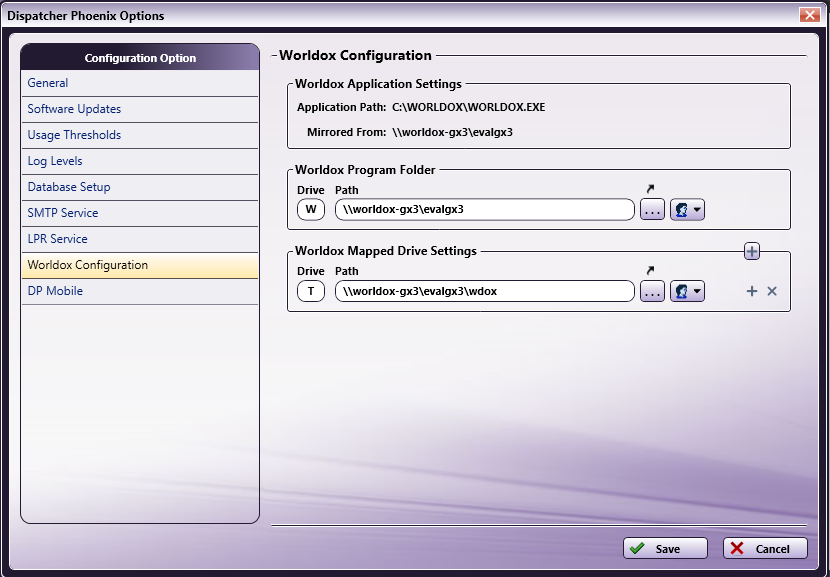
Worldox Configuration (Optional)
If the Worldox Connector node is installed, this option automatically appears. Before using the Worldox Connector, you must first define general settings about Worldox. The Worldox Configuration settings resemble the following illustration:
Do the following:
-
Specify the Worldox Program Folder.
If Dispatcher Phoenix is installed on a system that is mirroring the Worldox Server, you must specify the Worldox Program Folder. The path entered in the Worldox Program Folder Path field must be the same UNC path as the mirrored location. You can enter a drive letter of your choice in the Drive field; however, if the logged-in user already has Worldox mapped to a specific drive, that same drive must be used.
If using a network share, you must add network credentials by clicking on the Credentials icon. The user must be a user on the Worldox Server who has read/write access to that path.
Note: If Dispatcher Phoenix is installed directly on the Worldox Server, you do not have to specify the Program Folder.
-
Specify the Worldox Mapped Drive Settings.
The logged-in Windows User must have all Worldox Mapped Drives set up. Those settings need to be duplicated on this window for the SEC Workflow Services Account. Mapped drives are related to Worldox Profile Groups; each Profile Group has a base path that points to a mapped drive. Enter the path for the Profile Groups’ mapped drive in the Worldox Mapped Drive Settings Path field. If there are additional mapped drives that need to be specified, click the + button to add another Drive / Path. The drive letter specified must be the same as what is used in Worldox. If using a network share, you must add network credentials by clicking on the Credentials icon. The user must be a user on the Worldox Server who has read/write access to that path.
-
Select the Save button when you are done. You will then be prompted to enter the password for SEC Workflow Services.
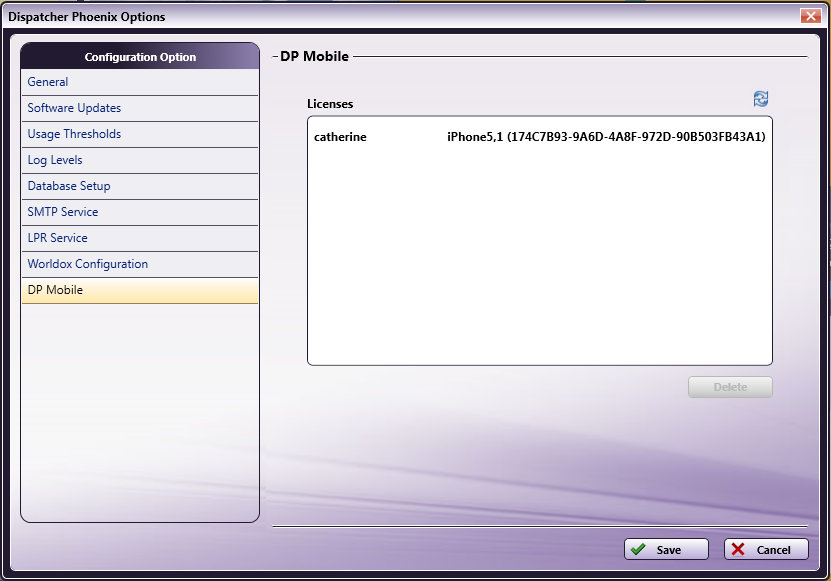
DP Mobile Configuration
When using DP Mobile, you can view the users and devices that are currently being used. The DP Mobile Configuration settings window displays the users and the devices being used.
To free up a license, select a user / device and then select the Delete button. You can also refresh the list by clicking on the Refresh icon.
See the following illustration:
Help Topics
From the Help menu  , you can choose the following options:
-
Customer Feedback
-
Register Add-
-
In (or Register Product, if application is a Demo version)
-
License Manager
-
Software Maintenance
-
License Transfer
-
Check for Updates
-
About Dispatcher Phoenix
Customer Feedback
To send us feedback about the application or if you have experienced an error, select Help > Customer Feedback. You can also access this window by selecting the Feedback button on the License Manager window.
The Customer Feedback window resembles the following illustration:
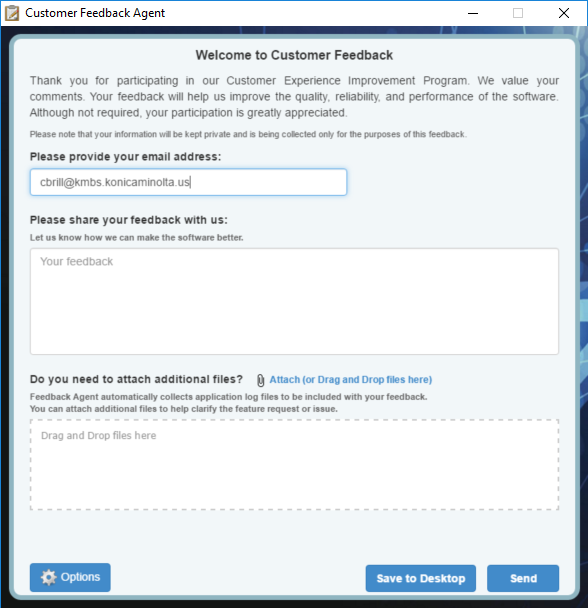
On this window, do the following:
-
In the Please provide your Email Address field, enter your email address.
-
In the Please share your feedback with us box, enter your feedback.
-
If you need to attach additional files you can either click on the file clip icon to browse for the files in Windows Explorer or drag-drop files to the empty box provided.
-
When you are done, select the Send button.
-
If you do not have an Internet connection at the current time but would like to send the feedback later, select the Save to Desktop button to save the feedback locally.
-
To configure specific settings for Customer Feedback, select the Options button. On the Options window, you can specify language preferences and any additional information that you would like submitted with the feedback (e.g., installed applications, installed Windows updates, etc.)
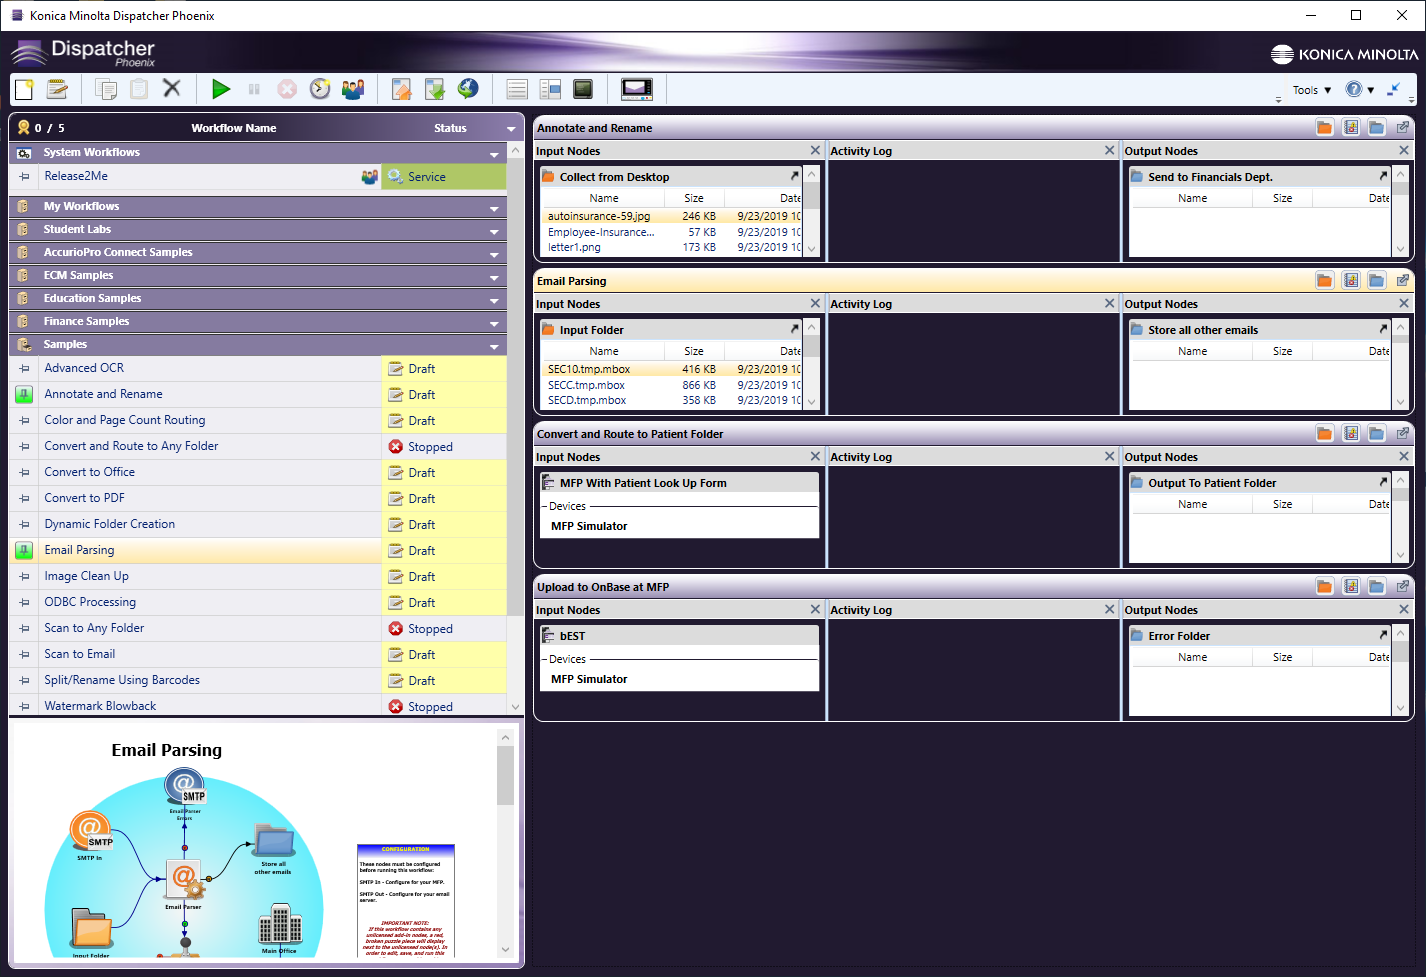
Compact Mode
If you click on the Switch to compact mode icon, the application will restart with only the Workflow List appearing, as in the following illustration:
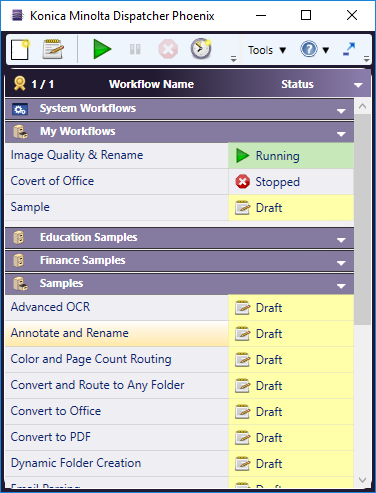
Workflow List
On the left side of the screen, the Workflow List displays the number of active inputs currently in use by your workflows, a list of the existing defined workflows, whether or not they can be accessed by other users (shared), and their current activity status. A workflow’s status can be one of the following:
-
Running - The workflow is currently running.
-
Paused - Execution of the workflow is currently paused.
-
Stopped - Execution of the workflow has been stopped.
-
Draft - The workflow has been created but not run yet, OR the workflow has been edited and the modified workflow has not run yet.
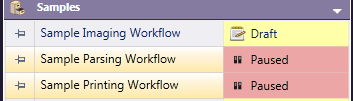
Workflows are organized in user-defined folders. When a workflow is first created, it will automatically be placed in the folder you are currently in. If there are no user-defined folders defined, the newly created workflow will be placed in a default folder titled “My Workflows.” A snapshot of your Active Input usage can also be seen in the upper left corner of the workflow list. The Workflow List resembles the following illustration:

When you first launch the application, the Sample Workflows folder containing all sample workflows is created for you.
Workflow Search
At the top of the Workflow List is a magnifying glass icon  . Clicking this button will open a search bar below the Workflow List header. Clicking the magnifying glass again will minimize the search area but maintain any search criteria.
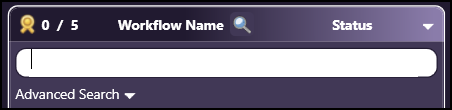
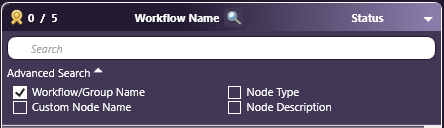
Typing in the search bar will automatically begin filtering the available workflows, based on the following categories, which can be viewed by selecting the Advanced Search option:
- Workflow/Group Name (Selected by default) - Searches through the names of workflows and groups for a match to the search criteria
- Node Type - Searches all workflows for the original names of nodes that match the search criteria
- Custom Node Name - Searches all workflows for nodes with updated names that match the search criteria
- Node Description - Searches all workflows for nodes with descriptions that match the search criteria
If there is anything in the search field, an X will appear on the right side of the field. This allows you to clear the field. Clearing the search bar will display the entire list of workflows.
Note: Entering a search term will expand any groups with workflows that meet the criteria. Clearing the search field will return all groups to their previous state of expanded or collapsed.
Special Characters
There are a few characters that behave differently from others.
The workflow search feature also supports wildcard search with * and =:
| Name | Symbol | Description / Use |
|---|---|---|
| Asterisk | * |
Searches for any string - Can be used at the beginning and/or end of a string only. Using this character within a string will search for the character, not the wildcard. |
| Equals | = |
Searches for the exact string provided (case sensitive) - Can be used at the beginning of a string only. Using this character within a string will search for the character, not the wildcard. |
| Backslash | \ |
Commonly used as an escape character, this forces the next character to be taken at face value, rather than as a wildcard or other programming command. The only character that requires a backslash is the backslash itself. For example, if you want to search for the string “ABC\123”, you will need to type “ABC\123” in the search field. |
Note: Searching for * or = alone will search for those characters specifically.
Notes:
- If you use the
=wildcard, it must appear at the beginning of the search or it will be interpreted as part of the search string. For example, if you search for=*ABC, the search feature will return all workflows that include “ABC” (case sensitive) with a string before it. If you search for*=ABC, the search feature will return all workflows that include “=ABC” (not case sensitive) with a string before it. - For the purposes of search, a string can include 0 characters. For example, a workflow named “ABC” would appear as a search result for the search parameter
*ABCandABC*.
Examples
The following examples can help provide information on how to craft searches using wildcards:
| Sample Search Text | Searches For: |
|---|---|
| =ABC | The string “ABC” (case sensitive) and nothing else. |
| *ABC | The string “ABC” with any character string before it. This would also find workflows with “abc”, “aBc”, “AbC”, etc. |
| ABC* | The string “ABC” with any character string after it. This would also find workflows with “abc”, “aBc”, “AbC”, etc. |
| =*ABC* | The string “ABC” (case sensitive) anywhere in a string. |
| =ABC* | The string “ABC” (case sensitive) with any character string after it. |
| =*ABC | The string “ABC” (case sensitive) at the end of the workflow name. |
Workflow List Title Bar Context Menu
When you click on the down arrow or right-click on the Workflow List Title bar, the following menu will appear:
Folder Title Bar Context Menu
When you click on the down arrow or right-click on a Folder Title bar, the following menu will appear:
Working With Folders
Using the context menus illustrated above, you can create folders, move folders, delete folders, and modify the appearance of the folders in the Workflow List.
Creating A New Workflow
The Folder Title bar’s drop down menu contains a New Workflow option. Instead of using the menu bar icon, you can choose this option to create a new workflow (opening up the Workflow Builder).
Creating Folders
To create a new folder, do one of the following:
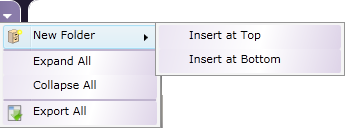
- On the Workflow List title bar, click on the down arrow; then choose New Folder from the menu that appears. You can choose to add the new folder either at the top of the Workflow List (Insert at Top option) or at the bottom of the Workflow List (Insert at Bottom option),
or
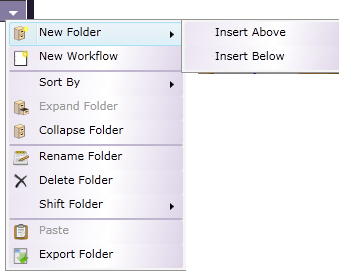
- On a Folder’s title bar, click on the down arrow; then choose New Folder from the menu that appears. You can choose to add the new folder either before the current folder (Insert Above option) or below the current folder (Insert Below option).
Naming/Renaming Folders
When you first create a folder, it is named “New Folder” by default. To give the folder a more meaningful name or rename an existing folder, click on the down arrow on the folder’s title bar; then choose the Rename Folder option from the menu that appears.
The name of the folder will be editable as in the following illustration:
At this point, you can enter a name for the folder; then either press the Enter key or click anywhere else in the application for the changes to take effect.
Note: You cannot name or rename a folder with a name that is already in use. Folder names must be unique.
Expand/Collapse Folders
The folders in the Workflow List can expand and collapse in the same way as Windows Explorer folders so that you can see more or less of each folder’s contents.
-
To expand a folder so that you can see its entire contents, click on the down arrow on a folder’s title bar; then choose Expand Folder on the menu that appears.
Shortcut: Click on the folder’s title bar to expand the list.
-
To collapse a folder so that its contents do not take up any room, click on the down arrow on a folder’s title bar; then choose Collapse Folder on the menu that appears.
Shortcut: Click on the folder’s title bar to collapse the list.
-
To expand all folders in the Workflow List, click on the down arrow on the Workflow List title bar; then choose Expand All from the menu that appears.
-
To collapse all folders in the Workflow List, click on the down arrow on the Workflow List title bar; then choose Collapse All from the menu that appears.
Move Folders
You can move the folders around the Workflow List to suit your purposes. To manipulate the position of the folder within the Workflow List, do one of the following:
-
Drag-and-drop the folder in the correct position using your mouse, or
-
Click on the down arrow on the folder’s title bar; then choose one of the Shift Folder options (Top, Bottom, Up, Down).
Delete Folders
To delete a folder, click on the down arrow on the folder’s title bar; then choose the Delete Folder option from the menu that appears.
Note: Deleting a folder requires deletion confirmation. If the folder contains workflows, then all workflows in the folder will also be deleted.
Working With Workflows
Using the Workflow List, workflows can be acted upon either individually or as a group (either from the same folder or different folders).
Selecting Multiple Workflows
To select more than one workflow, click on the workflows while pressing the Shift or Control key.
Using The Workflow Context Menu (With Multiple Workflows)
Right-clicking on one or more selected workflows (from the same or different folders) brings up a context menu. The options on this menu perform the same functions as the icons on the menu bar.
For example, to run several workflows at the same time, you could either select the workflows from the Workflow List; then click on the Start icon or right-click and choose the Start/Resume option on the menu that appears.
Before multiple workflows are run, each workflow is validated. If one workflow fails validation, all selected workflows in the Workflow List will stop processing as well.
Commands can be performed on multiple workflows, regardless of their status. If a workflow is already running and is in a group of workflows that has just been selected to run, the application will ignore the already-running workflow and continue executing the other selected workflows.
All commands will only act on those selected workflows for which it is appropriate to act. For example, if you select to start a combination of running and stopped workflows, the Run command will act only the stopped workflows. Similarly, the “Pause” command will only act on the selected workflows that are appropriate to pause, skipping over the other selected workflows.
When stopping multiple workflows, a warning message will appear for each workflow if the workflow is currently processing files.
Scheduling Workflows
You can even create one schedule for multiple workflows by selecting the workflows from the list; then choosing the Schedule Workflow icon from the tool bar or right-clicking and choosing the Schedule option from the menu that appears.
Copy/Paste Workflows
If you want to create a new workflow that is very similar to one that already exists, you can choose to copy the workflow, then paste it into the Workflow List.
Note: You can copy a running workflow, but you cannot edit one. To edit, you must first stop the workflow.
To copy/paste one or more workflows, do the following:
-
Select the workflow(s) on the Workflow List (either from the same folder or different folders).
-
Either click on the Copy Workflow icon from the tool bar or right-click on the workflow and choose Copy from the context menu that appears.
-
To paste the copied workflows into a specific folder, go to that folder and either click on the down arrow on the Folder name’s title bar and choose Paste from the menu that appears or right-click anywhere in the Folder and choose Paste from the context menu that appears.
-
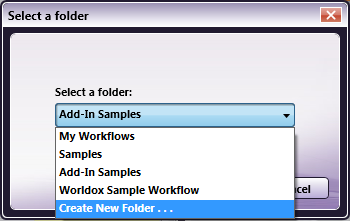
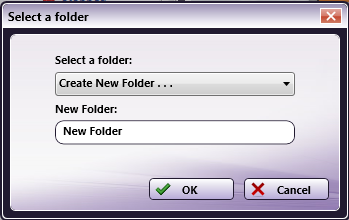
To paste the workflow(s) using the tool bar, click on the Paste Workflow tool bar icon. The Select a Folder window will appear, as in the following illustration:
-
On the Select a Folder window, choose the appropriate Folder from the drop-down list; then select the OK button.
Note: If you paste a workflow into a Folder that already contains a workflow with the same name, the pasted workflow will be renamed with the words “Copy.” For example, “Sample Workflow - Copy.”
-
If you want to create a new folder, select the Create New Folder… option from the drop-down list. The Select a Folder window will expand to allow you to enter the name of a new folder in which to place the copied workflow; select the OK button when you are done.
Note: You cannot give the new folder a name that is already being used. Each folder name must be unique.
-
When edited, the copied workflow will open in the Workflow Builder with the same attributes as the original, but the word Copy is added to the file and the workflow name.
-
Make the changes you need on the workflow, and give it a new name. Save your new workflow. After you save it, the name will be replaced. Close the Workflow Builder to return to the main application screen to see the new workflow added to your list.
Delete Workflows
To delete one or more workflows, do one of the following:
-
Select the workflow(s); then right-click and choose the Delete option from the menu that appears, or
-
Select the workflow(s); then click the Delete icon on the tool bar.
You will receive a confirmation message, asking you if you’d like to delete.
Locking Workflows
For security purposes, you can password protect your workflow. If a password is assigned, a password is required in order to change its schedule, change its shared status, or edit, copy, delete, or export it. All workflows with passwords will be locked once the application launches.
To lock a workflow with a password, do the following:
-
Right-click on the workflow you are interested in from the Workflow List (or select multiple workflows using the Control key and right-click).
-
From the context menu that appears, choose the Password Protection > Set Password option.
-
The Set Password pop-up window will appear. On this window, enter and confirm a password for the workflow.
-
Restart the application to lock the workflow with the specified password, or right-click on the workflow and choose the Password Protection > Lock Workflow option.
-
Once a workflow is locked, a lock symbol will appear next to the workflow name in the Workflow List. See the following illustration for an example:

Changing Workflow Passwords
Once a password has been set for a workflow, you can change the password. Do the following:
-
Right-click on the workflow you are interested in from the Workflow List (or select multiple workflows using the Control key and right-click).
-
From the context menu that appears, choose the Password Protection > Change Password option.
-
On the Change Password pop-up window that appears, enter the old password and a new password; then re-enter the new password and select the OK button.
Removing Workflow Passwords
To remove the password protection from the workflow, do the following:
-
Right-click on the workflow you are interested in from the Workflow List (or select multiple workflows using the Control key and right-click).
-
From the context menu that appears, choose the Password Protection > Remove Password option.
-
On the Provide Password pop-up window that appears, enter the password; then select the OK button.
Unlocking Workflows
To unlock a workflow (but keep the password that was specified for it), do the following:
-
Right-click on the workflow you are interested in from the Workflow List (or select multiple workflows using the Control key and right-click).
-
From the context menu that appears, choose the Password Protection > Unlock Workflow option.
-
On the Provide Password pop-up window that appears, enter the password; then select the OK button. An open lock symbol will appear next to the workflow name in the Workflow List. See the following illustration for an example:
![]()
Sort Workflows
To sort workflows in a folder, click on the down arrow on the Folder’s title bar; then choose the Sort By option from the menu that appears. You can choose to sort by workflow name (Name) or workflow status (Status).
Note: Any newly created workflows will not be automatically sorted based on previous sort conditions.
Reordering Workflows
To reorder the workflows, you can drag-and-drop the workflow name anywhere in the Workflow List (either in the same or different folder). In addition, you can use the Shift or Move to options (accessible by right-clicking on a workflow and choosing from the menu that appears).
-
To shift the workflow in the folder, right-click on a workflow and then choose Shift (Top, Bottom, Up, Down) from the menu that appears. The Top option shifts the workflow to the top of the folder. The Bottom option shifts the workflow to the bottom of the folder. The Up and Down options shift the workflow up or down one level.
-
To move the workflow within the Workflow List, right-click on a workflow and then choose Move To from the menu that appears. The Select a Folder window appears, allowing you to choose the appropriate folder location for your selected workflow(s). The Select a Folder allows you to create a new folder as well.
Note: When moving multiple workflows by dragging-dropping, you must keep the mouse and the Shift key pressed down at the same time while moving the mouse.
Viewing Activity Windows
To “float” the Activity panel for a selected workflow, select the workflow in the Workflow List. Then, right-click and choose the Open Activity Window option. The panel detaches from the workflow canvas. To “dock” a floating Activity panel back into the workflow canvas, click the X button on the Activity panel.
Note: If more than one workflow is selected when you choose this option, the activity window for the first workflow in the list that is selected will appear.
Exporting
Using the options on the main application screen, you can export individual workflows, multiple workflows across different folders, or entire folders. Multiple workflows and entire folders are now saved in one file. Naming conventions are as follows:
-
If exporting an entire folder, the default name of the exported file is the name of the folder.
-
If exporting multiple workflows from more than one folder, the default name of the exported file is My Workflows.
-
If exporting a single workflow, the default name of the exported file is the name of the workflow.
-
The file extension for all exported files is .wfxp.
Note: If a shortcut is used to access a network directory in a workflow that is exported, the directory will not be accessible when the workflow is imported again. The full network path is required to access the appropriate directory upon import so make sure that your exported workflow does not contain any shortcuts to network directories.
Exporting Workflows and Folders
To export workflow(s), do the following:
-
To export workflows, select the appropriate workflow(s) from the same or different Folders; then either right-click and choose Export… from the menu that appears, or click on the Export Workflow icon on the tool bar.
-
To export the entire contents of a folder, click on the down arrow on a Folder’s title bar; then choose the Export Folder option from the menu that appears. The Export Workflow(s) window will appear.
-
To export all folders in the Workflow list, click on the down arrow on the Workflow List title bar; then choose the Export All option from the menu that appears.
The Export Workflow Passwords message will appear, on which you can choose to export any existing passwords with the workflow. The following nodes can have passwords associated with them: Email Out, FTP, MFP User Box, Input Folder, Output Folder, and Watermark. If your workflow contains one of these nodes, you may want to export the passwords with the workflow; with this option enabled, the workflow can run without any additional configuration after import. This message will appear every time you export a workflow unless you check the Don’t show this message again box.
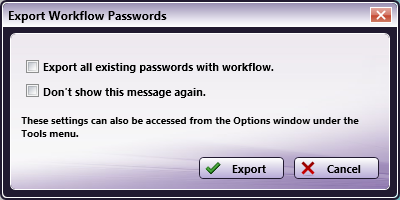
Once you enable the options that you are interested in and select the Export button on the Export Workflow Passwords message, the Export Workflow(s) window will appear, as in the following illustration:
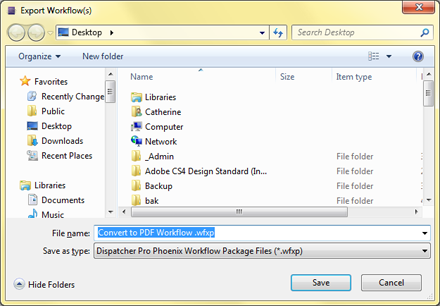
On the Export Workflow(s) window, specify a name and location for the exported workflow(s); then select the Save button. Note that if you change the name of the exported file on this window, the workflow will revert back to its original name when it is imported back into the application.
Importing Workflows
To import workflows back into the application, do one of the following:
-
Double-click on an exported file. The Import Wizard will appear. If Dispatcher Phoenix is not running, the application will automatically launch.
-
Choose the Import Workflow icon from the tool bar menu. The Import Workflow window will appear. On that window, find the exported file that you would like imported; then select the Open button. The Import Wizard will appear.
You can import both *.wfx and *.wfxp files. If you are importing workflows that contain Input Folder, Output Folder, MFP User Box, FTP, Email Out, and/or Watermark nodes, you may need to reconfigure their Network Credentials before running the imported workflow.
Using The Import Wizard
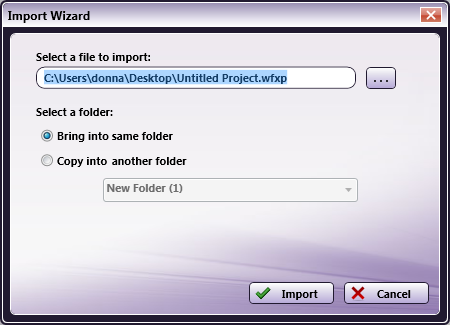
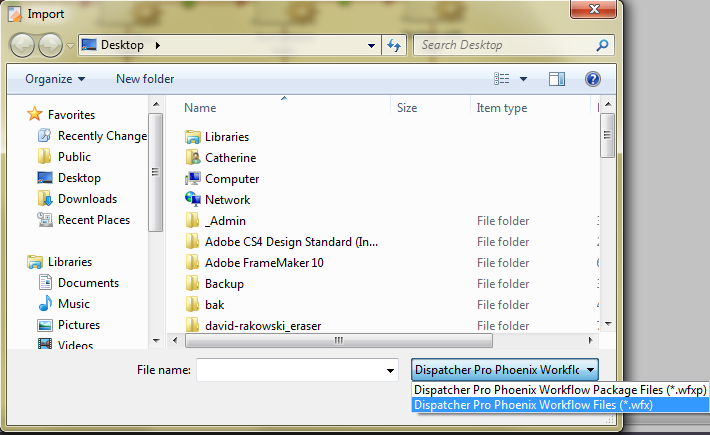
The Import Wizard resembles the following illustration:
To use the Import Wizard, do the following:
- Find the exported file that you want to import back into the application using the ellipsis button next to the Select a file to import field. On the Import window, you have the choice of importing two different file types: *.wfxp and *.wfx.
Note: If a *.wfxp file has been renamed to *.wfx, you will not be able to import it.
-
Select a folder into which the workflow will be imported. Options are:
-
Bring into same folder - This option creates a folder with the same name as the folder that the imported workflow was originally exported from (unless the folder already exists). If you are importing a *.wfx file, this option will be disabled.
-
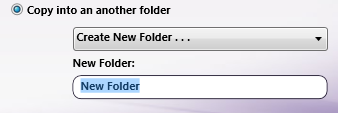
Copy into another folder - This option allows you to place the imported workflow in an existing folder chosen from the drop-down list. You can choose **Create New Folder…**to import the workflow(s) into a new folder. An empty field will appear in which you can enter the name of the new folder, as in the following illustration:
- Select the Import button when you are done. If an imported workflow already exists in the Folder that you are importing into, the workflow will be appended with “Copy” (similar to Windows naming conventions). If the file you have chosen has been corrupted or is not a Dispatcher Phoenix file, you will receive an error message. See the Troubleshooting section for more information.
Note: The Import Wizard can be launched multiple times so that you can simultaneously import a number of files.
-
Preview Area
The Preview area displays the graphical representation of the workflow that is selected in the Workflow List. You can double-click in the Preview area to edit the workflow (opening the Workflow Builder).
Using the Preview Area Context Menu
To open up the Preview area’s context menu, right-click on the Preview Area. The following context menu will appear with these options:
-
Start/Resume – Runs a workflow.
-
Stop – Stops the workflow.
-
Pause – Pauses the selected workflow.
-
Schedule – Sets the time when the workflow will run.
-
Edit… – Opens the workflow in the Workflow Builder for editing.
-
Export… – Exports the workflow as a *.wfxp file.
-
Animation Speed – Specify a speed for your workflow’s animation.
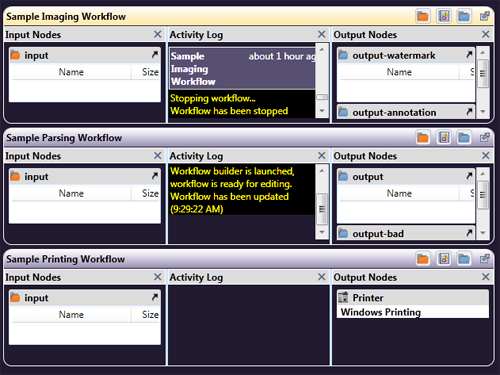
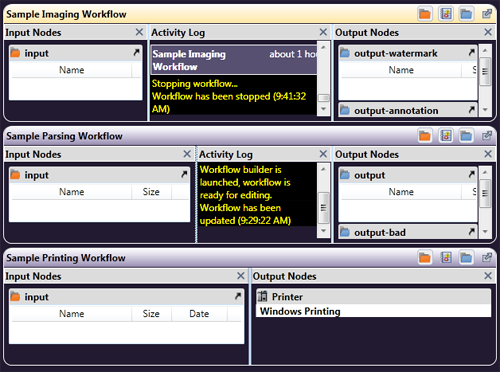
Activity Panes
The lower half of the window contains activity panes which display the Input Nodes, Activity Log, and Output Nodes for the selected workflow. You can scroll through the Activity Panes to review the Input, Activity Log, and Output for each workflow. You can also drag-and-drop files into and out of the folders in the Activity Pane, similar to using Windows Explorer.
Note: The folders in the Activity Pane can only display one thousand (1000) files. Should a folder have more files than can be displayed, when all files are attempted to be selected (as in the case of bulk deletion), only the first 1000 files will be affected. The process must be repeated for each 1000 files in the directory.
Using the Activity Panes Context Menu
To open up the context menu for use with Activity Panes, right-click on the Activity Pane.
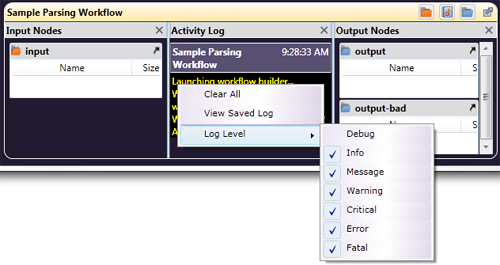
The following context menu will appear with these options:
-
Clear All – Clears all logs from the Activity Pane.
-
View Saved Logs – Opens up saved logs in
-
the Log Viewer.
-
Log Level - Specifies what information is logged.
Using Files in the Activity Pane
Dispatcher Phoenix allows you to act upon files in your workflow Input and Output folders just as you can on a PC desktop.
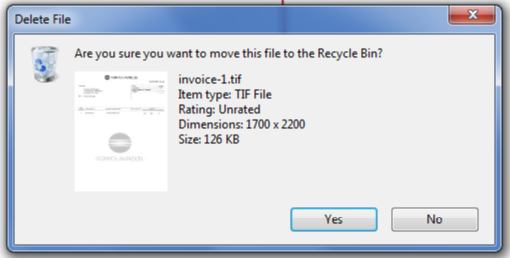
- Removing files - To delete one or more files, click on a file (or Ctrl-click to select multiple) in either folder type in the Activity Pane. Select Delete from the context menu. Upon confirmation, the files will be moved to the Recycle Bin. In the following illustration, right-clicking on a file in the Input folder and selecting Delete caused a prompt to confirm the action.
-
Opening files - To open a file, double-click on the file name.
-
Drag-and-drop files - You can drag-and-drop files directly into the Input and Output folders. You will be asked whether you’d like to copy or move the files, as in the following illustration:
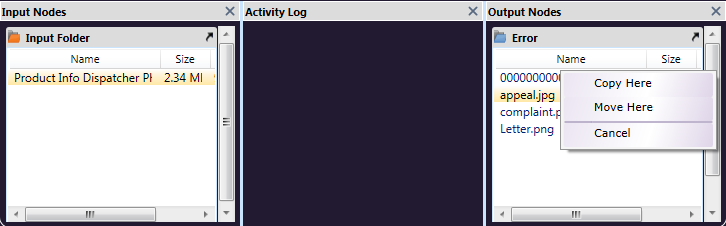
- Using context menus - Right-click on the Input or Output folder to see the context menu and options. The resulting menu will depend on the type of node and where the node is clicked. The following example is the result of right-clicking on the Input Folder header bar:
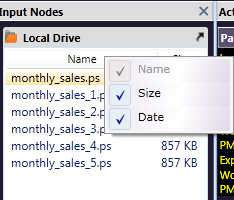
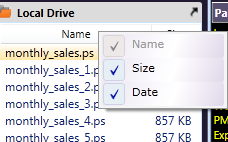
The next example is the result of right-clicking on the Input Folder Name:
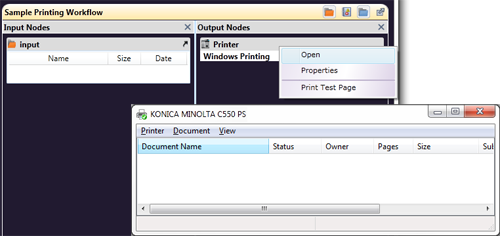
This last example is of a Printer Output node. Double-click to open the actual printer queue, or right-click to get the context menu shown.
Log Viewer
Activity log files are recorded each day individually for each workflow. To access the Log Viewer, do one of the following:
-
Right-click in the Activity Log section of a workflow that has been executed at least once; then select View Saved Log, or
-
Select Log Viewer… from the Tools pull-down menu.
-
Go to the Windows Start button > All Programs > Konica Minolta > Dispatcher Phoenix; then click on Dispatcher Phoenix Log Viewer.
The Log Viewer will look similar to the following illustration, with the selected workflow highlighted. You can select the contents (partial or all) of the Log Viewer using the mouse and/or Shift and arrow keys.
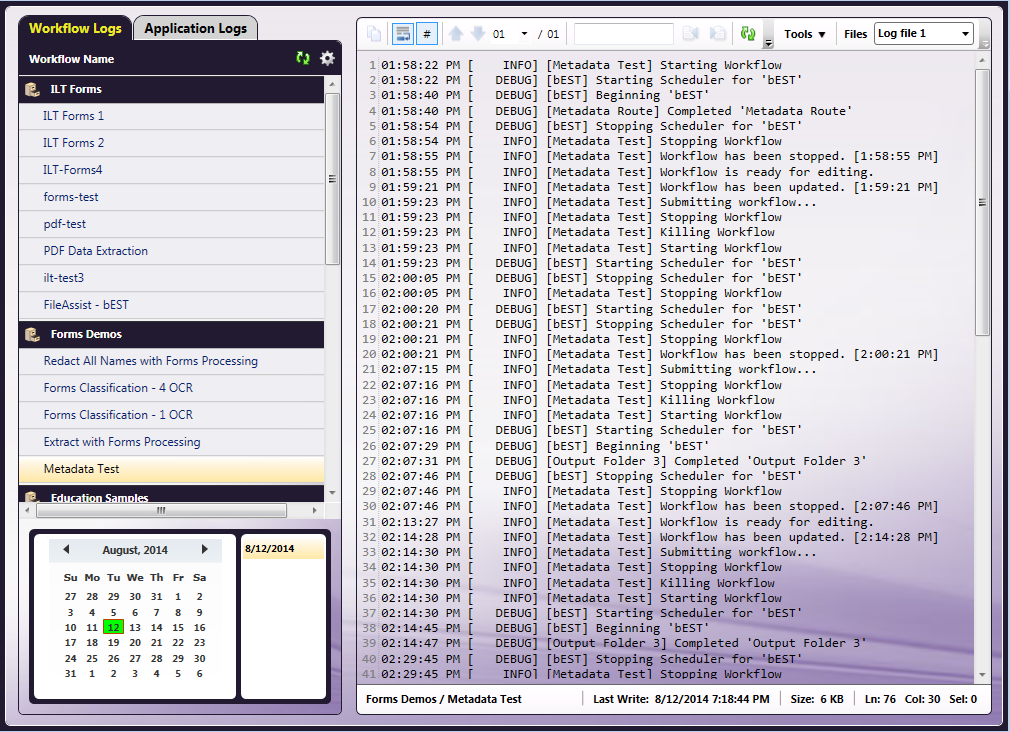
Workflow Logs
The Workflow Logs tab displays all workflows that have log files on disk (in other words, they must have run at least once). Click on a specific workflow to view its log files.
Features of the Workflow Logs tab include:
-
Folders - All workflows are grouped in the same folders as in the Workflow List on the Dispatcher Phoenix main application.
-
Refresh button – To reload the workflows listed in this panel without restarting the Log Viewer, click on the Refresh button.
-
Calendar - You can easily navigate the log’s history using the calendar at the bottom of the window. Clicking on the month name will bring up a 12-month year view, which can be scrolled one year at a time using the arrows. Clicking any month in the year view will bring up that month on the calendar. Months may be scrolled through one at a time using the arrows, as well.
-
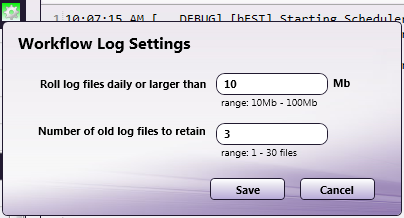
Workflow Log Settings - The information displayed in the Log Viewer depends on the processes in the workflow and your Log Settings. Click on the Workflow Log Settings button on the Workflow Logs tab and a drop-down palette will appear, as in the following illustration:
Do the following:
-
In the Roll log files daily or larger than field, enter a number at which the log file will be saved and the next log started from 10-100 MB in size.
-
In the Number of old log files to retain field, enter the number of log files that you would like to retain (up to 30 files).
-
Select the Save button when you are done. Note that the Dispatcher Phoenix application must be running in order to save the log settings.
Each of these settings, while set in one location, apply to each workflow individually.
Note: New log files will be created for each workflow under two (2) conditions: the day/date changes or the log file size reaches the set maximum.
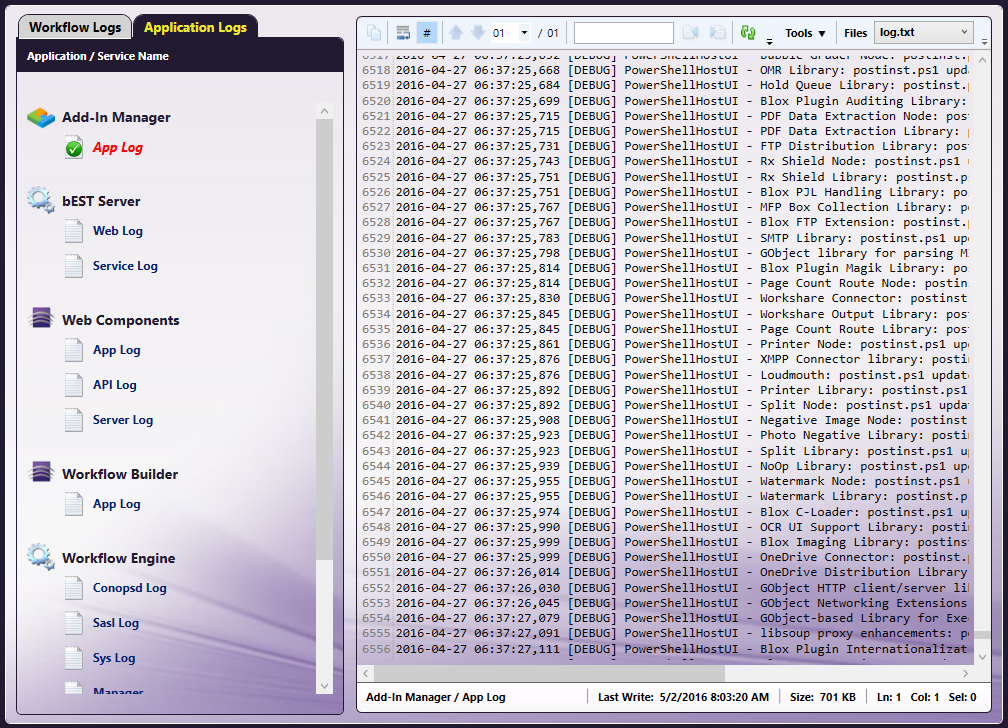
Application Logs
When you click on the Application Logs tab, you will be able to access logs from the following applications:
-
Add-In Manager
-
bEST Server
-
Web Components
-
Workflow Builder
-
Workflow Engine
-
MFP Registration Tool
See the following illustration for an example:
Tool Bar
The Log Viewer’s tool bar resembles the following illustration:

| Icon | Description |
|---|---|
 |
Copy selected text onto clipboard. |
 |
Wrap/unwrap text to Log Viewer window. |
 |
Display/hide line numbers. |
 |
If the log file is larger than 10 MB, it will be split into pages. Click on the up and down arrows to navigate from page to page. The current page and the total number of pages are displayed next to the arrows. |
 |
You can find a specific word in the Log viewer using the text field provided. Click on the arrow icons next to the text field to search up or down in the Log Viewer. Keyboard shortcuts are F3 (find next) and Shift + F3 (find previous). |
 |
Reloads new log information. |
 |
Access additional functionality, including exporting log files, launching external text editor, etc. |
 |
Access different Log files. |
Tools Button
When you click on the Tools button on the Log Viewer tool bar, the following drop-down menu will appear:
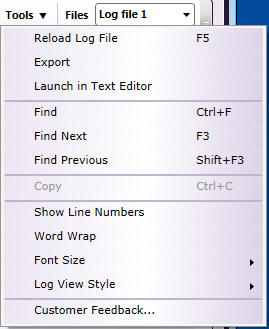
Choose the following:
-
Reload Log File – To reload new log information.
-
Export – To export the log file in a text file.
-
Launch in Text Editor – To open the log file in a text editor.
-
Find – To focus on Search text field on tool bar.
-
Find Next – To search for the next occurrence of the Search text.
-
Find Previous – To search for the previous occurrence of the Search text.
-
Copy – To copy selected text onto clipboard.
-
Show Line Numbers – To hide/display line numbers.
-
Word Wrap - To wrap/unwrap text to Log Viewer window.
-
Font Size – To change the size of the log file’s text. Options are: Default, Small, Medium, Large, Extra Large
-
Log View Style – To change the background style of the Log Viewer. Options are:
-
Default
-
Notepad (Notepad background)
-
Console (Console background)
-
Powershell (Powershell background)
-
-
Customer Feedback – To launch the Customer Feedback Agent.
Clear All and Log Level Options
You can right-click in the Activity Log area and Clear All logs. This clears logs from the Activity Log display. It does not, however, erase any log files on the system. To display the same log again, select the View Saved Log option from the panel menu.
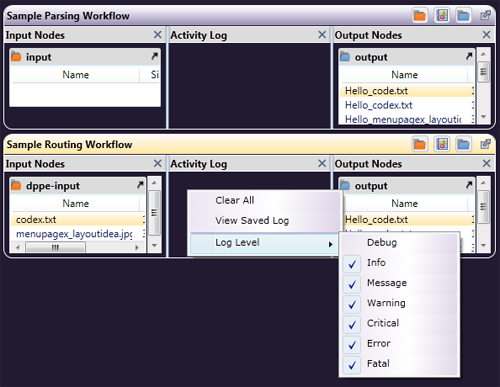
Choose Log Level (from the context menu) to mark the information you want included in your log files. By default, all levels are selected for logging. All of the activity logs contain debug information in case of error, to help with troubleshooting, but you have the option to deselect any of the other types of messages logged for your workflows.
Features and Functions
Dispatcher Phoenix will execute the workflows you create in its Workflow Builder. These workflows can also be edited or copied. The main screen includes the following features.
Workflow List
You can “pin” open a workflow to display the selected workflow in the lower left corner of the screen by clicking on the pushpin to the left of the workflow’s name in the Workflow List.
Note: When you pin a workflow, the workflow preview displayed in the lower left corner of the main application screen will appear as a static image; no LiveFlo animations will appear when the workflow is running.
Show/Hide Views
The next section of the menu bar has three icons that can be used to change the Workflow view.
| Icon | Description |
|---|---|
 |
Show/Hide Workflow List - Displays or hides the opened workflows in the upper left of the screen. |
 |
Show/Hide Workflow Preview - Displays or hides the workflow in the bottom left of the screen. |
 |
Show/Hide Workflow Activity - Displays or hides the activity information on the right hand side of the screen. |
Workflow Activity Panel
On the top right hand side of each opened workflow’s activity panel (under the Tools menu),four icons appear, allowing you to change the view of the selected workflow, as in the following illustration:
Icons on these panels do the following:
| Icons | Description |
|---|---|
 |
Show / Hide Input Nodes - Displays or hides Input folders. |
 |
Show / Hide Output Nodes - Displays or hides Output folders. |
 |
Show / Hide Activity Logs - Displays or hides Activity Logs. |
 |
Float Window - When selected, allows the window to detach from the Activity Panel and moved anywhere on screen. |
You can also stretch the length or width of a column by clicking and dragging the column border lines.
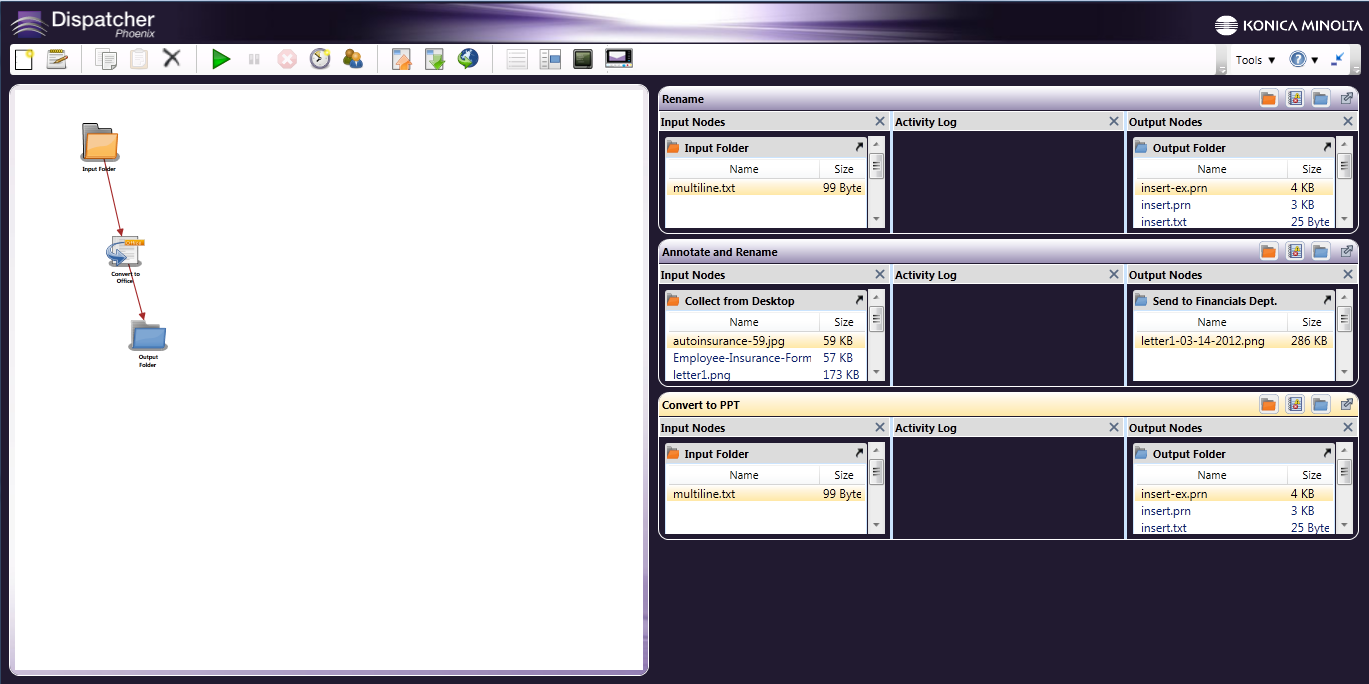
Workflow Views
The layout you set up for Dispatcher Phoenix (views displayed, pane sizes or workflow(s) shown) will be saved automatically. This way, the next time you open the application, your desired look and layout is presented without the need to reset all the panes and views.
The one exception is the Activity Pane. Since this pane can be detatched, the size of the node and activity lists will always open at the default size. However, if this pane is hidden, it will remain hidden upon opening the application.
Workflows - Pinned/Unpinned
The Dispatcher Phoenix screen has two different views of a selected workflow, and other views for the Workflow List and Activity Pane.
“Pinned” Workflow
“Unpinned” Workflow
Both views have a tool bar for your viewing preferences, allowing you to Zoom In and Out, to Fit to Width, show the Whole Page, or display as Two Pages (for a large workflow which actually uses at least two pages).
Activity Pane Views
You can stretch the length or width of a column by dragging it to the desired size, or use the icons, at the top of each section, to hide one or two of the columns.
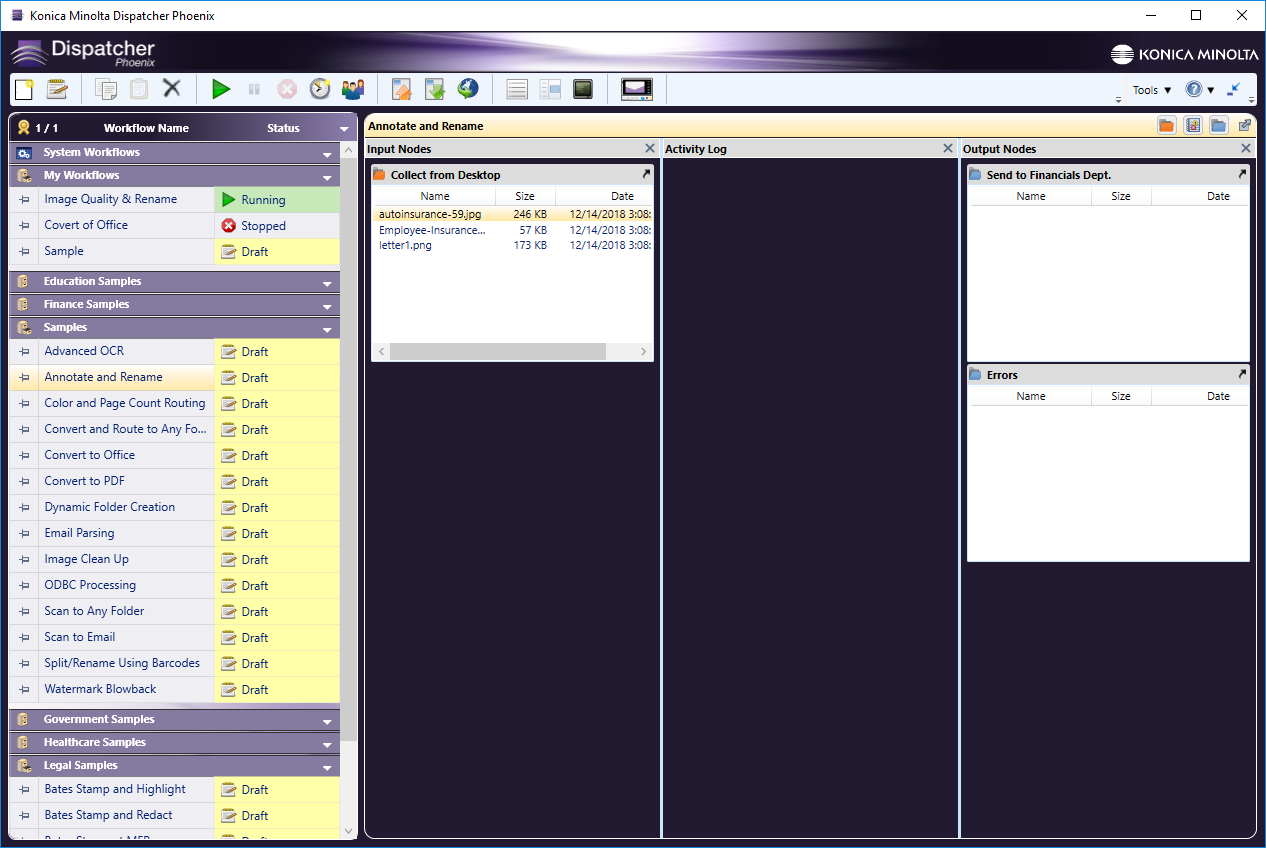
Hiding The Workflow List, View, Or Activity
You can click on one of the workflow view icons to hide the Workflow List, View, or Activity.
-
Workflow List Hidden - The following illustration displays the screen with the Workflow List hidden:
-
Workflow Preview Hidden - When you click on the second Show/Hide Workflow icon, the workflow’s preview will be hidden, as in the following illustration:
Working With Running Workflows
-
To stop a running workflow, select it in the Workflow List, and click on the Stop Sign icon. If the workflow is currently processing files, a message will appear, requiring action on how to proceed.
-
To temporarily pause a running workflow, highlight the workflow and click on the Pause icon. The workflow will stop running and the Status will change to Paused. To Pause All of the active workflows, use the Pause running workflow(s) option on the Tools menu.
- To close the application when a workflow is running, click the X icon at the top right hand side of the main application screen. If the workflow is currently processing files, a message will appear, requiring action on how to proceed. If no messages appear, this means that files were not being processed at that time. In this case, the previously running workflow will be resumed when the application opens again, and files will not be recollected.
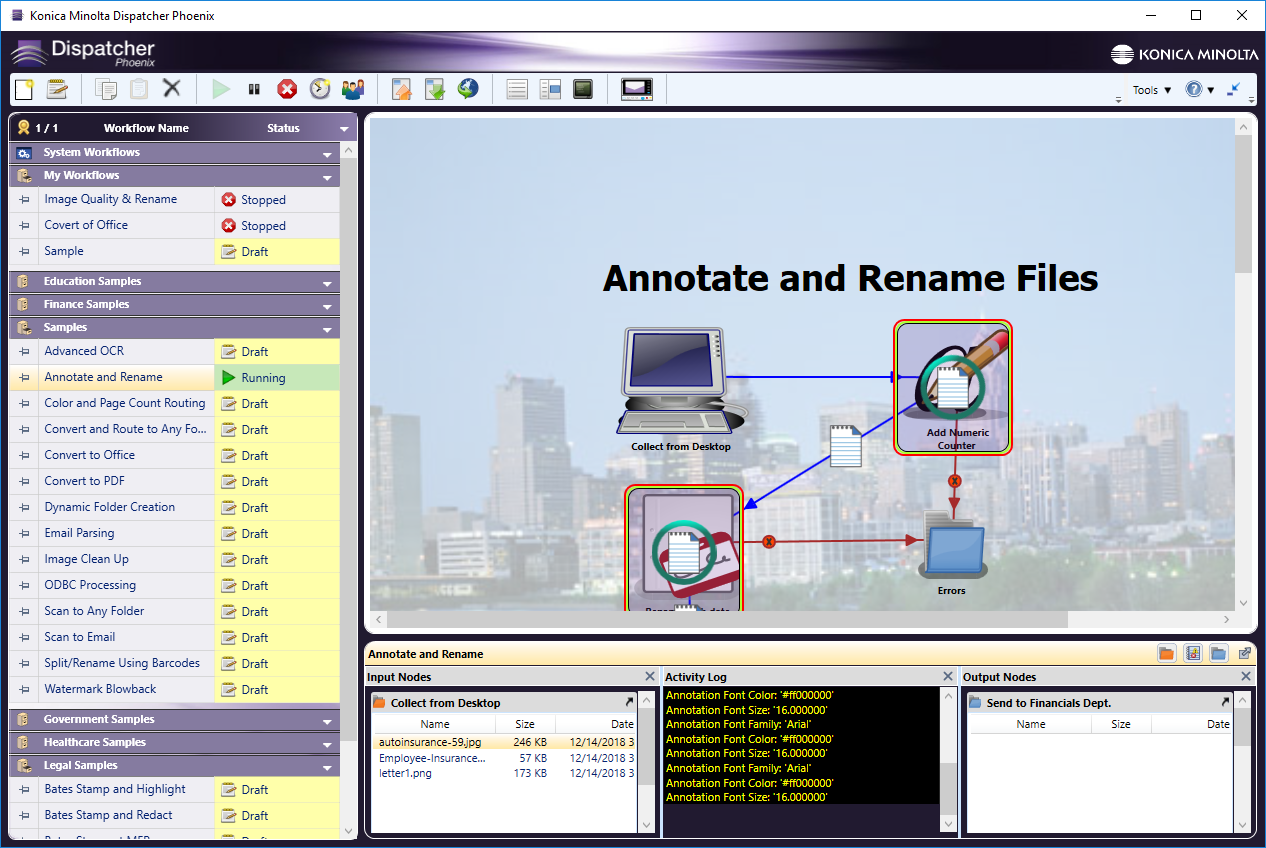
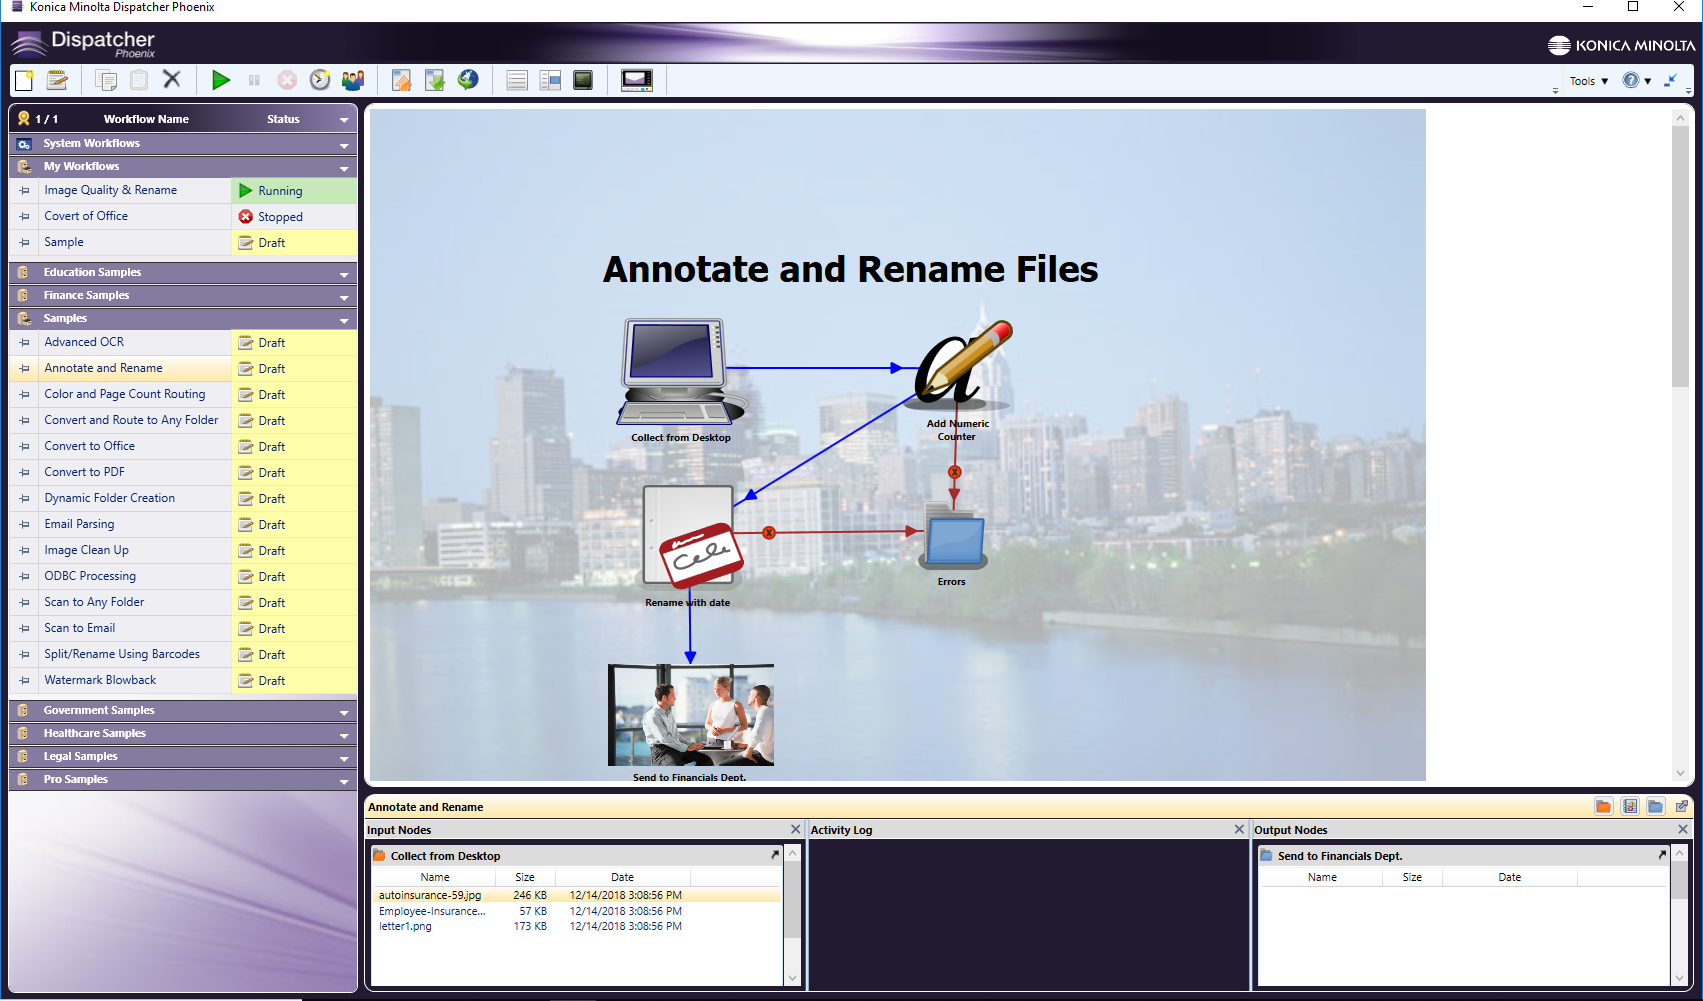
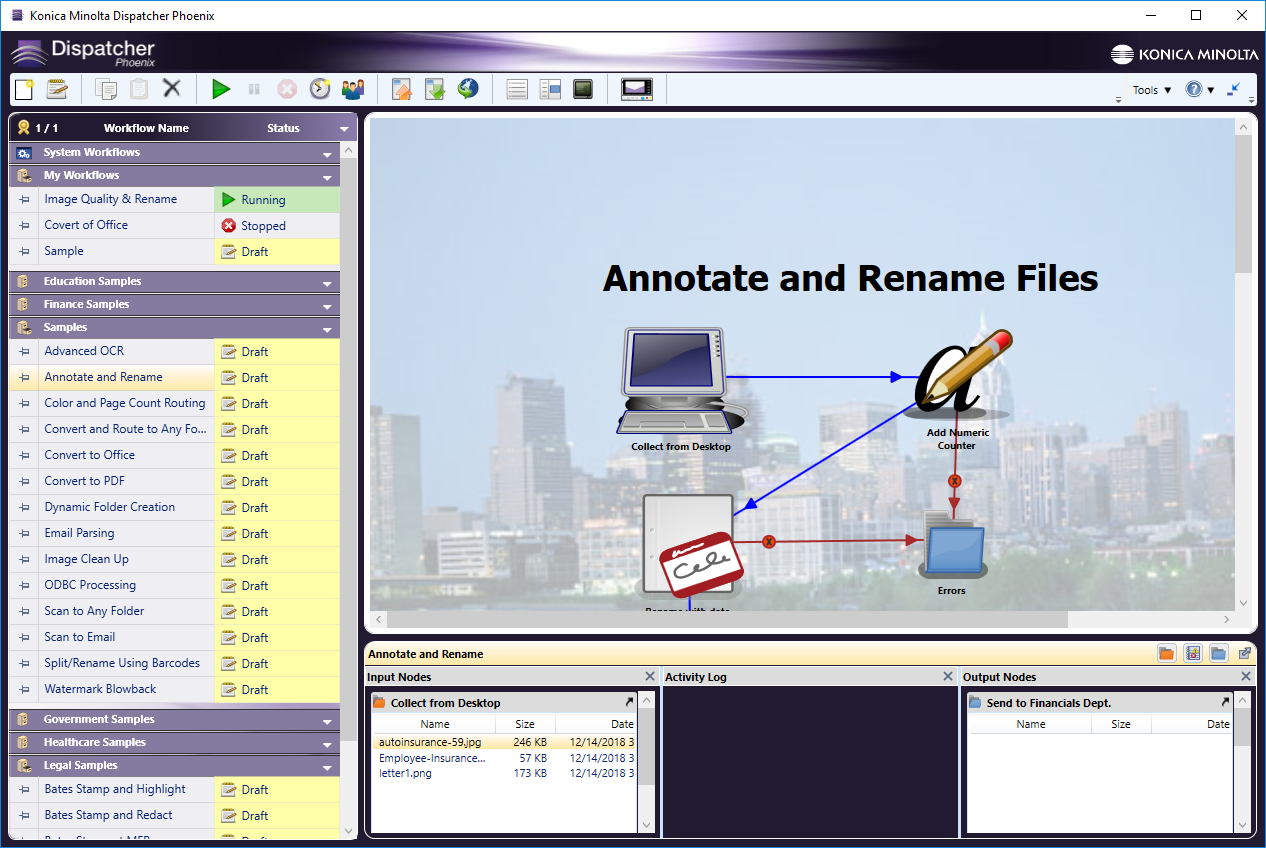
Running A Sample Workflow
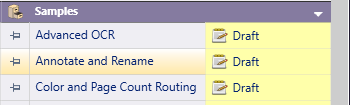
The first time you launch Dispatcher Phoenix, there will be sample workflows for you to use to get acquainted with the application. Before they can be executed (initially they are “drafts”), they need to be opened in the Workflow Builder and validated.
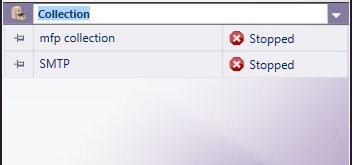
Dispatcher Phoenix can only execute valid workflows in the Workflow List. To be valid, a workflow must have each node defined to match your Collection Points, Processes, and Distribution Points. The samples listed at first launch contain valid processes, but need specific Collection (Input) and Distribution (Output) points defined to actually run the workflow. The Status column will show whether or not a workflow is Running or Stopped. If you try to run an invalid workflow, you will get a failure message.
In this example, you will run the Annotate and Rename sample.
Do the following:
-
Double-click on the Annotate and Rename sample in the Workflow List to launch the Workflow Builder.
-
Double-click on the Input Folder icon on the Workflow Builder’s Canvas Area to open the Input Folder Node properties window.
-
On the Input Folder Node properties window, do the following:
a. Check the Process files as a group box to have Dispatcher Phoenix collect all files at one time, before processing any of them. If this box is left unchecked, each file will be processed individually.
b. Make sure the Delete on Retrieve box is unchecked so that the files in the folder won’t be deleted after processing.
c. The Input Folder node’s directory has already been defined for you. To change the directory, click on the ellipsis button to find another directory. In this case, make sure that you add your own image files to the new directory.
d. Select the Save button when you are done.
-
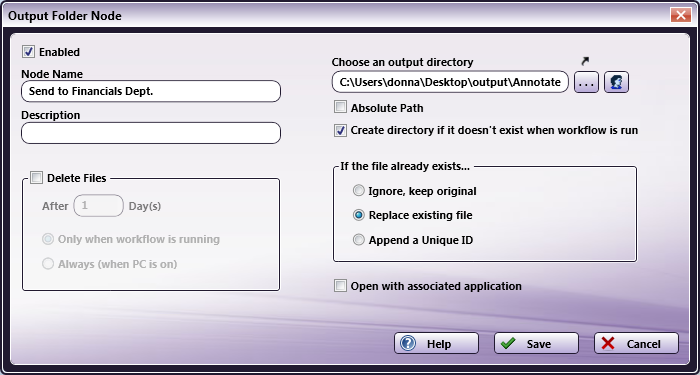
Double-click on the Output Folder icon on the Workflow Builder’s Canvas Area to open the Output Folder Node properties window, as in the following illustration.
-
On the Output Folder Node window, do the following:
a. The Output Folder node’s directory has already been defined for you. To change the directory, click on the ellipsis button to find another directory.
b. For this sample exercise, make sure that the Delete Files box is unchecked.
c. Select the Save button when you are done.
-
Double-click on the Annotation icon on the Workflow Builder’s Canvas Area to change the defined annotation.
-
Double-click on the Rename icon on the Workflow Builder’s Canvas Area to change the rename process.
-
Click on the Validate button on the tool bar to make sure the workflow is valid.
-
Click on the Save icon to save the workflow; then close the Workflow Builder by clicking on the X in the upper right corner of the screen.
-
Once the Workflow Builder has closed, you will be back at the main application screen, and the workflow will be highlighted. Click on the Run icon and you can watch your files run through the workflow, as in the following illustration: