Upland InterFAX Connector
![]()
The Upland InterFAX Connector node is designed to allow new and existing Dispatcher Phoenix workflows to distribute files via Upland’s web-based InterFAX system. Any documents routed through the Upland InterFAX Connector can be sent to a recipient specified by the node configuration window, node metadata, or data input at the MFP.
Important! For more information about limitations of the Upland InterFAX service, see the Upland InterFAX documentation.
Configuring the Upland InterFAX Connector
-
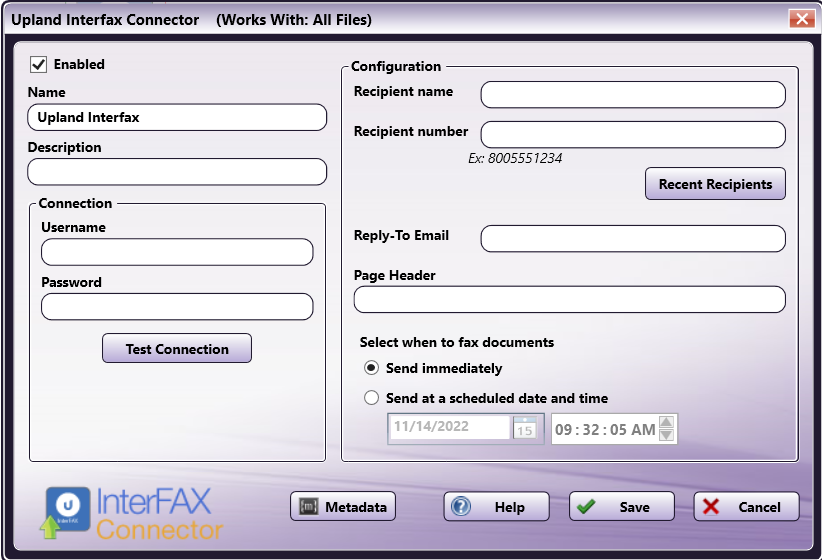
Enabled - To enable this node in the current workflow, check the box at this field. If you leave the box blank, the workflow ignores the node and documents pass through as if the node was not present. Note that a disabled node does not check for logic or error conditions. By default, nodes are enabled upon creation.
-
Node Name - The node name defaults into this field. This name appears in the workflow below the node icon. Use this field to specify a meaningful name for the node that indicates its use in the workflow.
-
Node Description - Enter an optional description for this node. A description can help you remember the purpose of the node in the workflow or distinguish nodes from each other. If the description is long, you can hover the mouse over the field to read its entire contents.
Buttons
- Metadata - To access the Metadata Browser window, click this button.
- Help - To access Dispatcher Phoenix Online Help, click this button.
- Cancel - To exit the window without saving any changes, click this button.
- Save - To preserve your node definition and exit the window, click this button.
Application Setup
To open the Upland InterFAX Fax Connector node configuration window, add a distribution node for InterFAX, then double-click on it.
Connecting to Upland InterFAX
To connect to Upland InterFAX, do the following:
-
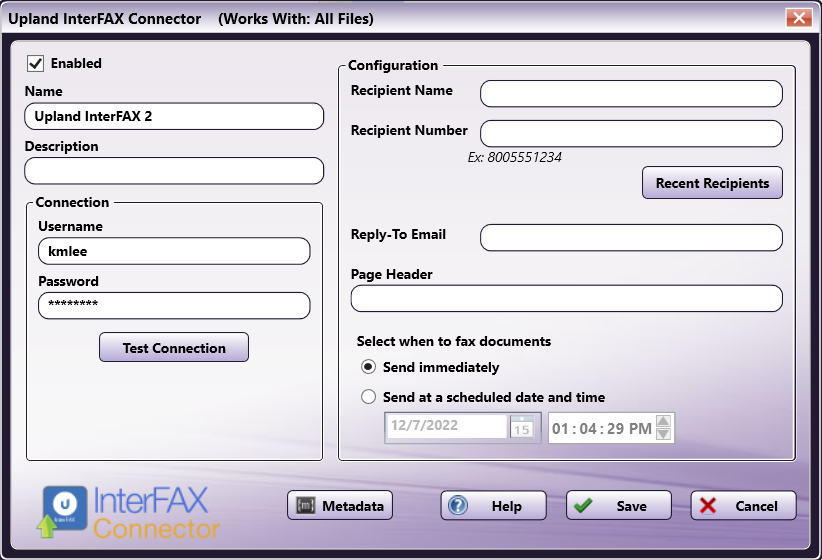
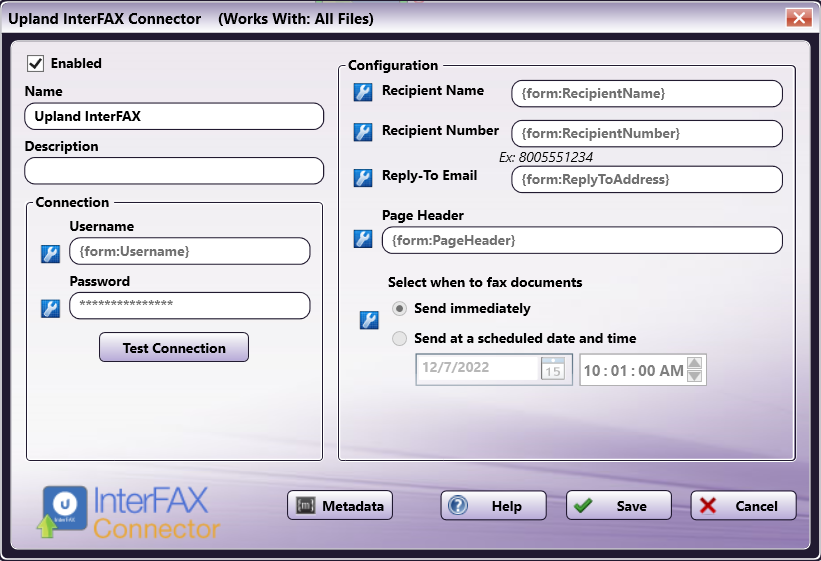
Enter the Username and Password for the Upland InterFAX, as in the following illustration:
-
Then, select Test Connection. If the connection is successful, a confirmation message will appear, as in the following illustration:

Configuring the Upland InterFAX Connector
After connecting to Upland InterFAX, you will be able to enter more information about the recipient and the documents to be faxed. To configure the Upland InterFAX Connector, do the following:
-
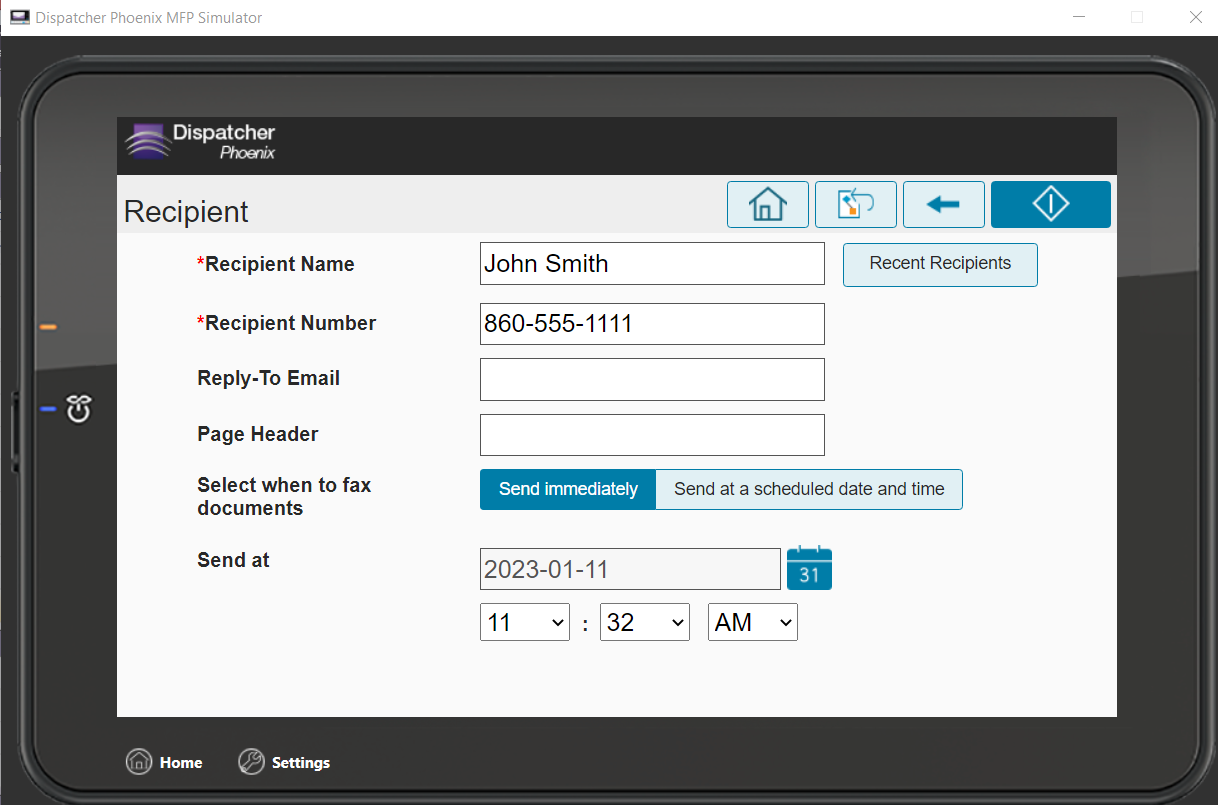
Enter the Recipient name and Recipient number in the fields. These fields are required to successfully upload a document to the Upland InterFAX system.
Notes:
-
The Recipient number field only accepts numbers or metadata. The node can be saved with other characters in this field, but the workflow will fail to validate. To add metadata to these fields, click on the Metadata button to open the Metadata Browser window. You can then drag-and-drop metadata variables into the appropriate fields.
-
If a configuration field contains the curly bracket character ( { ), then the administrator must add an additional curly bracket next to it to prevent the node from attempting to read the entry as metadata. For example, a contact named “Cynthia {ABC Corp}” would need to be entered as “Cynthia {{ABC Corp}”
-
Recipient Name and Recipient Number fields have a maximum length of 100 characters.
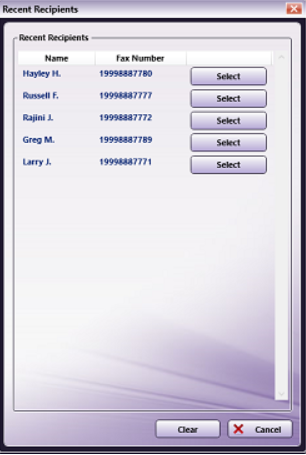
You can also use the Recent Recipients button to open a window containing the fax information for up to ten (10) of the most recent numbers faxed to. These numbers are displayed chronologically with the most recent number at the top. Use the Clear Recent Recipients button to delete all recent recipients.
-
-
You can also enter a Reply-To Email and Page Header, if necessary.
-
Select when you would like documents sent via InterFAX.
-
Send immediately - This faxes documents as soon as they are uploaded to InterFAX.
-
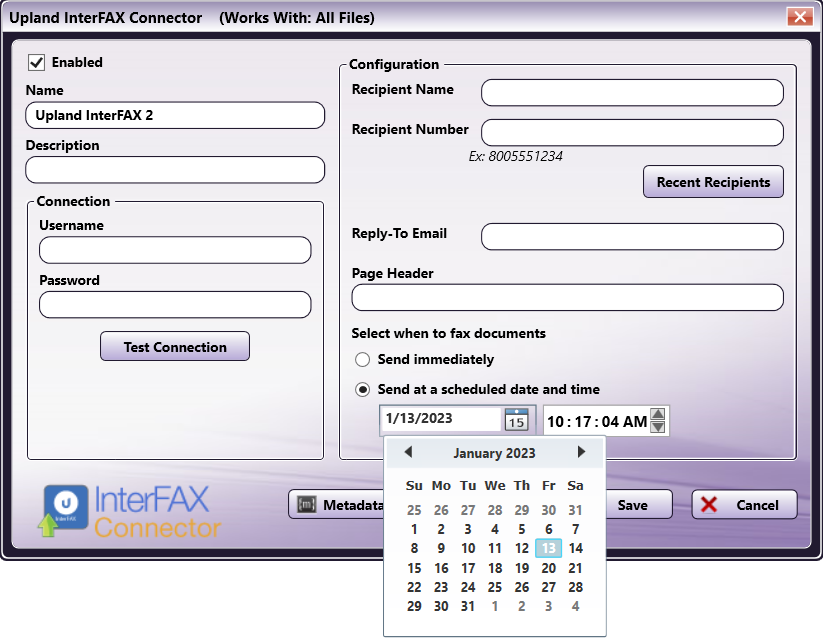
Send at a scheduled date and time - Enter or select a date and time that InterFAX will send the uploaded documents.
Note:
-
If you attempt to send documents at a scheduled date/time that has already passed, the documents will be faxed immediately.
-
Sending a fax can delay until after the specified date and time. Fax submission into the system can be delayed for up to 30 days.
-
-
Creating the Upland InterFAX Index Form
When the workflow is configured with an Index Form, you will be prompted to log into your Upland InterFAX account at the MFP before you begin scanning and sending. To create an Index Form that allows you to customize your Upland InterFAX Connector node at the MFP, do the following:
-
Make sure that your workflow includes a Upland InterFAX Connector node.
-
Click on the Forms dropdown in the toolbar and select Create New Index Form to open the Index Form Builder, as in the following illustration:
-
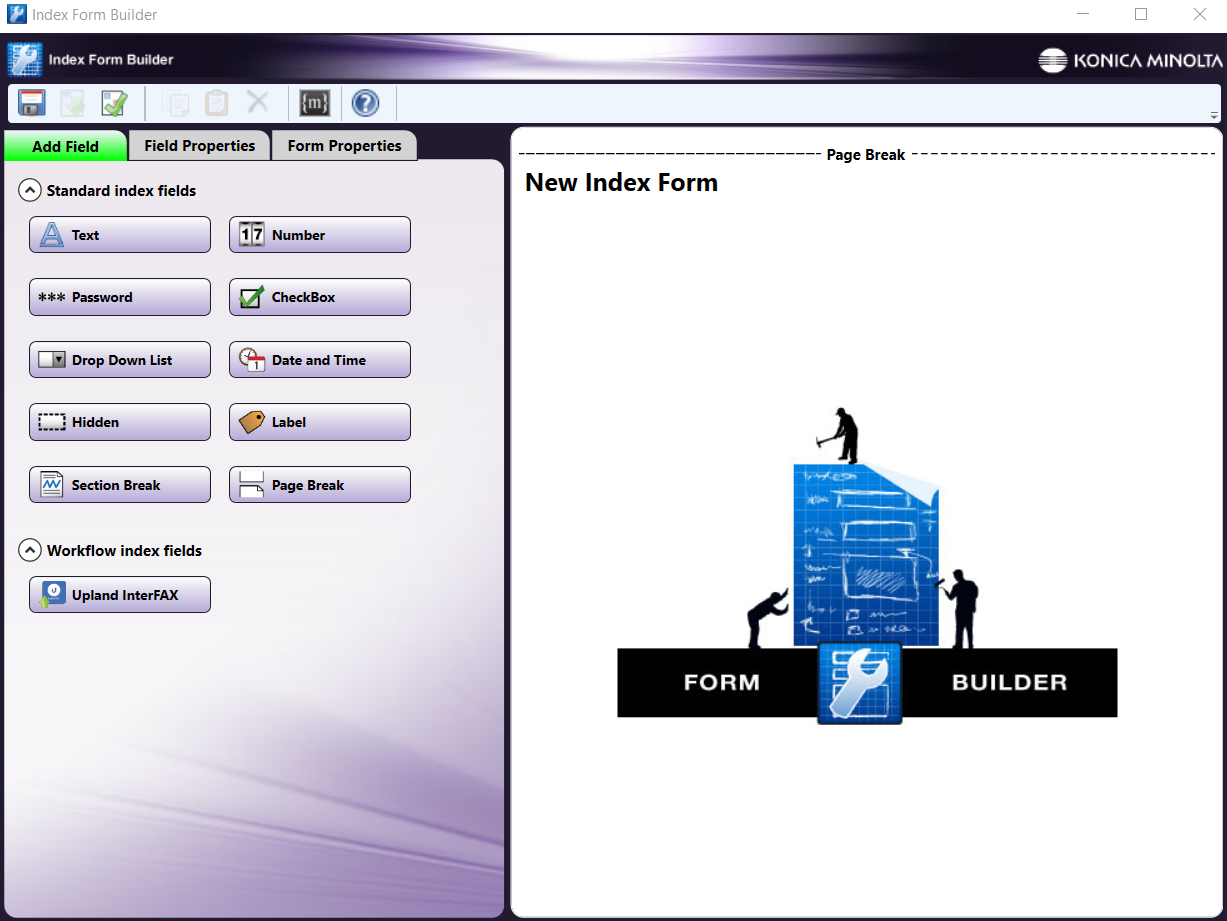
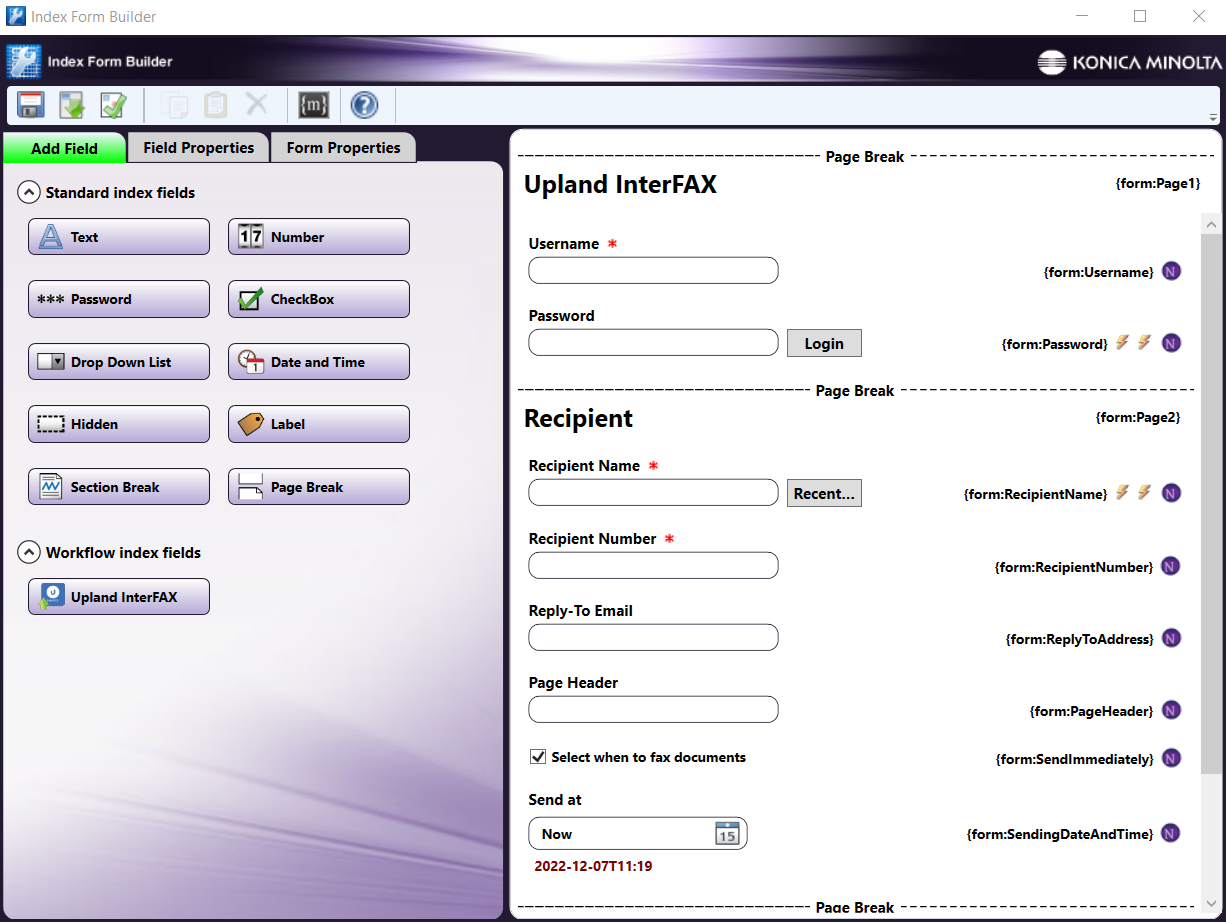
Select the Blank Index Form option in the pop-up. Then, drag the Upland InterFAX Connector icon to the Index Form Builder working area. Several fields will populate, as in the following illustration:
-
Validate, Save, and close the Index Form Builder.
-
Attach the Index Form to a node that supports Index Forms, such as the MFP Panel node, Web Capture node, or Release2Me node.
-
The Upland InterFAX Connector node properties window will automatically populate with the variable names of the fields on the Index Form. Although you cannot edit the fields on this window, you can click on the wrench tool button to go to that section or field in the Index Form Builder. See the following illustration:
Accessing InterFAX on MFP
At the MFP, take the following steps:
-
Select your workflow - If only one Dispatcher Stratus workflow is currently running, that workflow appears. However, if multiple workflows are running, the Selection screen appears and you must select a workflow.
-
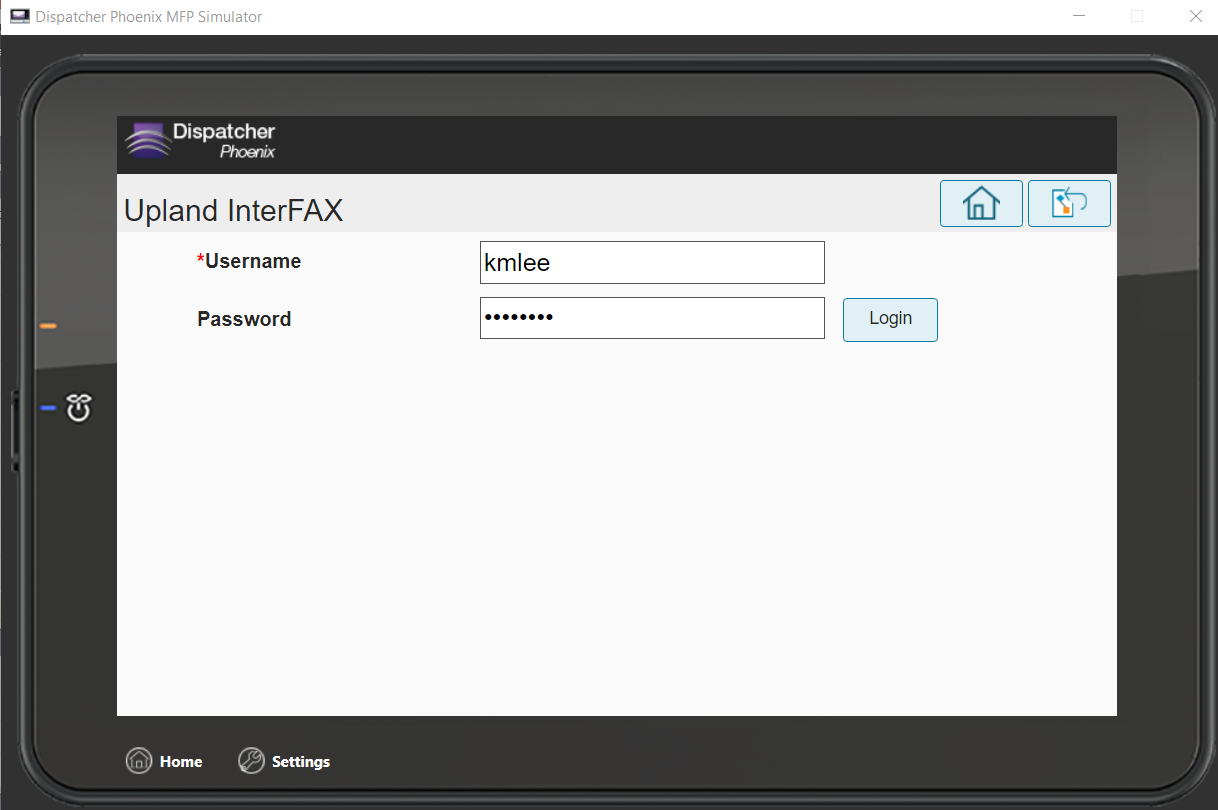
Enter your login credentials - If an InterFAX account has not been configured during node setup, you will need to enter your account information.
-
Enter the Recipient Information - When you are logged in, you can enter the name and fax number of the intended fax recipient. If necessary, you can also enter the Reply To Email and Page Header and update the fax time, if necessary. See the following illustration:
-
Once you have entered the necessary information, select the “Scan” button to initiate the scanning process. The scanned documents are sent to the Upland InterFAX service and faxed immediately or at the selected date and time.