Insert PDF Pages
Note: This node works with PDF files (version 1.3 or later).
The Insert PDF Pages Node is a process node that can be used to insert blank pages or pages from another PDF file into a PDF document. Use the node’s setting window to specify whether to insert the pages at fixed positions or insert them based on metadata values.
Using the Insert PDF Pages Node
Add the Insert PDF Pages Node to the workflow by dragging the node’s icon onto the Workflow Builder canvas, and then double-clicking on the icon to open the Insert PDF Pages Node’s window:
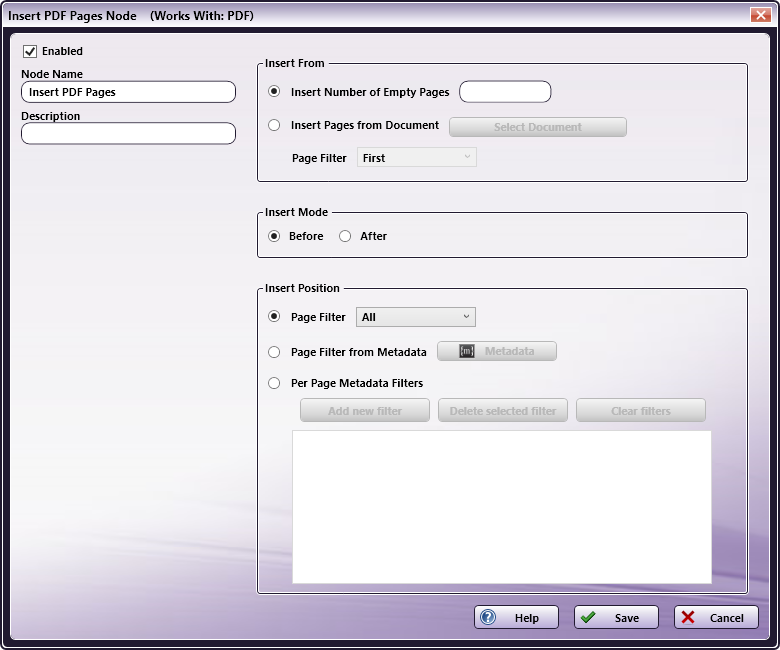
- Select the Enabled checkbox so that the process will run. When unchecked, this process is ignored. Documents pass through as if the node were not present (i.e., continue along the default or positive path). Note that a disabled node will not check for logic or error conditions.
- In the Node Name field, enter a meaningful name for the Insert PDF Pages Node.
- In the Description field, enter a description for the Insert PDF Pages. This is not required, but can be helpful with multiple collection points. If the description is long, hover the mouse over the field to read its entire contents.
- Select the Save button to apply the settings. Select the Cancel button to exit the window without saving any changes.
- Select the Help button to access online help.
Insert From
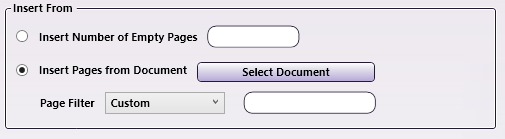
In this panel, specify the pages to be inserted. One, multiple empty pages, or pages from another PDF document may be inserted using this node.
-
Insert Empty Pages Number of Empty Pages: Enter the number of insertion pages to be added into the text field.
-
Insert Pages from Document: Click the Select Document button to navigate to and then select the source document which contains the pages that are to be inserted. The Page Filter drop-down is then activated.
-
Page Filter: Select one of the Page Filter options from the drop-down. The options are: All, First, Last, Even, Odd, and Custom.
If Custom is selected, the Page Range input field appears. Use the field to enter a custom range of page numbers. Both comma-separated values and ranges (e.g., 3-5 in-stead of 3,4,5 are accepted. A maximum of 100 characters may be entered in this field.
-
Insert Mode
Click one of the radio buttons to determine whether the additional pages will be inserted before or after the existing pages.

Insert Position
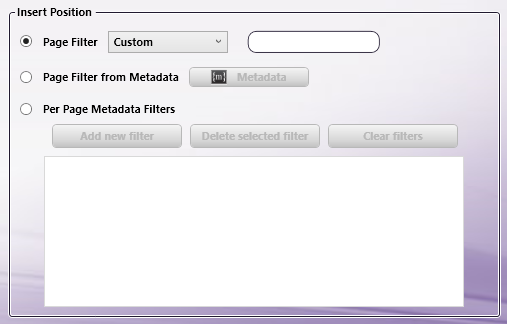
In this panel, specify where pages will be inserted.
-
Page Filter: Choose one of the predefined page filters from the drop-down menu. The values are: All, First, Last, Even, Odd, and Custom.
If Custom is chosen, the Page Range input field appears. Use the field to enter a custom range of page numbers. Both comma-separated values and ranges (e.g., 3-5 instead of 3,4,5) are accepted. A maximum of 100 characters may be entered in the field.
Note: The page number must not be greater than 2147483647.
-
Page Filter from Metadata: Use this option to select pages to process based on document-level metadata. Click on the Metadata Button (see below) to open the metadata browser.
Note: The result of the entered metadata expression must be a Custom Page Filter (see above), i.e. a string containing one or more comma-separated, single page numbers (e.g. 2) or page ranges (e.g. 3-5).
-
Metadata Button: Click to open a Metadata browser window. Either a metadata key or a custom string value may be entered. To select a metadata key, double-click on it, and then click on the Select button to apply the metadata key.
All Metadata syntax specified in the Help topic Metadata Reference Information may be used. For example, if there are multiple document-level values containing page numbers for the metadata key {data:page}, use {data:page[]|,} as the page filter from metadata to concatenate them with commas in order to generate a valid page filter. For a single value, use {data:page[]}.
-
Checkbox: To use this page, select the checkbox.
-
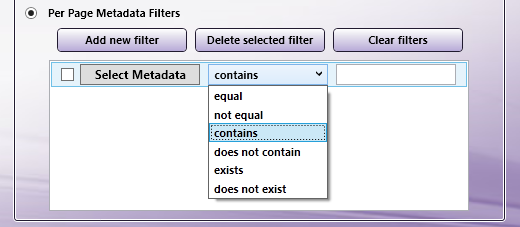
Add new filter: Click this button to add a new per-page metadata filter. Edit this new filter by clicking on its fields.
-
Select Metadata: Click to open a Metadata browser window, in which either a metadata key or a custom string value may be entered. To select a metadata key, double-click on it, and then click on the Select button to apply the metadata key.
-
Comparator drop down menu: Choose a value from the drop-down menu. Supported values are: Equal, Not Equal, Contains, Does Not Contain, Exists, or Does Not Exist.
-
Comparison value input field: All drop-down options, except for Exists and Does Not Exist require a value in this column.
-
-
Delete selected filter: To remove a single per-page metadata filter, click on the filter’s line the click the Delete Selected Filter button.
-
Clear filters: Removes all per-page metadata filters.