CDA Generator
The CDA Generator enables Dispatcher Phoenix to convert patient records and other clinical documents into standard HL7 CDA XML documents that will then be imported into a medical system such as an Electronic Health Record (EHR) application. The CDA Generator provides healthcare organizations with the interoperability they need to manage their patient records. This node creates an XML template that is ingested by an EHR vendor in order to view the patient’s health record.
A CDA-formatted XML file uses a common design structure with the following six characteristics:
- Persistence - Remaining in use for a long period.
- Stewardship - Maintained by a trusted organization such as a hospital using CDA.
- Potential for authentication - Legal verification that the clinical information is accurate.
- Context - A default context is added to the record such as patient identity and who created the document.
- Wholeness - The full document can be authenticated.
- Human Readability - A person can read the material on a browser or mobile device.
Note: The CDA Generator node supports all file types. However, there may be issues when using the CDA Generator node with TIFF (Tag Image File Format) files.
Setting Up the CDA Generator Workflow
Add a MFP Panel node, a CDA Generator node, and your chosen output to your workflow.

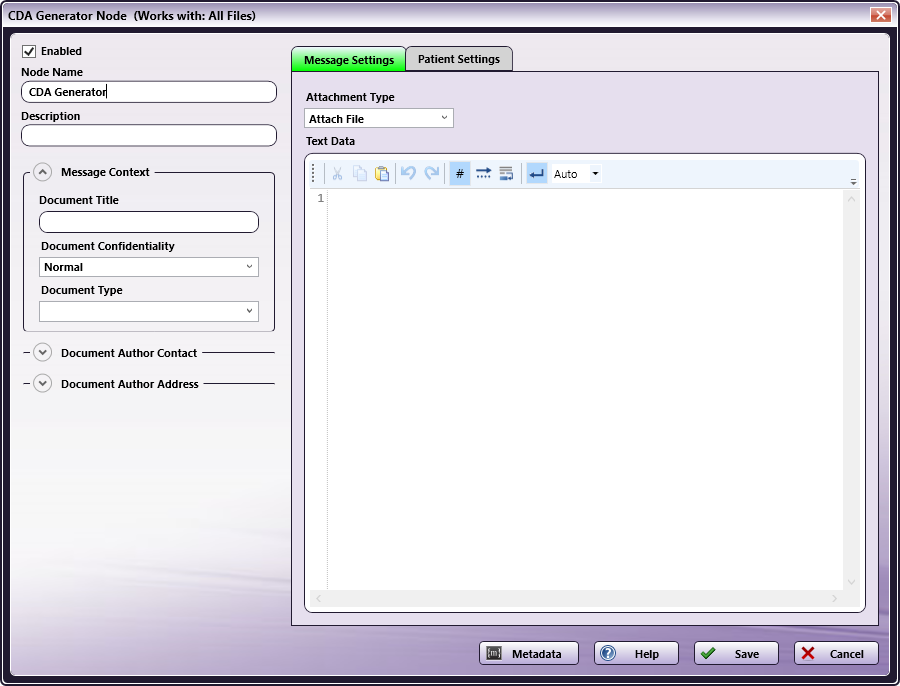
Configuring the CDA Generator Node
To open the CDA Generator node, double-click on it.
Do the following:
-
Make sure the Enabled box is checked. When unchecked, this process will be ignored. While the workflow will still validate, documents will not be processed and may be lost.
-
In the Node Name field, enter a meaningful name for the CDA Generator node.
-
In the Description field, enter a description for the CDA Generator node. This is not required, but it can be helpful when you have more than one processing node. If the description is long, you can hover the mouse over the field to read its entire contents.
-
In the Message Context area, configure the following settings:
- In the Document Title field, enter in a meaningful document title.
- From the Document Confidentiality drop-down list, choose whether the document confidentiality level is Low, Moderate, Normal, Restricted, Unrestricted or Very Restricted.
- From the Document Type drop-down list, indicate the document type being processed through the CDA Generator, such as Referral, Discharge, General Communication, Patient Initiated, Emergency Discharge, Inpatient Discharge, or Medication Management.
Note: All fields under Message Context accept Metadata. To browse for metadata to add to the fields, click on the Metadata button and the Metadata Browser window will appear. Using this window, you can drag-and-drop variable names from the Metadata Browser to the appropriate open text fields.
-
In the Document Author Contact section, configure the following information:
- In the Organization field, enter the organization the document author is associated with.
- In the First Name field, enter the first name of the document author.
- In the Last Name field, enter the last name of the document author.
- In the Phone Number field, enter the phone number for the document author.
Note: All fields under Document Author Contact accept Metadata, with the exception of Organization. To browse for metadata to add to the fields, click on the Metadata button and the Metadata Browser window will appear. Using this window, you can drag-and-drop variable names from the Metadata Browser to the appropriate open text fields.
-
In the Document Author Address section, configure the following fields:
- In the Address field, enter the street address of the document author.
- In the City field, enter the city associated with the street address of the document author.
- In the State field, enter the state where the document author is located.
- In the Zip Code field, enter the zip code of the city and state where the document author is located.
- In the Country field, enter the country the document author resides in.
-
In the Message Settings tab, configure the following settings:
- From the Attachment Type drop-down list, indicate the type of attachment being processed through the CDA Generator. The options are: No Attachment, Attach File, Attach Text.
- In the Text Data area, enter the required text, if any, that will need to be included in the patient record. For example, you may include any doctor’s notes or observations.
-
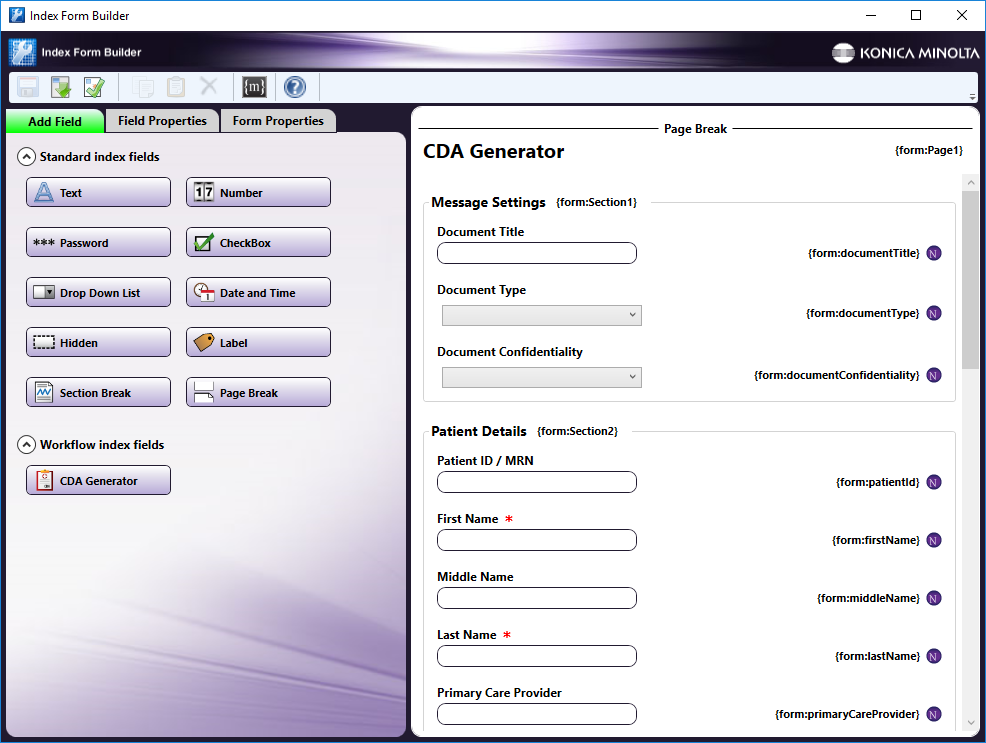
In the Patient Settings tab, configure the patient details. The patient details include:
- Patient ID/MRN.
- First Name. This field is required.
- Middle Name.
- Last Name. This field is required.
- Date of Birth (MM/DD/YYYY).
- Gender.
- Race.
- Primary Care Provider.
- Address.
- City.
- State.
- Zip Code.
- Country.
- Phone Number.
Note: All fields under Patient Settings accept Metadata. To browse for metadata to add to the fields, click on the Metadata button and the Metadata Browser window will appear. Using this window, you can drag-and-drop variable names from the Metadata Browser to the appropriate open text fields.
-
Select the Save button to keep the CDA Generator configuration. You can also select the Help button to access online help or select the Cancel button to exit the window without saving any changes.
Creating a CDA Generator Index Form
You can create an index form that allows you to customize the CDA Generator process at scan time.
-
Add a MFP Panel node and CDA Generator node to your workflow.
-
Open up the Index Form Builder from the MFP Panel node. You should see a CDA Generator button under the Workflow index fields area.
-
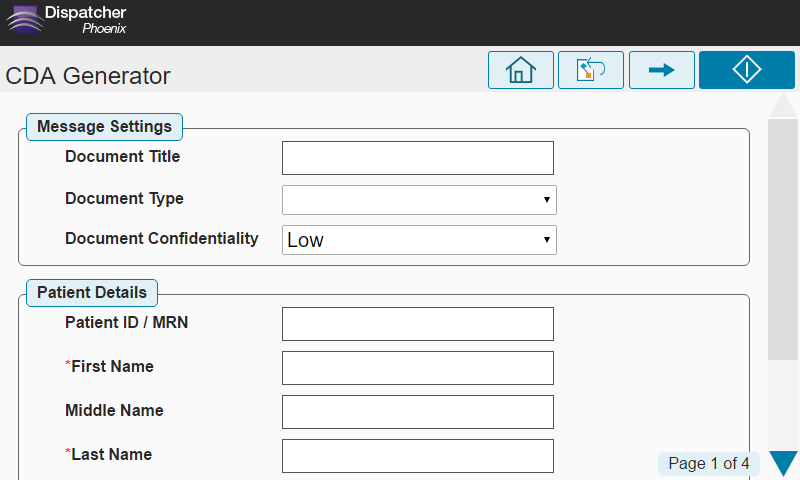
Drag and drop the CDA Generator button to the Index Form work area. A CDA Generator index form will automatically appear, as in the following illustration:
-
Save and close the Index Form Builder. Once the MFP user specifies patient data with the index form at the MFP, the CDA Generator node will be automatically populated with the index form metadata.
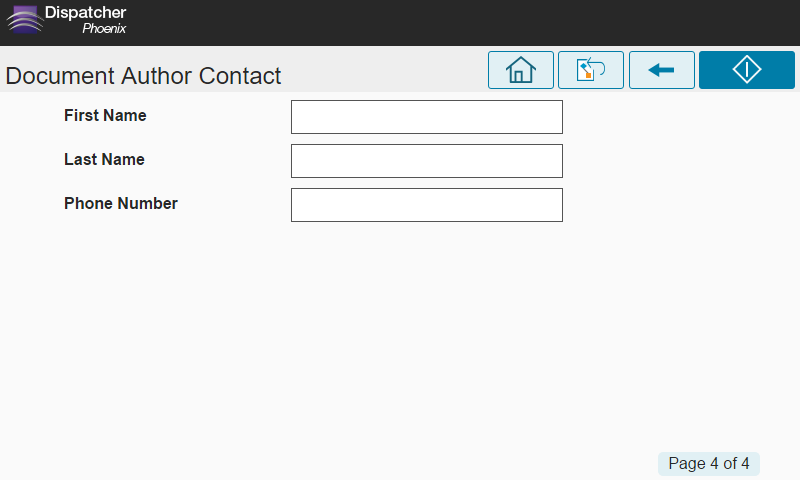
Using the CDA Generator at the MFP
Once an index form has been created and your output node defined, an MFP user can specify document settings at the MFP. See the following illustration for an example:
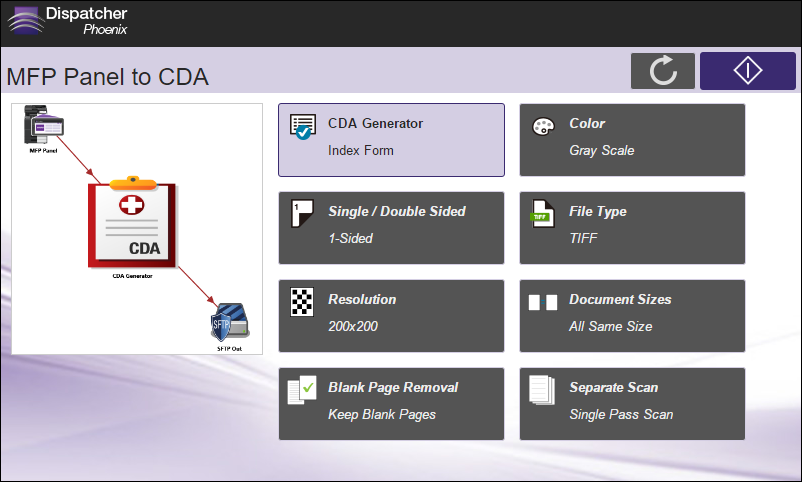
Screen 1: Specify Message Settings and Patient Details
Screen 2: Enter the Patient’s Date of Birth, Gender and Race

Screen 3: Enter the Patient’s Address and Other Contact Information

Screen 4: Enter the Document Author’s Contact Information