Windows Fax Connector
The Windows Fax Connector node is designed to allow new and existing Dispatcher Phoenix workflows to distribute files via a local fax modem. Any documents routed through the Fax Distribution Node can be sent to a recipient specified by the node configuration window, node metadata, or data input at the MFP. Optionally, a cover sheet can be included with each item that is faxed, which will contain additional metadata pertaining to the faxed document, such as the sender’s name, recipient’s name, and any other additional notes.
Prior to configuring the Windows Fax Connector node, please ensure your fax modem or server are configured according to the Windows Fax and Scan user guide. In addition, open Windows Fax and Scan Setup. Then, go to Fax Setup and select your fax medium, either modem or server, to complete the pre-configuration process.
By default, when using a fax modem the Windows Fax service only allows administrators to send faxes on some operating systems. To enable single-user access or additional group access you will need to grant permission to all fax components in Microsoft Fax Service Manager.
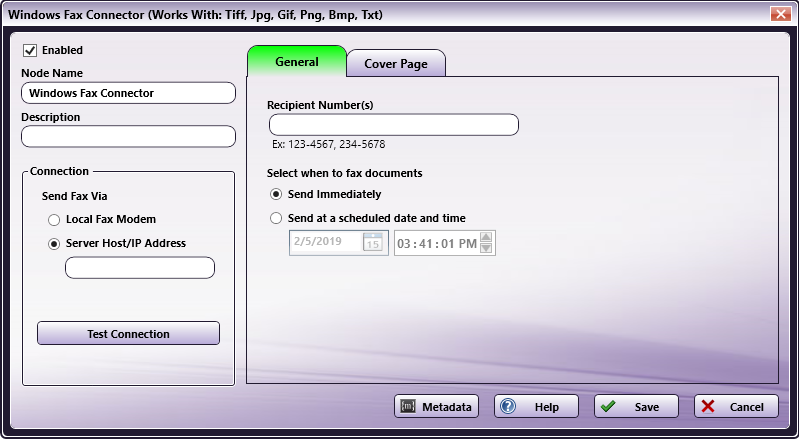
To open the Windows Fax Connector node configuration window, add a distribution node for Windows Fax, then double-click on it.
Do the following:
-
Make sure the Enabled box is checked. When unchecked, this output will be ignored. While the workflow will still validate, documents will not be distributed and may be lost.
-
In the Node Name field, enter a meaningful name for the Windows Fax Connector.
-
In the Description field, enter a description for the Windows Fax Connector. Although this is not required, it can be helpful to distinguish between multiple distribution points. If the description is long, you can hover the mouse over the field to read its entire contents.
-
In the Connection area, select how to send your fax:
- Local Fax Modem: Select to send documents out of the workflow using a fax modem and phone line connected to your PC.
- Sever Host/IP Address: Select to use a fax server to distribute files via fax.
-
Use the Test Connection button to verify the system is properly configured to distribute documents via fax.
-
The General tab includes fields that allow you to specify the Recipient Number(s) and Fax Settings. These fields can also be accessed and filled out at the MFP during scan time.
-
Configure Fax Settings:
-
Recipient Number(s): enter in the recipient number(s) where the fax should be sent. This field can be configured with a single fax number for can contain a comma-separated list of several numbers Ex. 1-555-123-4567, 1 5551234567 or 4567.
-
Select when to fax documents: Select the radio button for:
- Send Immediately - The fax will be sent as soon as the file is outputted through the Windows Fax Connector.
- Send at a scheduled date and time - Select a specific date and time when the fax should be sent to the recipient.
-
-
-
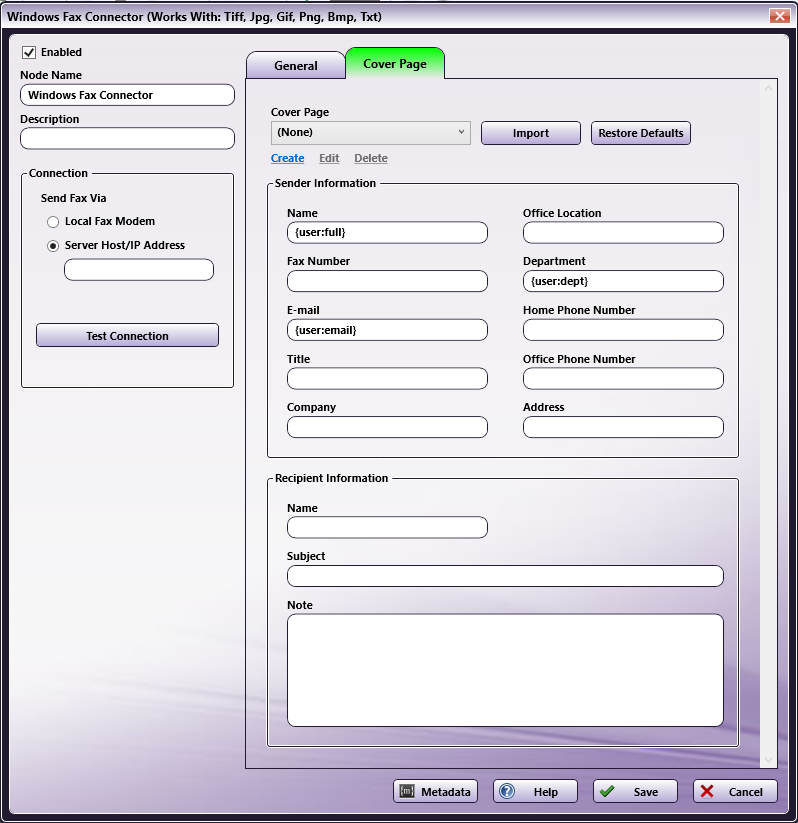
The Cover Page tab includes fields that allow you to select and customize the Cover Page which can be included with the fax.
Note: All the fields on the Cover Page tab, and the Recipient Number(s) field on the General tab accept Metadata. To browse for Metadata to add to the field, click on the Metadata button and the Metadata Browser window will appear. Using this window, you can drag-and-drop metadata variables from the Metadata Browser into the appropriate open text fields.
-
Select the Save button to keep the Windows Fax Connector Out node configuration. You can also select the Help button to access online help and select the Cancel button to exit the window without saving any changes.
Inserting a Cover Page
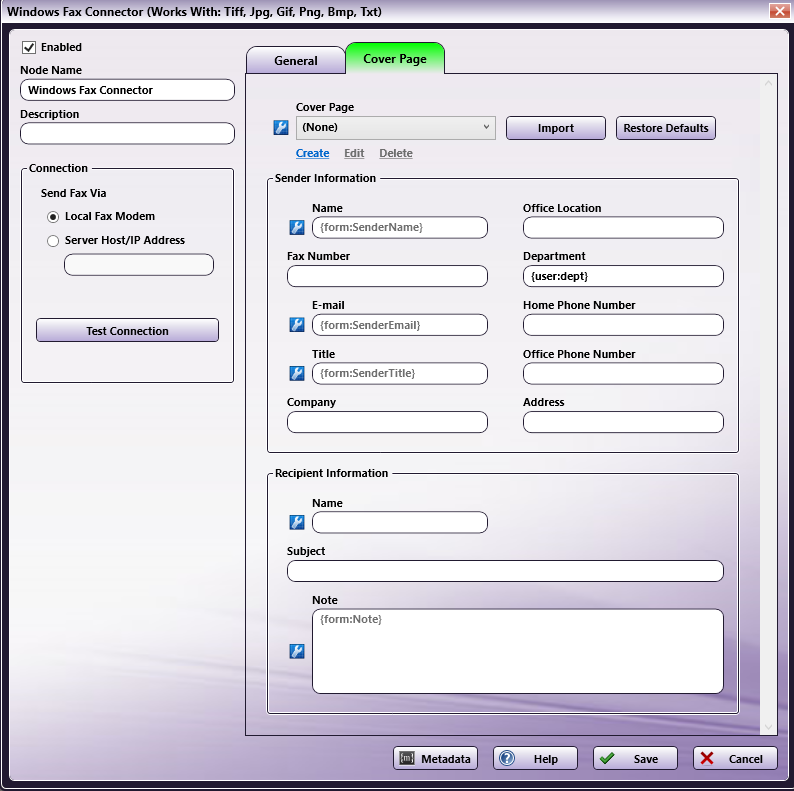
To insert a cover page that will be send with the faxed document, open the Windows Fax Connector node and navigate to the Cover Page tab on the configuration window.
-
From the Cover Page dropdown, select the template you wish to use for the cover page. By default, the Windows Fax Connector comes with the following Microsoft Fax Cover Pages: FYI, Urgent, Generic and Confident.
-
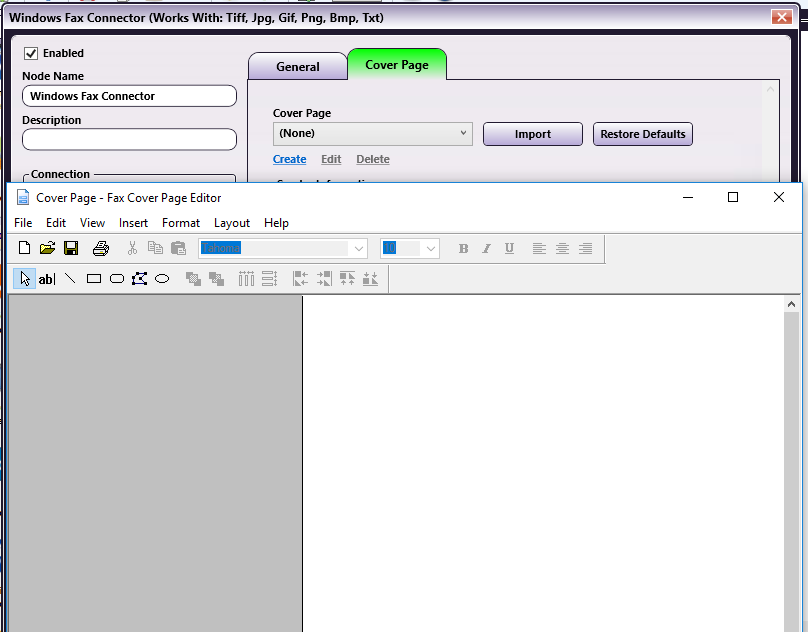
To create a new cover page template, Click Create from beneath the cover page dropdown. The Cover Page Editor will open in a separate window. The Cover Page Editor is a Windows Fax and Scan tool that allows you to create and edit Cover Pages for use with your outgoing Windows Faxes.
Note: New cover pages created in the Cover Page Editor will be automatically saved to the folder located at the following path: C:\Users\QA\Documents\Fax\Personal CoverPages. Cover pages saved at this location will automatically be copied to the program data for Dispatcher Phoenix and available in the cover page dropdown. For this reason, cover pages saved to any other location will need to be imported to the Dispatcher Phoenix Windows Fax Connector.
-
To edit an existing template, select the template from the dropdown and click on Edit.
-
To delete a template from the available cover page template list, click on Delete.
-
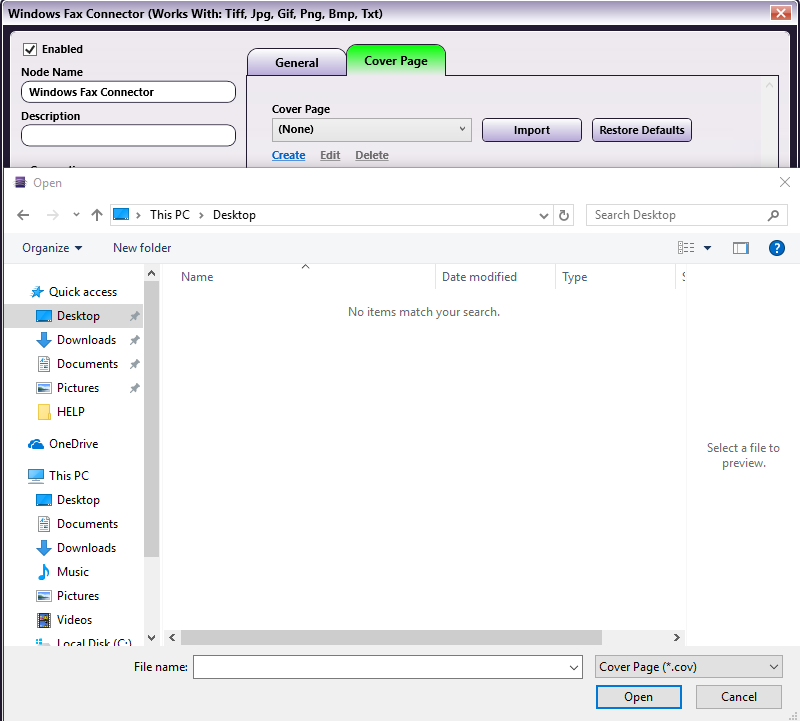
To import a new or custom cover page to the drop-down list, click the Import button. Then, select the cover page from the file explorer and click Open.
-
To restore a cover page template to its default configuration, select the Restore Defaults button. Then, select the desired cover page(s) from the list and click Restore Selected as illustrated below:

-
-
In the Sender Information area, configure your personal information for the cover page.
- Name - By default, this field is auto-populated with the system metadata key for the full name of the user who is logged into Windows.
- Fax Number - Specify the fax number from which the fax is being sent.
- E-mail - By default, this field is auto-populated with the system metadata key for the email address of the user who is logged into Windows.
- Title - Enter in the sender’s job title.
- Company - Specify the organization where the fax is being sent from.
- Office Location - If the organization has multiple locations, specify the location using this field.
- Department - By default, this field is auto-populated with the system metadata key for the department of the user who is logged into Windows.
- Home Phone Number - Enter in the home phone number for the sender.
- Office Phone Number - Enter the work phone number for the sender.
- Address - Specify the physical address for the sender.
-
In the Recipient Information area, enter in the recipient’s information to be listed on the cover page.
- Name - Enter in the name of the recipient.
- Subject - Specify a subject for the outgoing fax.
- Note - Add a note to the outgoing fax.
Creating a Windows Fax Connector Index Form
You can create an index form that allows you to customize your Windows Fax Connector node at the MFP. Do the following:
-
Make sure that your workflow includes a MFP Panel node and a Windows Fax Connector node.
-
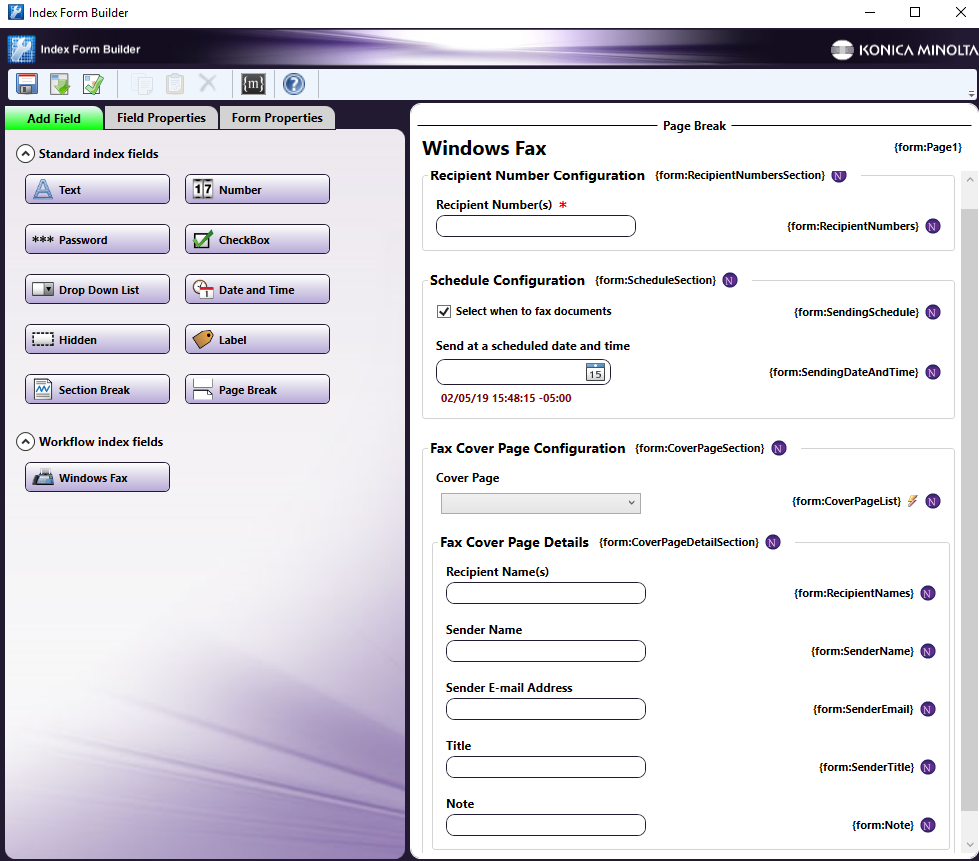
Open up the Index Form Builder from the MFP Panel node. You should see a Windows Fax button under the Workflow index fields area.
-
Drag and drop the Windows Fax button to the Index Form work area. A default Windows Fax Connector Properties index form will automatically appear, as in the following illustration:
-
Save and close the Index Form Builder.
-
The Windows Fax Connector node properties window will be automatically populated with the variable names of the fields on the Index Form. Although you cannot edit the fields on this window, you can click on the wrench tool button to go to that section or field in the Index Form Builder. See the following illustration:
Using Windows Fax Connector Index Form with Multiple Inputs
Once you associate your Windows fax Connector node with a MFP Panel node’s index form, all the information necessary to connect and route to Fax is entered at the MFP. Because of this, you cannot connect any other types of collection nodes (Input Folder, MFP User Box, etc.) to that indexed Windows fax Connector node in your workflow. In this case, if you need to add other collection nodes to your workflow, you must add a new Windows Fax Connector node that is not connected to an Index Form.
Windows Fax Connector Index Form on MFP
At the MFP, the Windows Fax Index Form will appear as follows:

Database Query
You can also manually configure a query to retrieve cover page templates from Windows Fax.
Using the Index Form Builder, do the following:
-
Add a new field, such as a drop-down list.
-
Define an On Load event for the field; then add a Query.
-
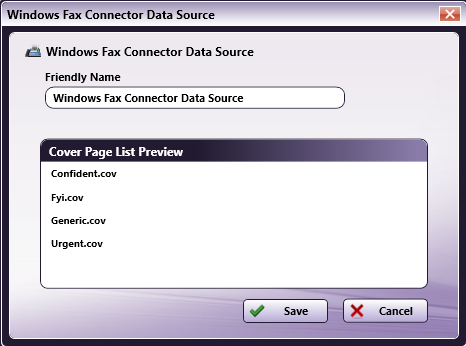
Add the Windows Fax Connector Data Source from the Query list.
-
The Windows Fax Connect Data Source Configuration window appears as in the following illustration:
-
Click Save. Then, save and close the Index Form Builder Tool.