Highlight/Strikeout

The Highlight/Strikeout process is used to either highlight important information or cross-out information (marking it for deletion). On this node, you enter the text to search for and highlight or strikeout and specify where/how often the text should have highlights or strikeouts applied. Multiple search terms can be specified. This process works with TIF/TIFF, PNG, JPG/JPEG, BMP, and PDF files. Note that GIF files can be processed by this node but the accuracy of the output may vary.
The maximum, allowable size for incoming documents is A0 (33.1” x 46.8”), and the maximum dpi is 2400. Any images exceeding those limits will not be processed. In addition, word processor formats (.doc and .rtf) have a length/height limit of 22”.
Note: Some features of this node may not work correctly without Microsoft.NET Framework 3.5. You should install the framework from Windows Update or download it from the Microsoft web site.
Note: This nodes includes the OmniPage OCR engine.
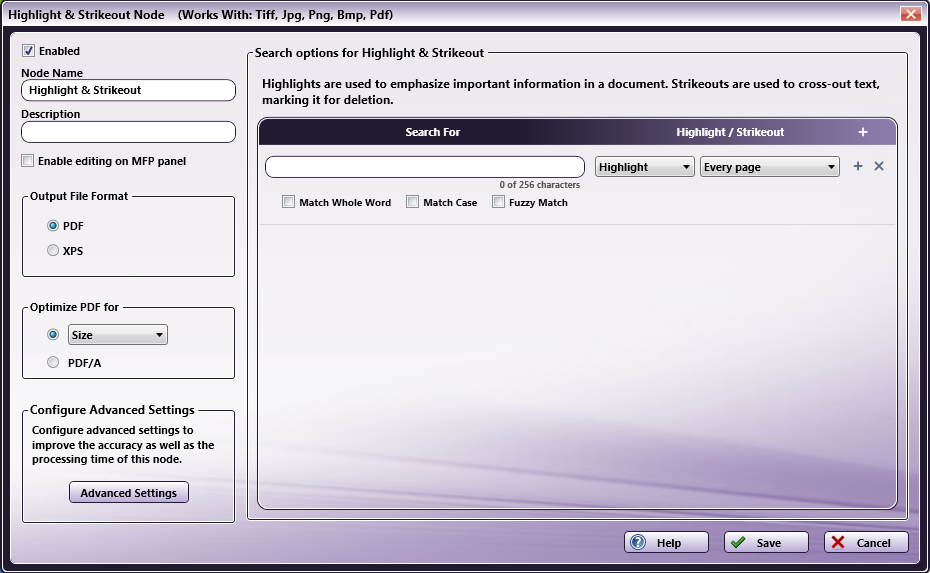
To open the Highlight/Strikeout Node window, add a process node for Highlight/Strikeout and double-click on it.
-
Check the Enabled box when there are multiple processes in a workflow. If unchecked, this process will be ignored. Documents will pass through as if the node was not present. Note that a disabled node will not check for logic or error conditions.
-
In the Node Name field, enter a meaningful name for the Highlight/Strikeout node.
-
In the Description field, enter a description for the Highlight/Strikeout node. Although this is not required, it can be helpful to distinguish multiple processes from each other. If the description is long, you can hover the mouse over the field to read its entire contents.
-
Check the Enable editing on MFP panel box to allow users to customize the Highlight/Strikeout node at the MFP Panel.
-
In the Output File Format area, you can choose the format you would like for the output. For more information on which file types are supported, please see the OCR Settings page.
-
To further define the output file, do one of the following:
-
Optimize for size, quality, or various PDF versions by choosing from the Optimize PDF For drop-down list,
or
-
Optimize for archiving by choosing the PDF/A radio button. This will create a PDF/A compliant output file. PDF/A is the standard for long-term preservation of electronic documents and ensures that files will display identically regardless of the computer environment and remain readable throughout the years.
-
-
Click the Advanced Settings button to adjust the accuracy and speed of the OCR process by configuring OCR settings.
-
In the Search options for Highlight & Strikeout area, you can specify the word, text string, or phrase that you want to search for and either highlight or strikeout. Using this area, you can specify as many search text strings, words, or phrases as necessary. In order for this node to be saved, at least one search item must be specified. See the following section for more information.
-
Select the Save button to keep your Highlight and Strikeout definition. You can also select the Help button to access online help and select the Cancel button to exit the window without saving any changes.
Search for Highlight and/or Strikeout

To search for text that needs to have highlights or strikeouts, do the following:
-
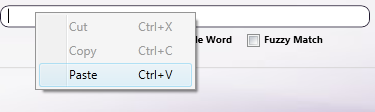
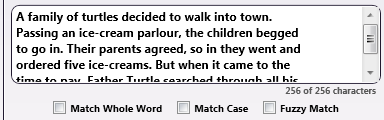
Enter the appropriate text or block of text (up to 256 characters) in the empty field provided under the Search for column. You can also cut, copy and paste text into the field using Microsoft shortcut keys (Ctrl+C, Ctrl+X, Ctrl+V) or right-click on the field and choose from the context menu that appears, as in the following illustration:
Note:: Text matching will not be performed across multiple lines. If your search phrase contains line breaks, make sure that the Fuzzy Match option is enabled.
-
Once you have specified text to search for, select any other options that you want using the check box(es) below the field:
| Option | Description | Example |
|---|---|---|
| Match Case | Check this box if capitalization matters during your Search & Highlight/Strikeout. With this option enabled, highlight/strikeout will be applied to word(s) that match the case of the word or phrase that you entered. | If “MR. JONES” is searched for and this option was enabled, “Mr. Jones” will not be highlighted or have strikeouts applied in the processed document. |
| Match Whole Word | Check this box to search for and highlight/strikeout only complete words, and not words that merely contain what you’ve specified. | If “boat” is searched for and this option was NOT enabled, the words “boathouse” and “sailboat” would be partially highlighted or have partial strikeouts applied. |
| Fuzzy Match | Check this box to search for and highlight/strikeout words or text strings that either match or come close to matching what you entered. This option is provided to compensate for any OCR errors. | If “Turtle” is searched for and this option was enabled, the word “Hurtle” would also be highlighted or have strikeout applied to it in the document. |
-
In the drop-down list next to the Search field, choose whether or not you want to highlight or strikeout the specified text.
-
In the next drop-down list, specify where to search and highlight or apply strikeouts. Options include:
-
Every page - Highlight or strikeout text found on every page.
-
Every even page - Highlight or strikeout text found on even pages.
-
Every odd page - Highlight or strikeout text found on odd pages.
-
First page - Highlight or strikeout text found on the first page only.
-
Last page - Highlight or strikeout text found on the last page only.
-
Define your own page range - Define a custom page range for the highlighted or strikeout text. Once you choose this option, an empty field will appear below the drop-down list in which you can enter the page range. Do the following:
-
Specify a page range by using commas and/or dash signs counting from the start of the document. For example, enter 1, 2, 5-7 to highlight text on pages 1, 2, 5, 6, and 7.
-
Specify a specific sequence within a range of pages by using parentheses. For example, enter 1-10(3) to strikeout text on every third page from pages 1 to 10.
-
Specify the last page by using ‘end.’ For example, enter end(-5) - end to highlight text on pages 15-20 of a 20-page document.
-
-
-
Enter as many text strings, phrases, or words as you’d like to search for and highlight or strikeout. Click on the + sign to add an empty Search for row to the node. Click on the X sign to delete a Search for row (either empty or filled) from the node. See the following illustration for an example of multiple Search for options:
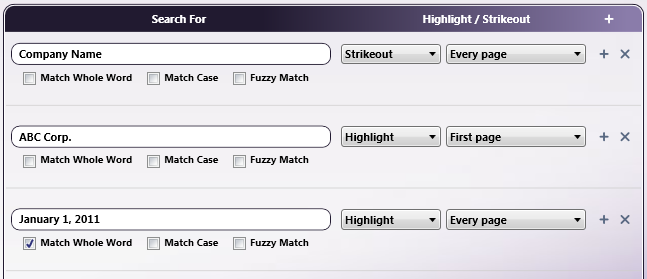
Note: This node does not support empty Search for row fields. Once a Search for row has been created (by clicking on the + sign), the field must be filled with text in order for the node to be saved.
Examples of Search and Highlight/Strikeout
- To highlight one word or phrase, enter the text in one Search for row, as in the following illustration:

Original Document

Highlighted Output

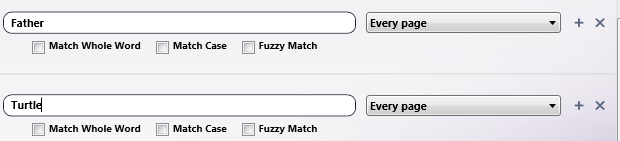
- To highlight multiple words, use separate Search for rows for each word. For example, to highlight the words “Father” and “Turtle,” enter those words in two different rows, as in the following example:
Original Document
Highlighted Output

- To strikeout a block of text, copy and paste the text into the Search for field (using the context menu that appears when you right-click on the field). Any time that block is found in the document, a strikeout is applied.
Original Document
Strikeout Output

- To strikeout all words that contain either a certain text string or something similar to it, use the Fuzzy Match option, as in the following illustration:

Original Document

Strikeout Output
