Rx Shield

Rx Shield provides a secure prescription printing solution that complies with federal mandates for tamper-resistant prescriptions. The Rx Shield process does the following:
-
Adds a customizable Security Features Listing box to the bottom of the prescription.
-
Prints a copy security background pattern in the document. Text such as “Invalid Copy” or “Unauthorized” appears when the prescription is improperly copied. As an option, you can also add the date/time, distribution control number, serial number, and job number to the text, if needed. Unauthorized copying is deterred when security warning text, such as “Copy” or “Private,” appears as a visible stamp on the copied prescription.
Files processed by this node must be sent to Konica Minolta devices that support Copy Protection features via the Printer node. Make sure that the MFP has the PDF interpreter that supports the version of PDF that you are sending.
Notes:
-
This node works with PDF files.
-
These features work only with Konica Minolta MFP devices that support Copy Protection.
-
The sample images used in the Preview Area are for display purposes only and may not match the printed output exactly.
-
You may have to tweak the Rx Shield settings for your specific MFP in order for the security warning text to appear properly once a prescription is illegally copied.
To open the Rx Shield Node window, add a process node for Rx Shield and double-click on it. You will see a sample prescription displayed in the preview area with default Rx Shield settings applied to it, as in the following illustration:

To get started with this node, do the following:
-
Check the Enabled box so that the process will be run. When unchecked, this process will be ignored. Documents will pass through as if the node was not present (i.e., continue along the default or ‘positive’ path). Note that a disabled node will not check for logic or error conditions.
-
In the Node Name field, enter a meaningful name for the Rx Shield node.
-
In the Description field, enter a description for the Rx Shield Node. This is not required, but helpful to distinguish one process from another. If the description is long, you can hover the mouse over the field to read its entire contents.
-
To use this node, you can do the following:
-
Customize the Security Features Listing Box. See below for more information.
-
Choose the stamp (either preset or registered on the MFP) that will appear when the prescription is improperly copied. The stamp that you specify will be printed in the background pattern as concealed text. When the prescription is copied, the concealed text appears on the entire page, indicating that it is an unauthorized copy.
-
Add the date (with time as an option) stamp to copied prescriptions. See the “Add Date/Time” section on page 381 for more information.
-
Add the Job Number, Serial Number, and Distribution Control Number stamp to copied prescriptions.
-
Customize the text/background pattern.
-
Display different sample documents in the Preview area.
Note: You can print multiple stamps (e.g., preset stamp, registered stamp, date/time, job number, serial number) at a time; however, the number of stamps that can be printed may be limited depending on the type and angle of the selected stamps.
-
-
When you are done, select the Save button to save your changes and close the node.
Customize the Security Features Listing Box
One of the federal requirements for a secure prescription printing solution is to ensure that the prescription is counterfeit-resistant. To address this requirement, Rx Shield automatically prints a warning box at the bottom of the prescription. This box includes all the security features that have been added to the prescription by Rx Shield. You can customize the header and warning text in this box by doing one of the following:
- Select the Print Warning Box button on the top menu bar; a drop-down palette will appear, allowing you to edit the Security Warning Header and Security Warning Text, as in the following illustration:
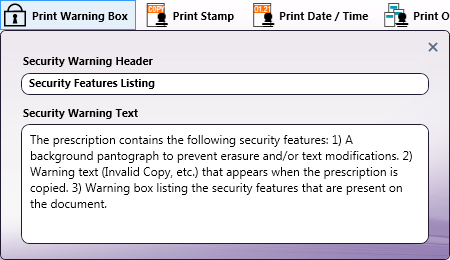
The edited text will automatically appear on the preview sample document; when done, click out of the drop-down palette or click on the X on the top right-hand side to close it.
- Click in the Security Features Listing box displayed on the sample document in the Preview area; then edit the Security Warning Header (default is “Security Features Listing”) and/or the Security Warning Text directly in the Preview area.
Note: If you remove all Security Warning Text from the sample document in the Preview area, you must select the Print Warning Box button on the top menu bar to enter new text.
Customize Stamps
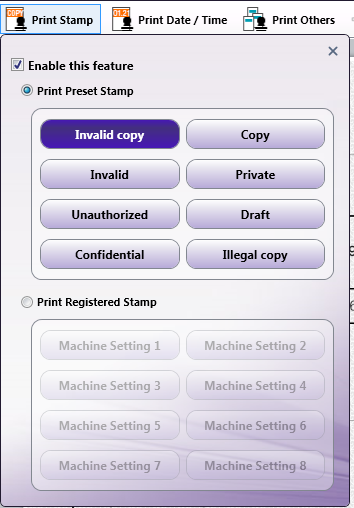
To customize the default stamp that will reveal itself when the prescription is copied, select the Print Stamp button on the top menu bar; a drop-down palette will appear, allowing you to choose either preset stamps or custom stamps that have been defined on the MFP, as in the following illustration:
Do the following:
-
This feature is enabled by default. If you do not want any text printed on the prescription, uncheck the Enable this feature box.
-
To choose a preset stamp, click on the Print Preset Stamp radio button; then choose one of the buttons listed: Invalid Copy, Copy, Invalid, Private, Unauthorized, Draft, Confidential, or Illegal Copy. The words that you selected will automatically appear on the sample document in the Preview Area.
-
To choose a custom stamp that was defined on the MFP, click on the Print Registered Stamp radio button. The text registered on the MFP appears as “Machine Setting 1,” “Machine Setting 2,” etc. Choose one of the buttons listed. Although the sample document in the Preview Area will not display the correct stamp, the actual stamp corresponding to the Machine Setting that you selected will print on the document when the workflow runs.
-
When done, click out of the drop-down palette or click on the X on the top right-hand side to close the palette.
Add Date/Time
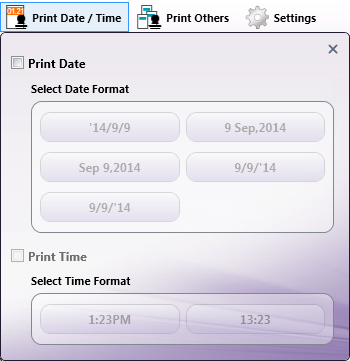
To add a date/time stamp to the text that will reveal itself when the prescription is copied, select the Print Date/Time button on the top menu bar; a drop-down palette will appear, allowing you to choose and format the date/time for the document, as in the following illustration:
Do the following:
-
This feature is disabled by default. If you do want to add the date (optionally including the time as well) to the prescription, check the Print Date box. The Select Date Format buttons now become active. Choose a format for the date by selecting one of the buttons listed below. Note that the buttons reflect the current date.
-
After selecting a Date format, you can choose to add the Time as well. Check the Print Time box. The Select Time Format buttons now become active. Choose a format for the time by selecting one of the buttons listed.
The settings that you choose will appear automatically on the sample document in the Preview Area.
-
When done, click out of the drop-down palette or click on the X on the top right-hand side to close the palette.
Add Job Number, Serial Number, Distribution Control Number
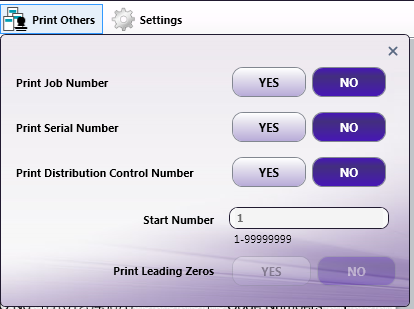
To add the job number, serial number, and/or distribution control number to the document, select the Print Others button on the top menu bar; a drop-down palette will appear, as in the following illustration:
Do the following:
-
To add the job number managed by the printer, select the Yes button next to Print Job Number.
-
To add the serial number programmed on the printer, select the Yes button next to Print Serial Number.
-
To add copy numbers when printing multiple sets of copies, select the Yes button next to Print Distribution Control Number. You can specify the starting number for this number in the Start Number field. You can also specify that zeros should be placed in front of the Distribution Control Number by selecting the Yes button next to Print Leading Zeros.
The settings that you choose will appear automatically on the sample document in the Preview Area.
-
When done, click out of the drop-down palette or click on the X on the top right-hand side to close the palette.
Customize Settings
To modify settings for the stamps and background security pattern, select the Settings button on the top menu bar; a palette on the right-hand side of the window will appear, as in the following illustration:
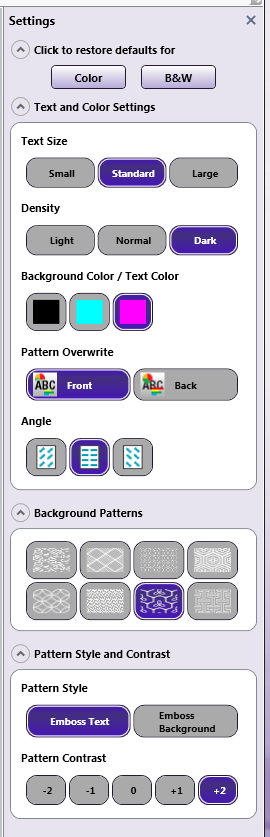
Note: Most of the changes that you make will be automatically applied to the sample document in the Preview Area.
Do the following:
-
To revert changes back to the default Color settings, select the Color button under Click to restore defaults for. Default color settings are: “Invalid Copy” stamp, Standard text size, Dark density, Magenta background, Pattern in front, 0° angle, Background Pattern #7, Embossed text, +2 pattern contrast.
-
To revert changes back to the default Black & White settings, select the B&W button under Click to restore defaults for. Default black and white settings are: “Invalid Copy” stamp, Standard text size, Dark density, Black background/text, Pattern in front, 0° angle, Background Pattern #4, Embossed text, +2 pattern contrast.
-
To modify the text size, select the Small, Standard, or Large button under Text Size.
-
To modify the density of the background pattern, select the Light, Normal, or Dark button under Density.
-
To select text and background colors, choose a color button (Black, Cyan, or Magenta) under Text / Background Color.
-
To select whether the pattern is added to the background or foreground of the document, choose Front or Back under Pattern Overwrite. Note that these options will not be visible on the sample document in the Preview Area.
-
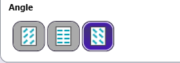
To modify the angle of the text, choose the appropriate button under Angle, as follows:
-
To select the pattern to be applied when the prescription is improperly copied, choose a pattern button under Background Patterns.
-
To specify the contrast of the background pattern, choose the following under Pattern Style:
-
Emboss Text – Text pattern will appear embossed when the prescription is improperly copied.
-
Emboss Background – Text pattern will appear as an outline when the prescription is improperly copied.
-
-
To adjust the contrast between the background pattern and the text, choose a number button under Pattern Contrast.
-
To close the palette, click on the X on the top right-hand side to close the palette.
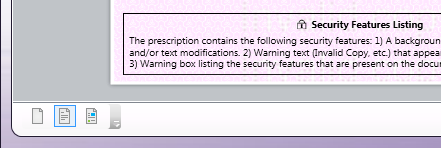
Customize Preview Area
This node comes with two sample documents that are displayed in the Preview Area. The toolbar at the bottom of the window allow you to choose which sample document to preview. See the following illustration:
Using Rx Shield At The MFP
You can also modify Rx Shield settings at the MFP by first attaching an Rx Shield Index Form to the MFP Panel node in your workflow; then, at the MFP, you can access that workflow and specify new settings for the Rx Shield process.
Do the following:
-
Set up a workflow with a MFP Panel node and Rx Shield node.
-
Check the Attach Index Form box; then select the + icon (Add new index form).
-
When prompted, choose to Create New Blank Index Form.
-
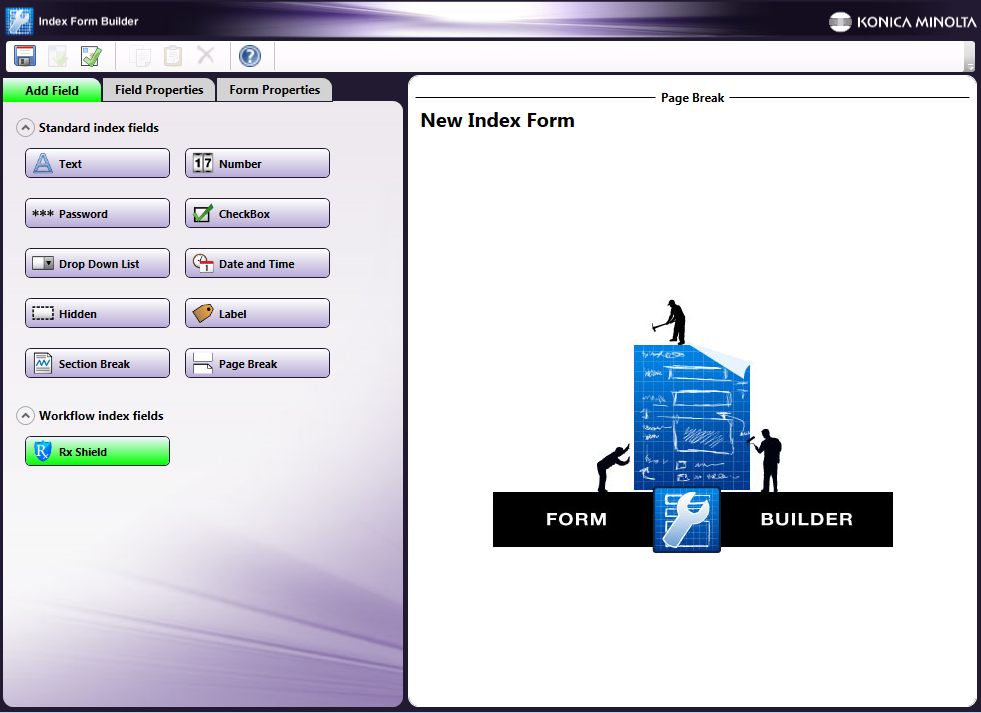
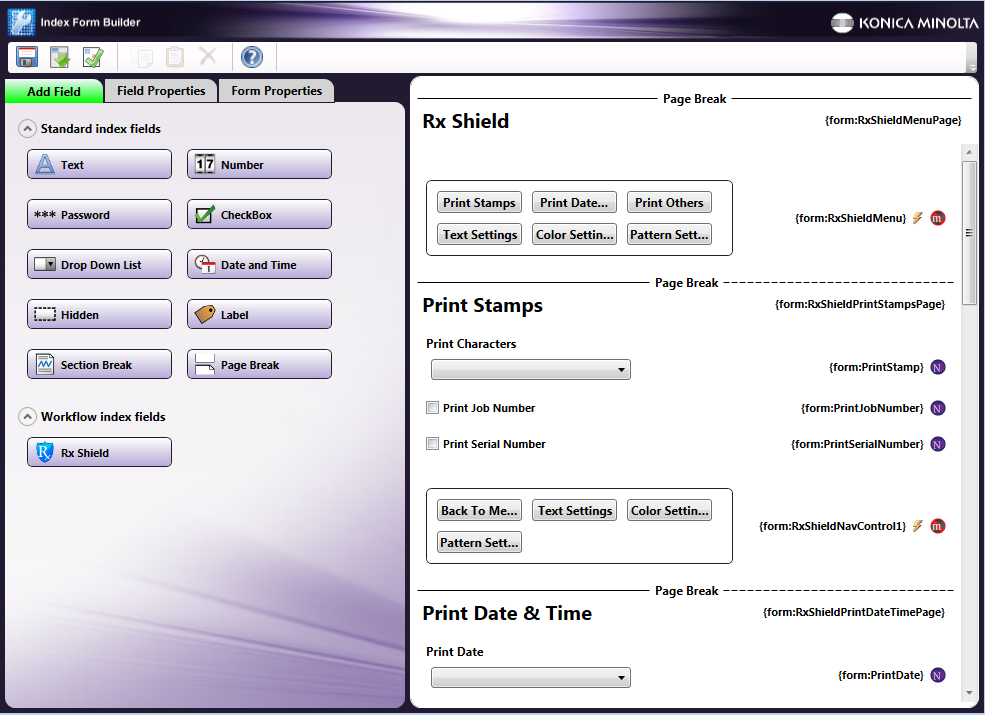
You should see an Rx Shield button under the Workflow index fields area on the left-hand side of the Index Form Builder, as in the following illustration:
-
Drag-drop the Rx Shield button to the right-hand side of the Index Form Builder. The appropriate Index Form fields should automatically appear, as in the following illustration:
-
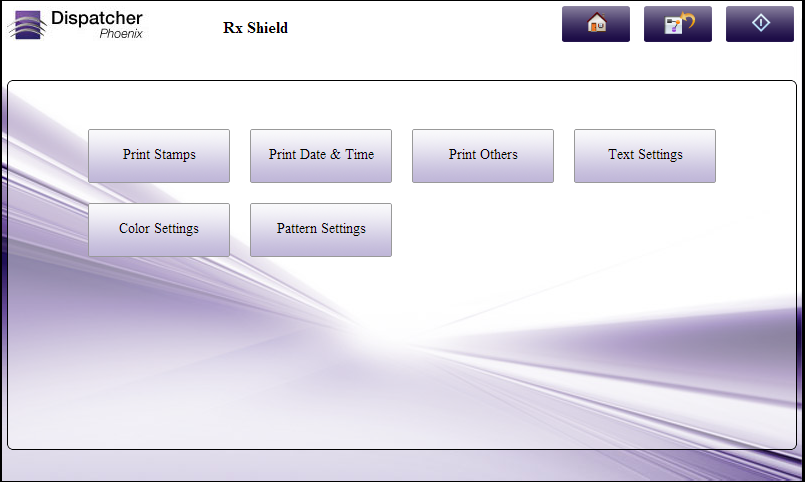
At the MFP panel, run the Rx Shield workflow; then tap on the Rx Shield icon to customize secure prescription printing settings. You should see the following screen:
-
Here, you can do the following:
- Tap on Print Stamps to choose the text that you want added to the security pattern that is applied to the document, and whether or not to add the Job Number and Serial Number as well. See the following illustration:
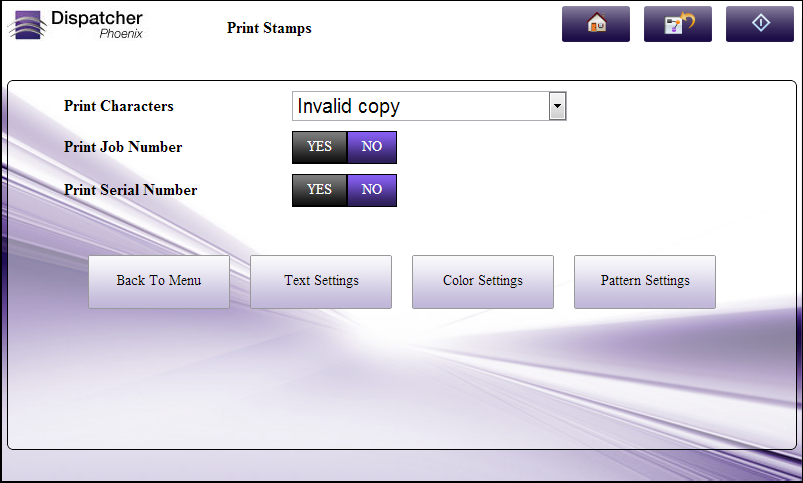
When you are done, you can choose to return to the main menu screen or modify Text Settings, Color Settings, or Pattern Settings using the buttons at the bottom of the screen.
- Tap on Print Date & Time to add the Date (and Time, if necessary) to the security pattern that is applied to the document. See the following illustration:
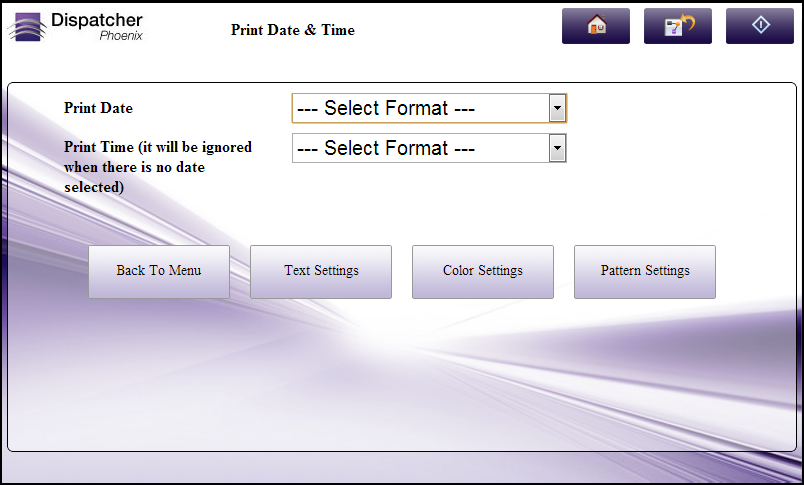
When you are done, you can choose to return to the main menu screen or modify Text Settings, Color Settings, or Pattern Settings using the buttons at the bottom of the screen.
- Tap on Print Others to add the Distribution Control Number to the security pattern that is applied to the document. See the following illustration:
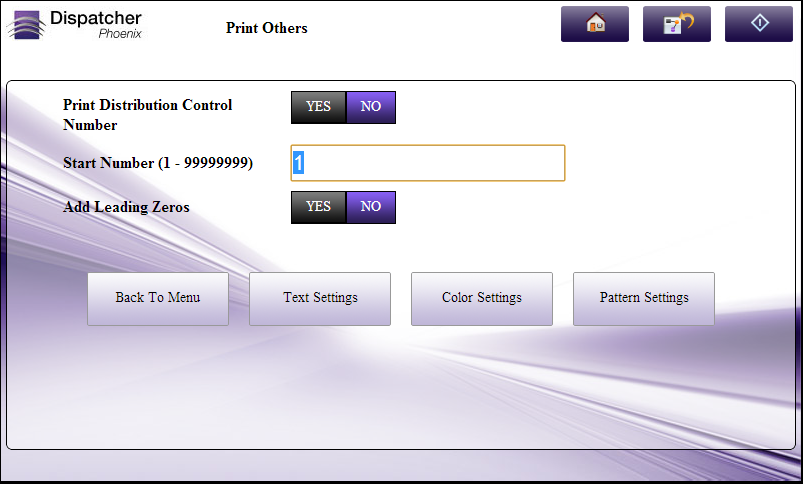 When you are done, you can choose to return to the main menu screen or modify Text Settings, Color Settings, or Pattern Settings using the buttons at the bottom of the screen.
- Tap on Text Settings to format the text and pattern. See the following illustration:
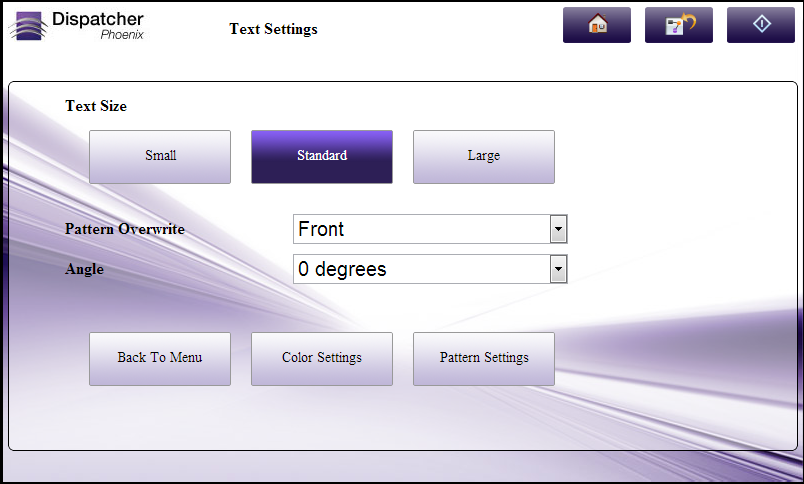
When you are done, you can choose to return to the main menu screen or modify Color Settings or Pattern Settings using the buttons at the bottom of the screen.
- Tap on Color Settings to change the color and density of the text and background. See the following illustration:
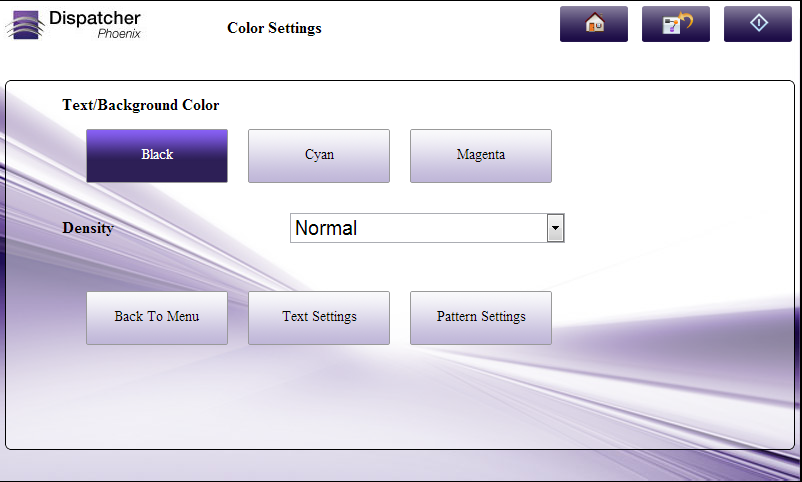
When you are done, you can choose to return to the main menu screen or modify Text Settings or Pattern Settings using the buttons at the bottom of the screen.
- Tap on Pattern Settings to modify the background pattern. See the following illustration:
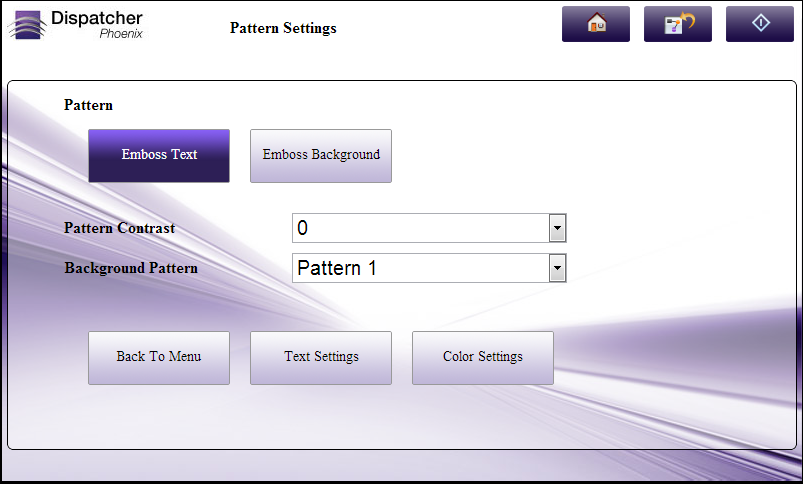
When you are done, you can choose to return to the main menu screen or modify Text Settings or Color Settings using the buttons at the bottom of the screen.