Job Ticket Editor

Note: This node works with PDF files (version 1.3 or later).
Use the Job Ticket Editor Node to modify job ticket information. Information set with this node is added to the metadata, and then carried forward to the next node in the workflow.
As an example, the Job Ticket Editor Node may be configured to change the Copy count of all jobs sent to the node to 25. When a job is sent to a Job Ticket Editor Node that includes this setting, the node modifies the job ticket’s metadata for Copy, overwriting it with the new value of 25. For this example, all the other job ticket metadata values remain unchanged. The job is then sent forward in the workflow with only the Copy value modified.
Using the Job Ticket Editor Node
Add the Job Ticket Editor Node to the workflow by dragging the Job Ticket Editor Node’s icon onto the Workflow Builder canvas, and then double-clicking on the icon to open the Job Ticket Editor Node’s window:

Click an option in the left-side panel and its setting options appear below the option.
The right-side panel contains a grid composed of four columns.
When setting options are displayed in the left panel, select an item, and then drag-and-drop it on the grid. A new row is added for each item moved. Once an item is in place, values may be edited for all four columns.
-
Select the Enabled checkbox so that the process will run. When unchecked, this process is ignored. Documents pass through as if the node were not present (i.e., continue along the default or positive path). Note that a disabled node will not check for logic or error conditions.
-
In the Node Name field, enter a meaningful name for the Job Ticket Editor Node.
-
In the Description field, enter a description for the Job Ticket Editor Node. This is not required, but can be helpful with multiple collection points. If the description is long, hover the mouse over the field to read its entire contents.
-
Click the Save button to save the changes. If Cancel is selected and the window is closed, the changes are not saved.
-
Click the Help button to access online help.
Grid Setting Options
-
Metadata Name: This column displays the Metadata Name of the item that is added when a value is dragged-and-dropped from the left column.
-
Metadata Values: This column displays the Metadata value of the item that is added when a value is dragged-and-dropped from the left column. These values are determined by the element type. The value may be modified by selecting a new value from the list or manually editing the value in the field.
-
If metadata already exists: This drop-down will display two or three options depending on the element type. Select an option to specify the action required to update the Job Ticket Editor settings.
- Replace: Overwrite the value if the target metadata key exists. Otherwise, create a new metadata key value pair.
- Ignore: Do nothing if the target metadata key exists. Otherwise, create a new metadata key value pair.
- Append: Append the existing value if the target metadata key exists. Otherwise, create a new metadata key value pair.
-
Delete: Click the Delete icon and the selected row is deleted from the grid.
Job Settings Options (Left-Side Panel)
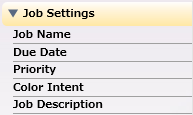
- Job Name: The job ticket description.
- Due Date: The Due Date of the job.
- Priority: The Priority of the job. The options are Normal or Rush.
- Color Intent: The color mode of the job. The options are B&W, Color, Color (High Chroma), Mixed, or Mixed (High Chroma).
- Job Description: A text entry field in which a relevant description of the job can be entered, when required.
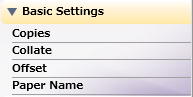
Basic Settings Settings Options (Left-Side Panel)
-
Copies: The Copy count of the job.
-
Collate: The Collate setting of the job. The options are On or Off.
-
Offset: The Offset printing setting of the job. The options are On or Off. When On is selected, two additional options appear. Either Offset Output Copies or Offset Output Pages must be selected.
-
Paper Name: The name of the paper that should be loaded into the destination printer’s tray to support the job.
Note: Each printer that supports the Paper Name field may have rules or limitations regarding the characters that may be entered in this field. Please refer to a printer’s user’s guide for specific details about such Paper Name requirements.
Layout Settings Options (Left-Side Panel)
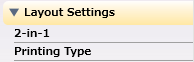
- 2-in-1:Use the setting to print two pages of a PDF file onto a single sheet of output paper. The options are Off, 2-in-1, 2 Repeat, 2 Repeat Reversal (L), 2 Repeat Reversal (R), 2 Repeat Reversal (U), or 2 Repeat Reversal (D).
- Printing Type: The Printing Type to be applied to the job. The options are Booklet, Double-Sided, One-Sided, or Adhesive Binding.
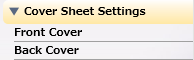
Cover Sheet Settings Options (Left-Side Panel)
-
Front Cover: Add a Front Cover to the document. The options are Off, Blank, or Printed. When Blank or Printed is chosen, the Paper Name text field appears and a Paper Name may be entered.
-
Back Cover: Add a back cover to the document. The options are Off, Blank, or Printed. When Blank or Printed is chosen, the Paper Name text field appears and a Paper Name may be entered.
Note: Each printer that supports the Paper Name field may have rules or limitations regarding the characters that may be entered in this field. The value entered in the Paper Name Front Cover and Back Cover fields must follow these rules and limitations. Please refer to a printer’s user’s guide for specific details about such Paper Name requirements.
Finishing Settings Options (Left-Side Panel)
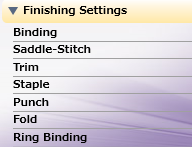
- Binding: The Binding position of the document. The options are Auto, Left, Top, or Right.
- Saddle Stitch: Use to activate Saddle-Stitch for the document. The options are Off or On.
- Trim: Use to activate post-print cutting to Saddle-Stitch and Center-Fold documents. The options are Off or On
- Staple: Use to staple the document. The options are Off, 1 Staple, 2 Staples, 2 Staples Narrow, or 2 Staples Narrow Plus.
- Punch: Use to apply punch holes to the document. The options are Off, 2 Holes, 3 Holes, 4 Holes, or Stream Punch.
- Fold: Use to apply a Fold operation to the document. The options are Off, Z-Fold (A3, B4, 11x17, 8K), Z-Fold (8 1/2x14), Half-Fold In, Half-Fold Out, Letter Fold In, Letter Fold Out, Zigzag Fold In, Zigzag Fold Out, Double Parallel Fold In, Double Parallel Fold Out, Gate Fold In, Gate Fold Out, Multi-Letter Fold In, Multi-Letter Fold Out, or Multi-Half Fold.
- Ring Binding: Use to activate Ring Binding for the document. The options are On or Off. When On is selected, two additional options appear. Choose either Inside or Outside for both Front Cover Print Side and Back Cover Print Side.
Job Ticket Metadata
Once the JDF Ticket Editor Node is added to a workflow, one entry named Job Ticket is shown in the Metadata Browser.
The syntax for the Job Ticket is {job:name of job ticket attribute}. Use the Metadata Browser window (as show in the screen capture below) to choose a Job Ticket variable:
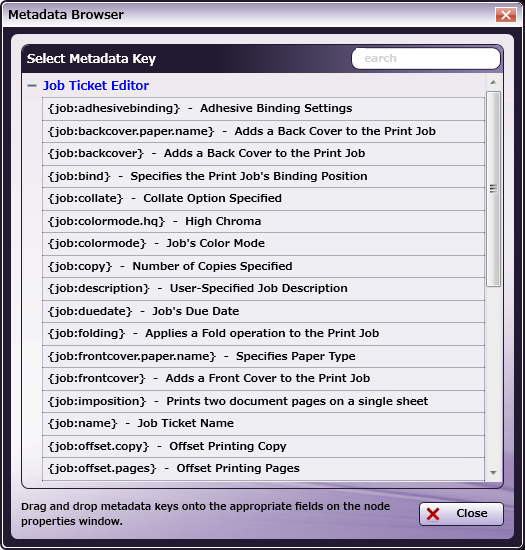
Note: This Help file contains detailed information about supported Job Ticket Metadata and the JDF XPaths and Value Ranges. Refer to Job Ticket Metadata Information When launched, the Metadata Browser window displays the pre-defined Job Ticket Metadata, the system-defined variables (such as Date, File, System and User info), and the metadata values from the active node.