Dispatcher Pro Port
A Windows device driver will be installed with Dispatcher Phoenix, which creates a new printer port type called the Dispatcher Pro Port. The port supports the print-to-file feature for any Windows application, and requires a valid Dispatcher Phoenix license to access and use the port’s functionality.
Note: If the language of the Operating System is not English, the driver and printer are not automatically installed with Dispatcher Phoenix. In this case, you must manually add the Dispatcher Pro Port to a new printer.
Setting up the Dispatcher Pro Port on Windows
To set up Dispatcher Pro Port on an existing printer, do the following:
-
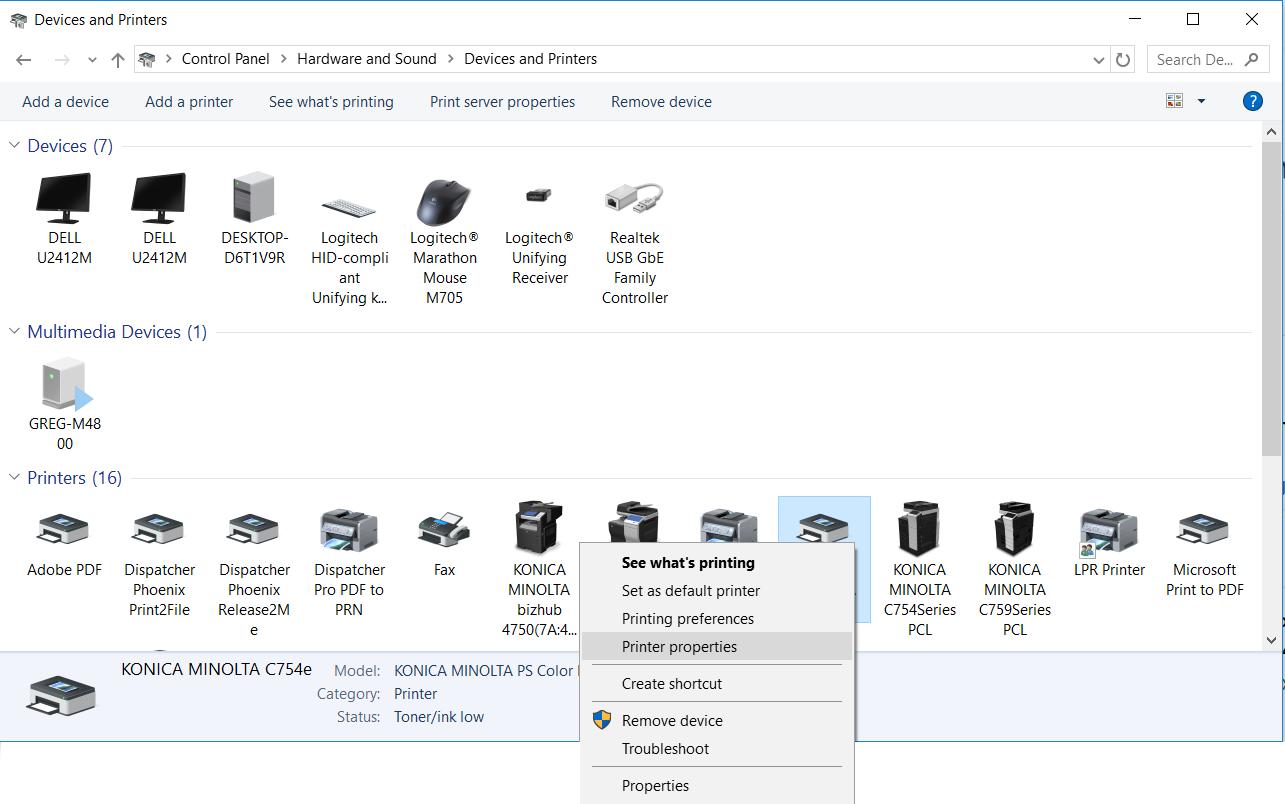
From the Start Menu, select Control Panel and open View Devices and Printers.
-
Right-click on any installed printer and select Printer Properties.

-
Click on the Ports tab.

-
Select the Add Port… button.
-
Select Konica Minolta Dispatcher Pro Port from the available port types.
-
Select the New Port… button.
-
Select a directory for the output files, and click OK. Make a note of this special Output directory.
-
Click Close in the window. The new port will appear on the port tab list.
-
Select the newly created port and click Apply.
You can now use the selected printer with the Print-to-File feature with Print Nodes.
Adding Dispatcher Pro Port to a New Printer
To add Dispatcher Pro Port to a new printer, do the following:
-
From the Windows Start menu, choose Devices and Printers.
-
On the Control Panel > Hardware and Sound > Devices and Printers window, choose the Add a printer option at the top of the screen.
-
In the Add Printer window that appears, select the Add a local printer option.
-
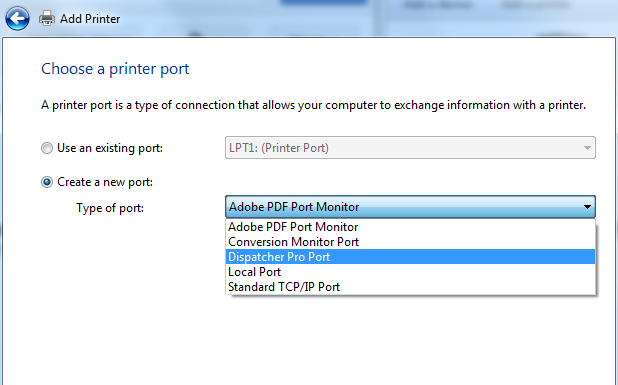
In the next window that appears, choose the Create new port radio button; then select Dispatcher Pro Port from the list.

-
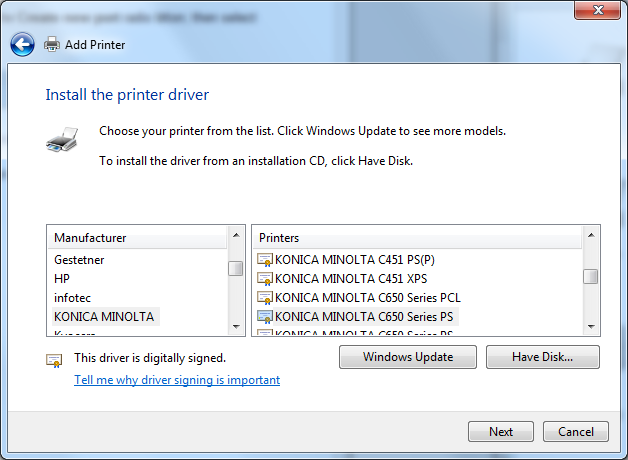
Select Next and a “Browse for Folder” pop-up window will appear, allowing you to choose a folder for output files that will be used by the Dispatcher Pro Port. Once you choose a folder and select the OK button, the Install the printer driver window will appear:

-
On this window, you should choose Konica Minolta as the manufacturer and choose any printer from the Printers column. Once you select the Next button, the Type a printer name window will appear.
-
On the Type a printer name window, enter a name for the Dispatcher Pro Port printer; then select the Next button.
-
In the Printer Sharing window, choose the Do not share this printer radio button; then select the Next button.
-
On the final window, select the Finish button.

