System Settings
Dispatcher Phoenix Web’s System Settings Tool allows administrators manage important configuration options for the application. To get started, do the following:
- Log into Dispatcher Phoenix Web with your Windows User Credentials.
- Select the System Settings tile.
See the following illustration for an example:

Dispatcher Paragon
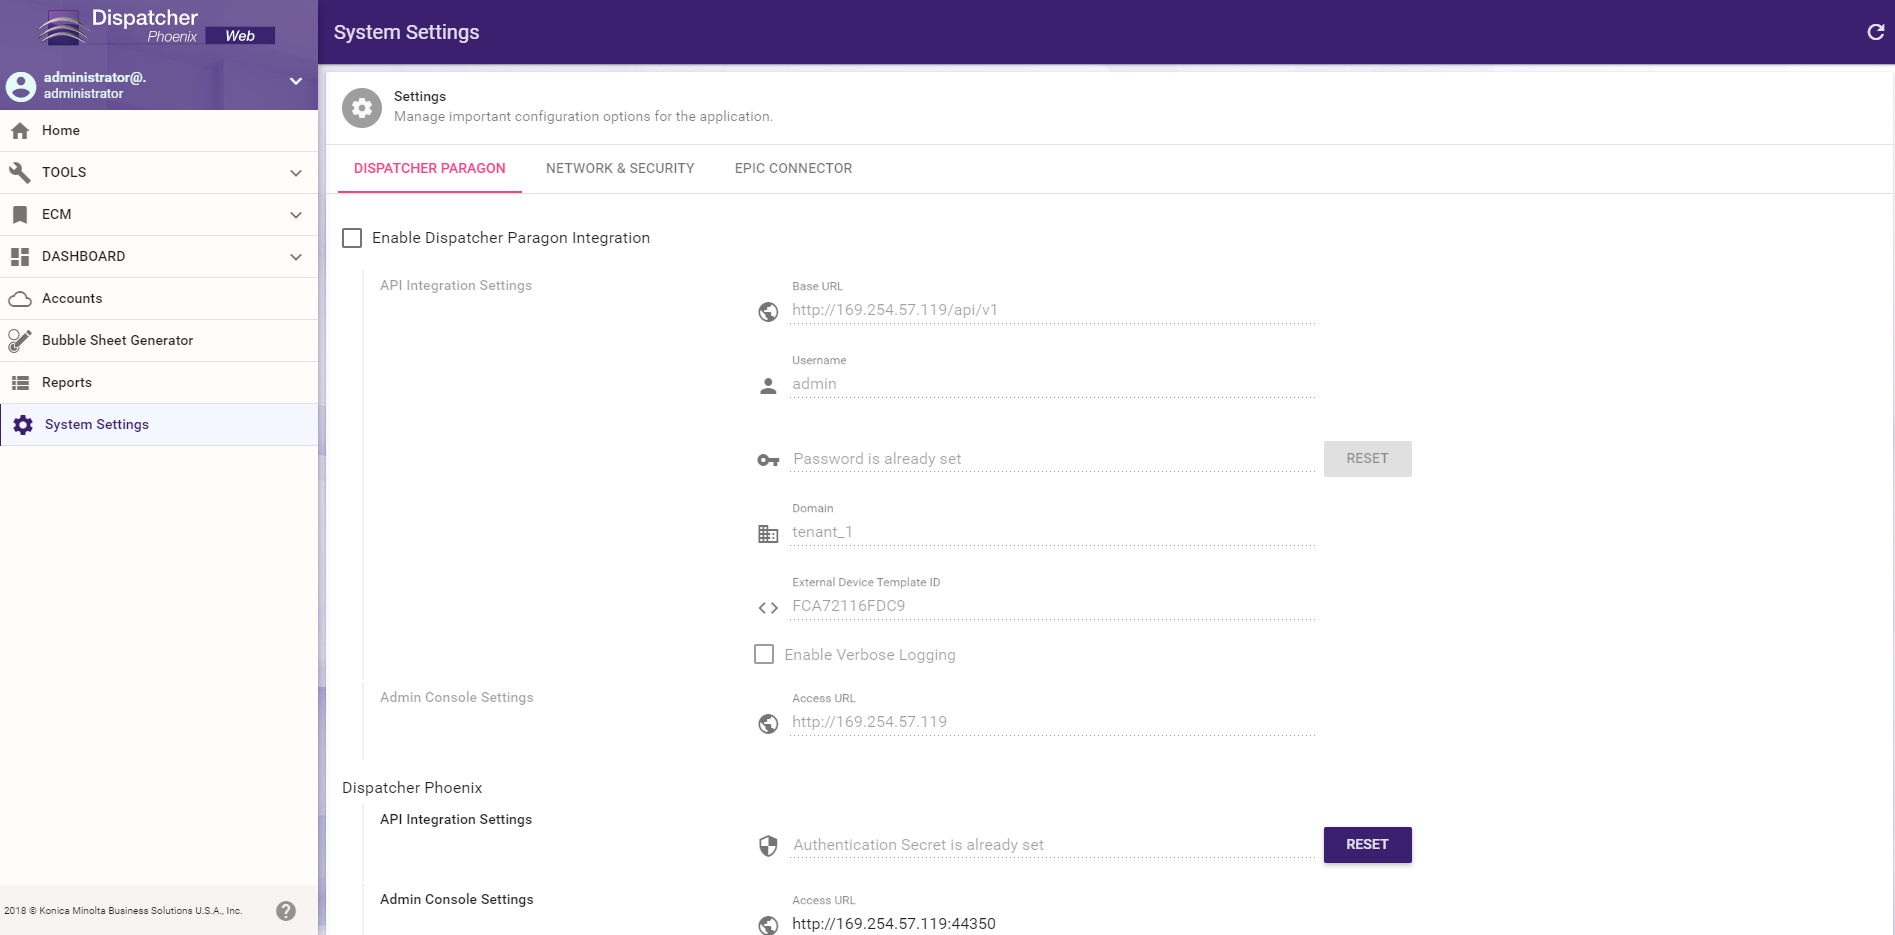
Note: Fields that contain sensitive information have a Reset button that allows you to enter a new value.
For more information on configuring Dispatcher Paragon, click here.
Network & Security
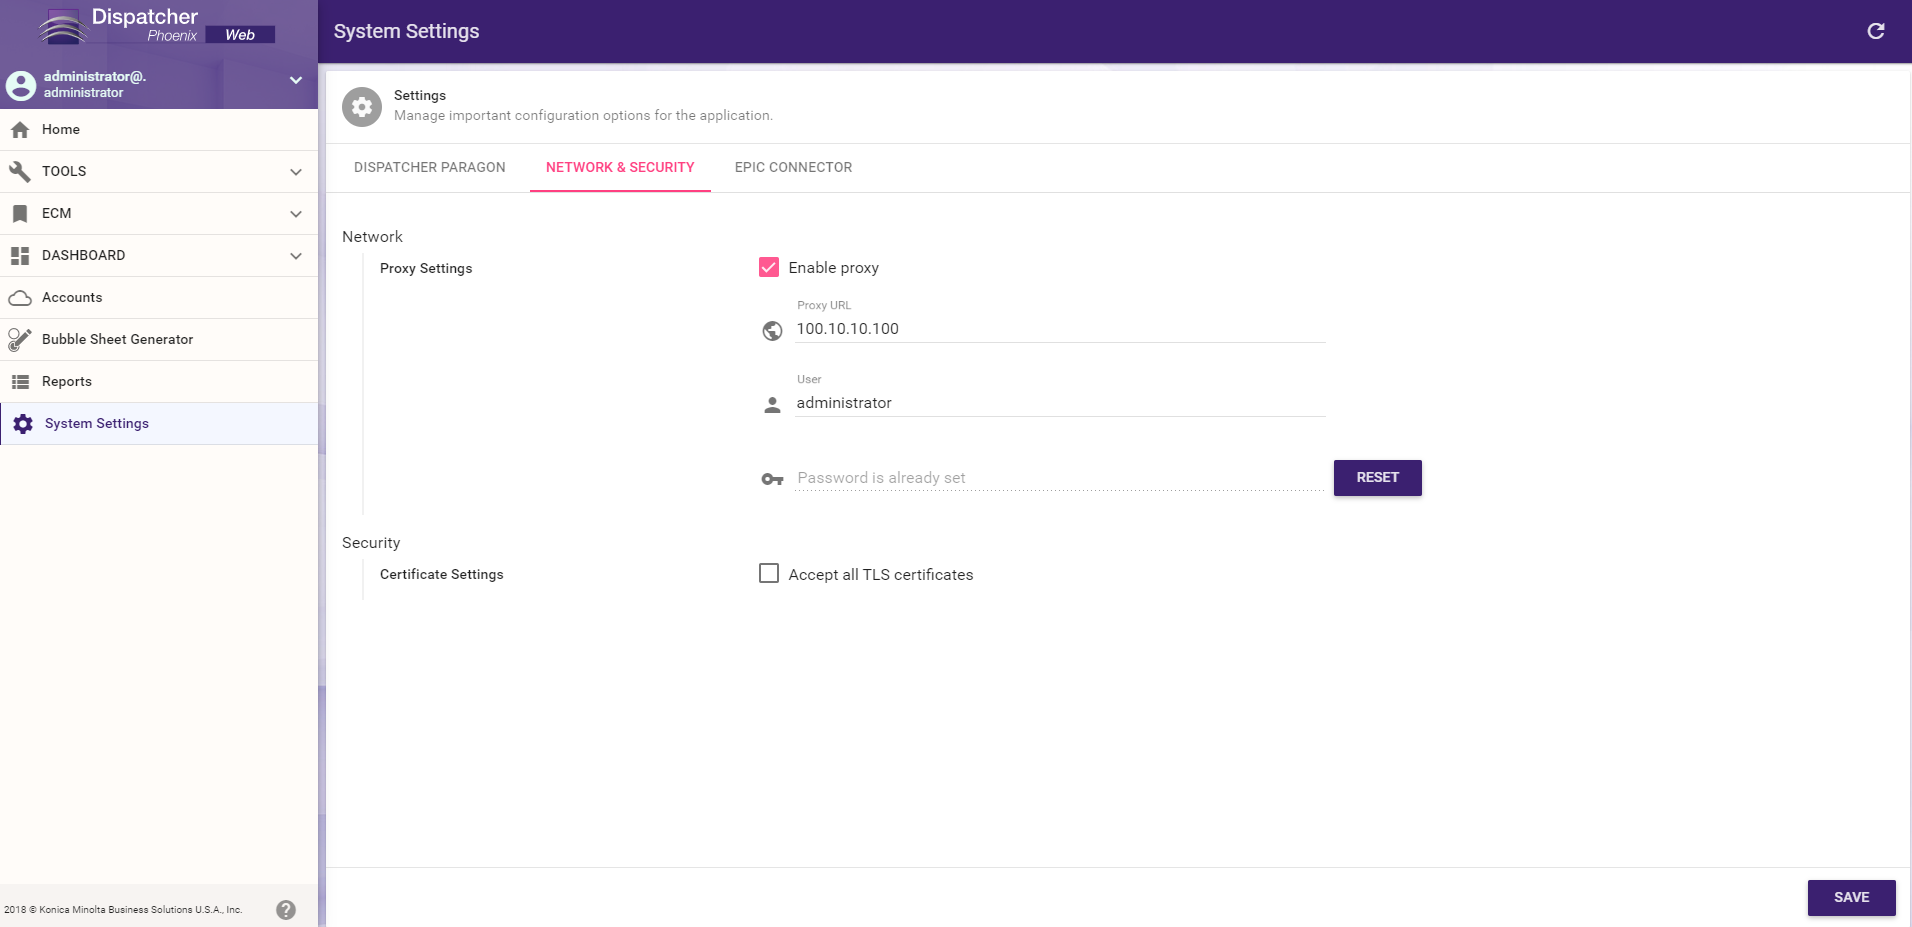
The Network & Settings allow you to configure the following settings:
Proxy Settings
-
Enable Proxy: Select this checkbox to enable the use of a proxy server.
-
Proxy URL: IP Address / Hostname of the Proxy Server.
-
User: If the proxy server requires authentication, enter username.
-
Password: If the proxy server requires authentication, enter password.
Certificate Settings
- Accept all TLS certificates: Select this checkbox to accept all third-party SSL / TLS certificates.
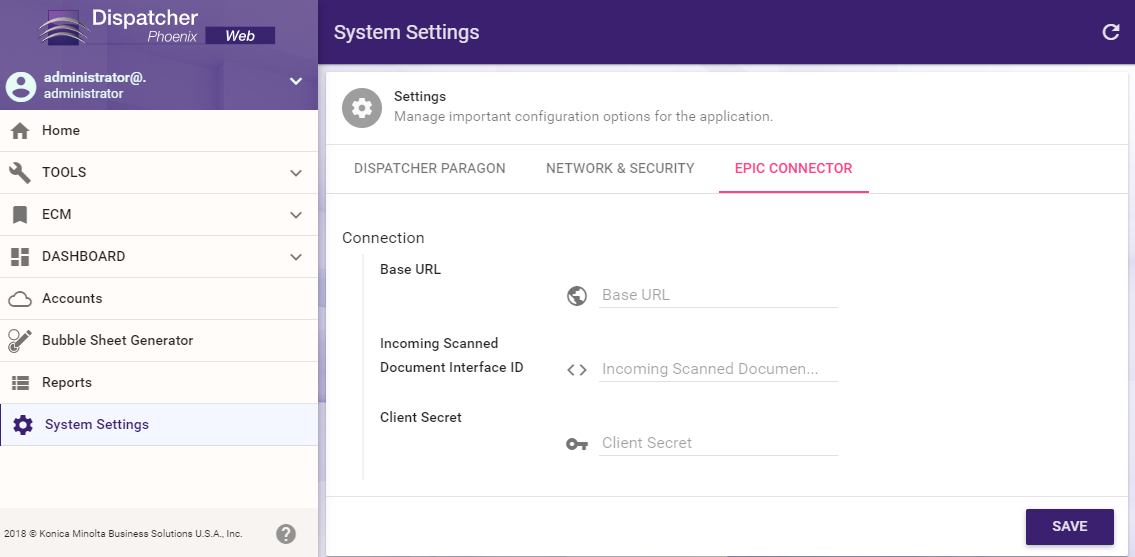
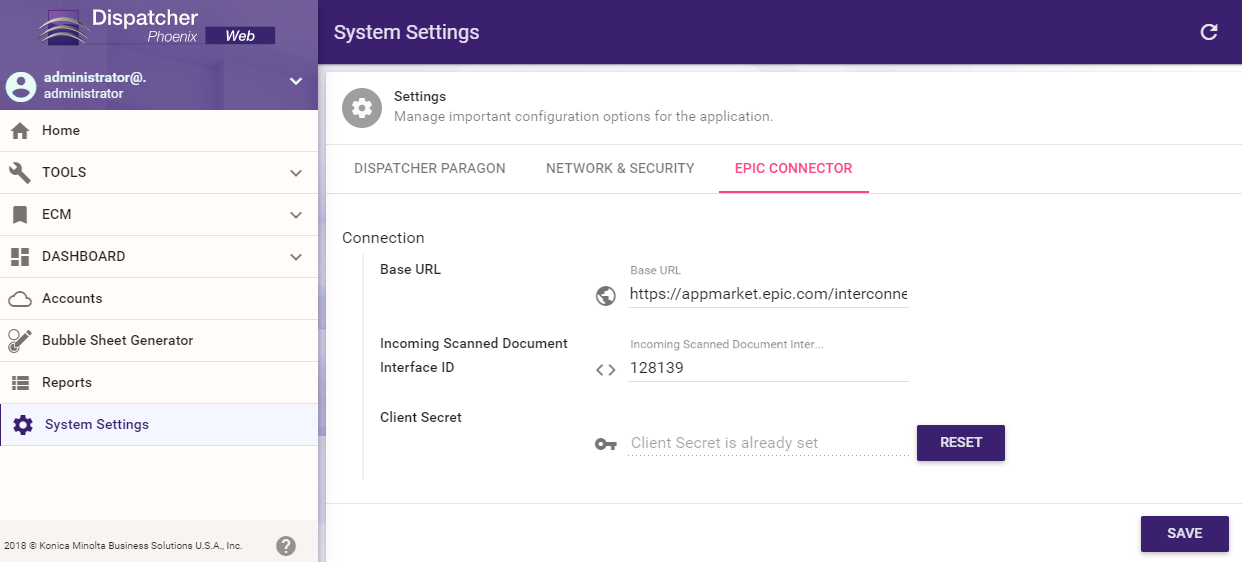
Epic® Connector
In order to add an Epic® Account to your Dispatcher Phoenix Web Accounts and begin using the Epic® Connector, you must first add the necessary system settings for Epic®. To update the Epic® system settings, do the following:
-
In Dispatcher Phoenix Web, select the System Settings tile.
-
Select the Epic® Connector tab, as in the following illustration:
-
Enter the Base URL, Incoming Scanned Document Interface ID, and Client Secret. Then, select Save, as in the following illustration:
-
You may now add an Epic® account using the previous steps under Adding Accounts.