Guardian Connector
The Guardian Connector node is used to distribute scanned documents directly to an employee’s electronic I-9 record in the Guardian database. Guardian is a solution by LawLogix that helps businesses eliminate audit risk by converting paper I-9 records into electronic I-9 records and storing them in Guardian’s online platform for central management. An I-9 form is a government form that must be completed by all employers to document new hires’ eligibility to work in the U.S. With Guardian, Human Resources managers can easily track and manage pending I-9s, new employees without I-9s, pending re-verifications and much more. The Guardian Connector should be used in conjunction with a MFP Panel collection node, as shown in the illustration below:
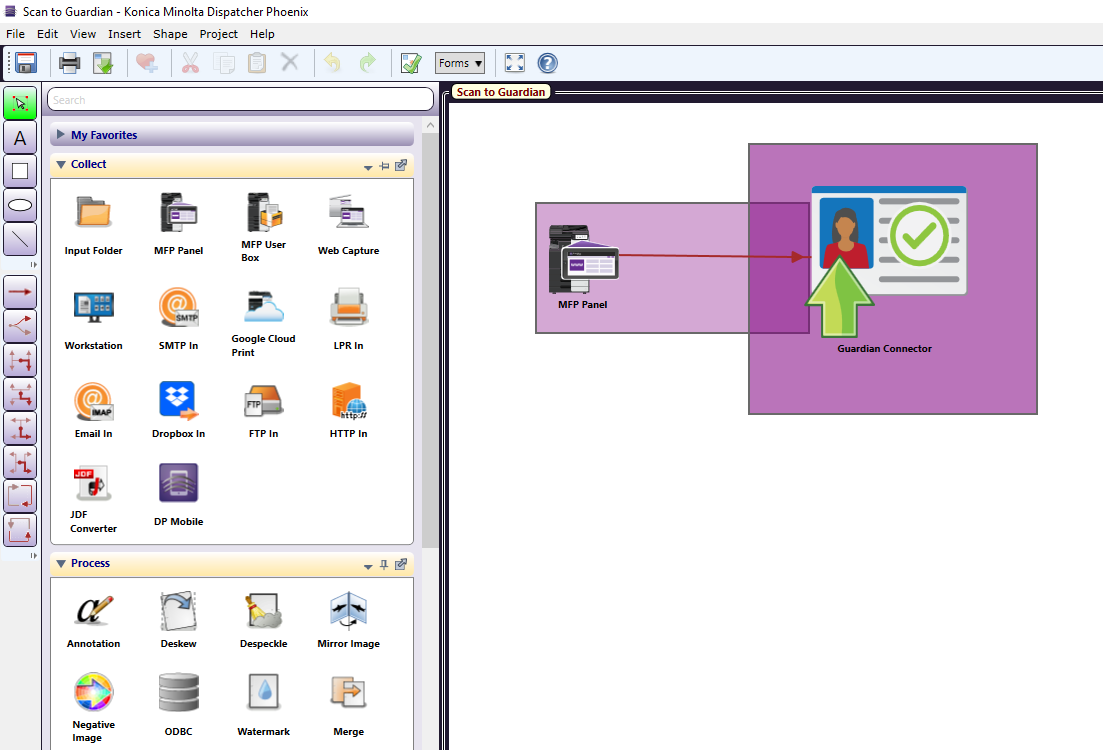
Setting Up the Guardian Connector Workflow
Add a MFP Panel node and Guardian Connector node to your workflow.
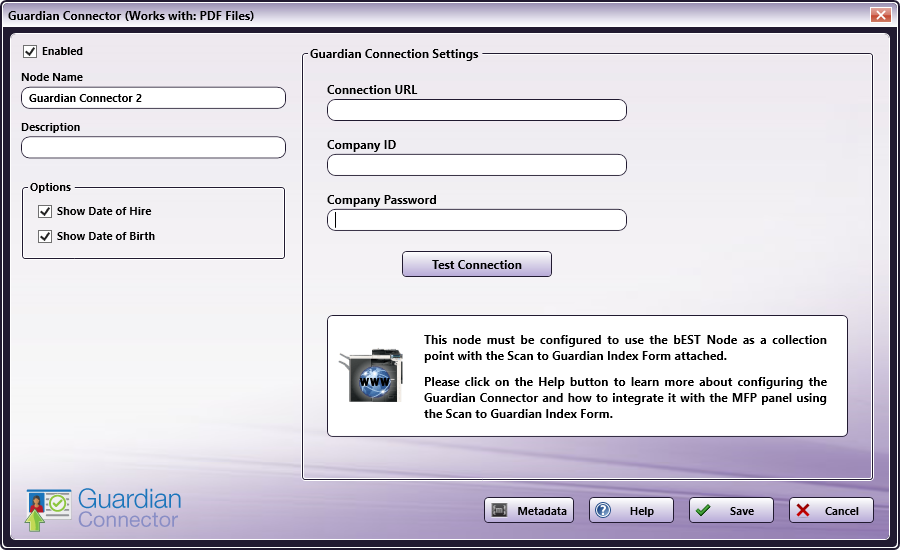
Step 1: Configuring The Guardian Connector Node
To open the Guardian Connector node, double-click on it.
Do the following:
-
Make sure the Enabled box is checked. When unchecked, this output will be ignored. While the workflow will still validate, documents will not be distributed and may be lost.
-
In the Node Name field, enter a meaningful name for the Guardian Connector node.
-
In the Description field, enter a description for the Guardian Connector node. This is not required, but it can be helpful when you have more than one output destination. If the description is long, you can hover the mouse over the field to read its entire contents.
-
In the Guardian Connection Settings area, enter the system information for your company’s guardian account:
-
In the Connection URL field, enter the identifying URL for your organization’s Guardian account.
-
In the Company ID field, enter in your company’s unique Guardian ID.
-
In the Company Password field, enter the password needed to successfully login to Guardian.
-
Click the Test Connection button to test the connection with Guardian.
-
-
Select the Save button to keep your Guardian Connector settings. You can also select the Help button to access online help or select the Cancel button to exit the window without saving any changes.
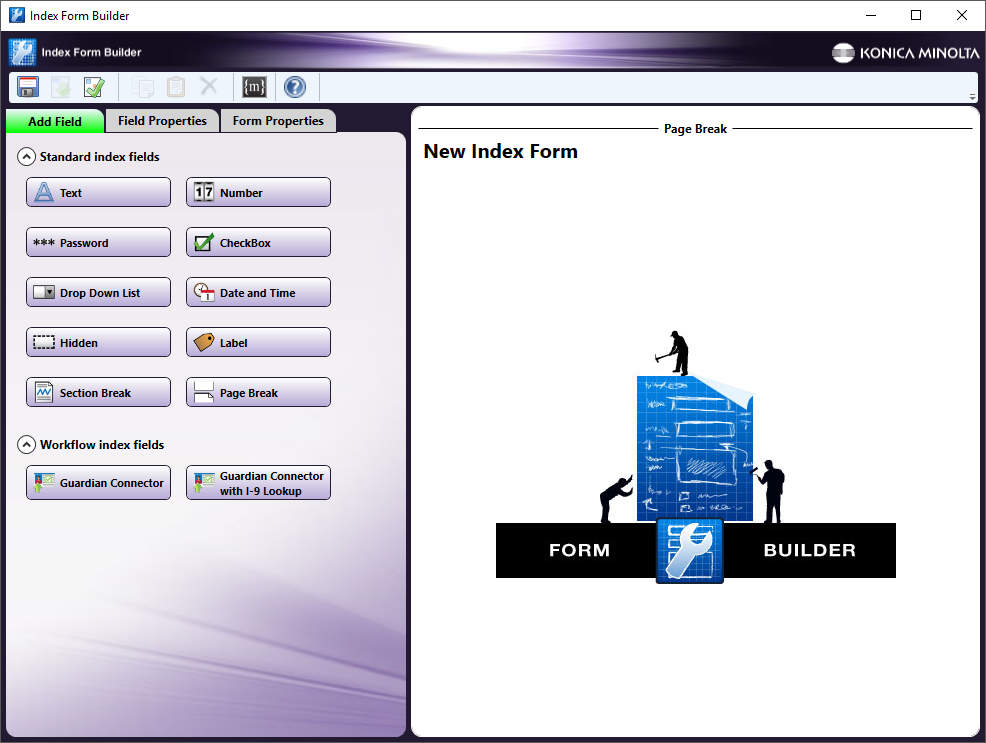
Step 2: Create a Guardian Connector Index Form
Next, create a Guardian index form. This allows users to scan into Guardian from an MFP. Do the following:
-
Make sure that you have configured your Guardian Connector node with the Connection URL, Company ID, and Company Password.
-
Open up the Index Form Builder from the MFP Panel node and select Blank Index Form. You should then see two Guardian Connector buttons under the Workflow index fields area:
-
Use the Guardian Connector index form to allow a user to view a comprehensive list of pending I-9’s at the MFP.
-
Use the Guardian Connector with I-9 Lookup index form to allow a user to search the Guardian database for the pending I-9 record at the MFP.
-
-
Drag and drop a Guardian Connector index form to the Index Form work area. A Scan to Guardian index form will automatically be created, as in the following illustration:
The Guardian Connector node properties for Connection URL, Company ID, and Company Password will be auto-populated in the index form.
-
Save and close the Index Form Builder.
Step 3: Scanning to Guardian from the MFP
At the MFP, users can log into Guardian and scan their pending I-9 documents. Do the following:
-
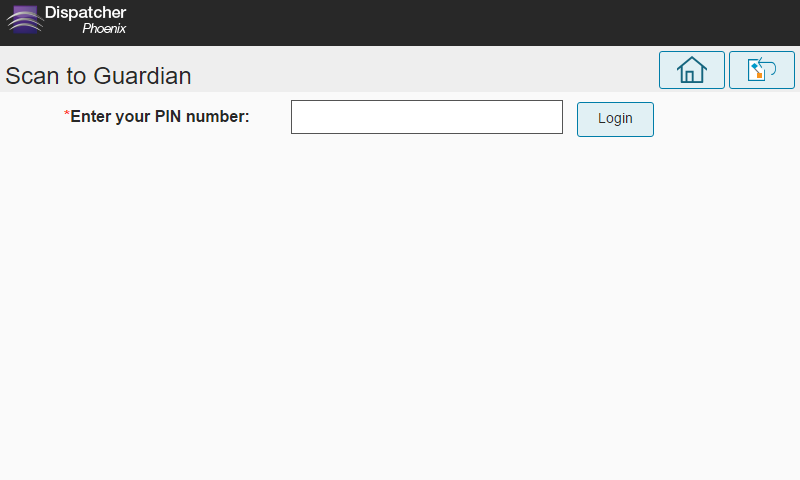
Access your Scan to Guardian workflow.
-
Enter your Guardian PIN #.
-
Select the employee record for which you’d like to upload an I-9 document. If using the Guardian Connector index form, pending I-9 records are automatically displayed for the user who as authenticated into the MFP, as seen in the following illustration:

-
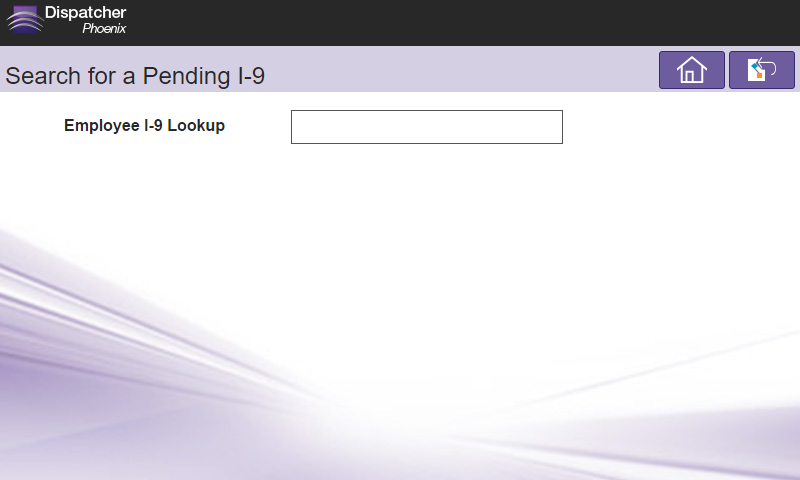
If the Guardian Connector with I-9 Lookup index form is being used, the user will be prompted to Search Guardian for the pending I-9 record, as in the following illustration:
-
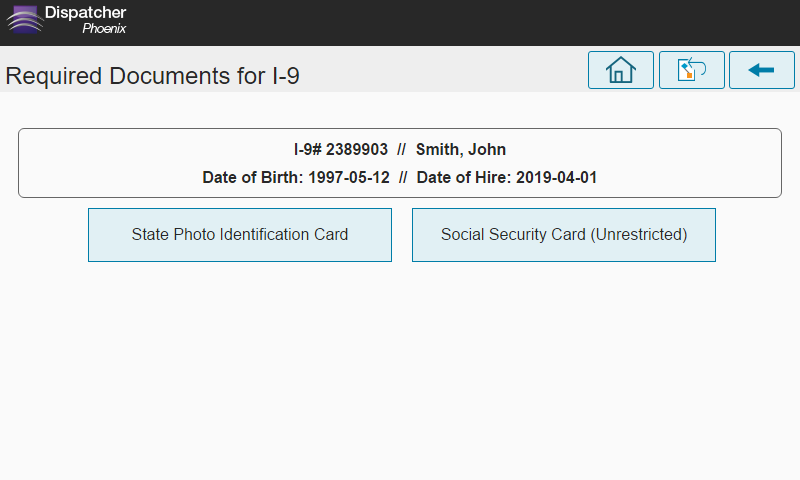
Select the document type that you will scan for upload to Guardian. A document that has been previously uploaded to the platform will show a green check mark icon (
 ) next to the document name. A document that has been scanned and is in the process of being uploaded to Guardian will show an hourglass icon (
 ).
).
-
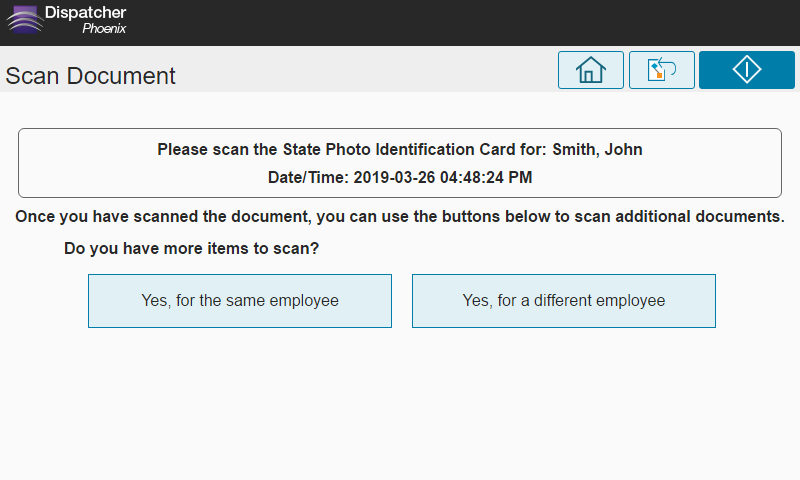
Once the scan operation has been completed, you can choose to navigate back to the same employee record to upload another document using the Yes, for the same employee button. Or, use the Yes, for a different employee button to navigate back to the list of pending I-9s as shown in the following illustration:
Configure for Database Browsing
You can also manually configure a query to retrieve data (e.g., list of pending I-9’s, I-9 documents, I-9 employees details, etc.) from Guardian.
Using the Index Form Builder, do the following:
-
Add a new field, such as a drop-down list.
-
Define an On Notified and On Selection Change event for the field; then add a Query. For more information on building custom index forms, click here.
-
Choose Guardian Data Source from the Query drop-down list.
-
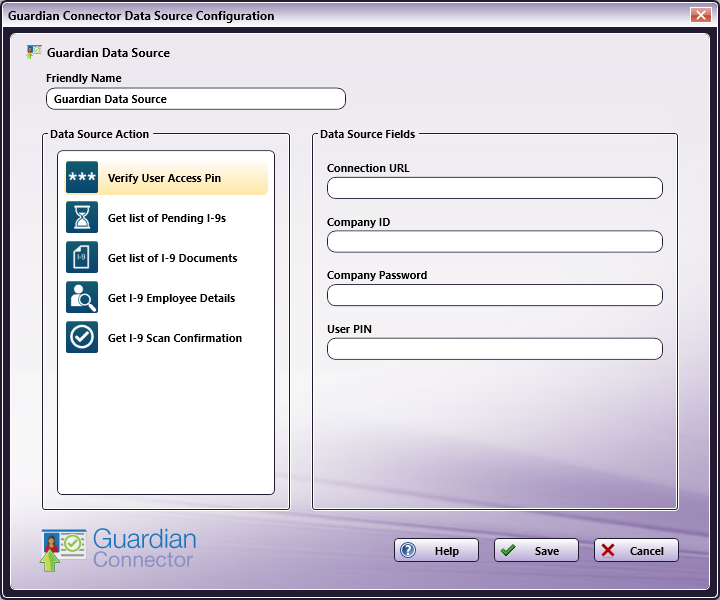
The Guardian Connector Data Source Configuration window appears, which allows you to perform specific actions in order to retrieve data from Guardian. See the following illustration for an example:
-
In the Friendly Name field, enter an identifying name for the Guardian data source configuration.
-
In the Data Source Action area, you can choose what kind of action to perform on the Guardian data source. Options include:
- Verify User Access Pin – This option enables authentication by a user at the MFP.
- Get List of Pending I-9’s - This option returns all of the Guardian record’s pending I-9 information.
- Get list of I-9 Documents - Use this action to display a list of I-9 documents needed for a particular employee’s record.
- Get I-9 Employee Details - This option returns the relevant employee details prior to the scan operation.
- Get I-9 Scan Confirmation - Use this action to display a list of options once an I-9 Document is scanned.
-
Select the Save button to keep your Guardian Connector Data Source Configuration. You can also select the Help button to access online help and select the Cancel button to exit the window without saving any changes.