Parse (Search)
The simplest parser process performs a Search operation. The Parse process only searches the file attributes, such as name, type and size. Based on the results, files are then passed on to destinations within the workflow depending on the set criteria. To open the Parser Node window, add a process node for Parser and double-click on it.

-
Check the Enabled box so that the process will be run. When unchecked, this process will be ignored. Documents will pass through as if the node was not present (i.e., continue along the default or ‘positive’ path). Note that a disabled node will not check for logic or error conditions.
-
In the Node Name field, enter a meaningful name for the Parse node.
-
In the Description field, enter a description for the Parse node. Although this is not required, it can be helpful in reminding you which Process is active in the workflow. If the description is long, you can hover the mouse over the field to read its entire contents.
-
In the Search criteria box, specify whether the results should include files that match any of the search criteria (Match any one search criteria radio button) or should include files that match all of the search criteria (Match all search criteria radio button).
-
To search by file name, check the Search for file name box; then do one of the following:
-
To search the file name for the exact text entered or for specific file types, such as JPG or PNG), select the Normal radio button; then specify the text or file types with an asterisk, separated by commas, in the File Name field. Check the Match case box to include only file names which match the case entered,
or
-
To search for a pattern rather than words or phrases, select the Regular expression radio button; then specify the expression in the File Name field.
-
-
To search by size, check the Search for file size box; then specify the size units and appropriate math operator. When you choose the In Between option, you will need to specify two values; those limits will be included in the search results.
-
Select the Save button to keep the Parse definition and add a connector to the next node in the workflow. You can also select the Help button to access online help and select the Cancel button to exit the window without saving any changes.
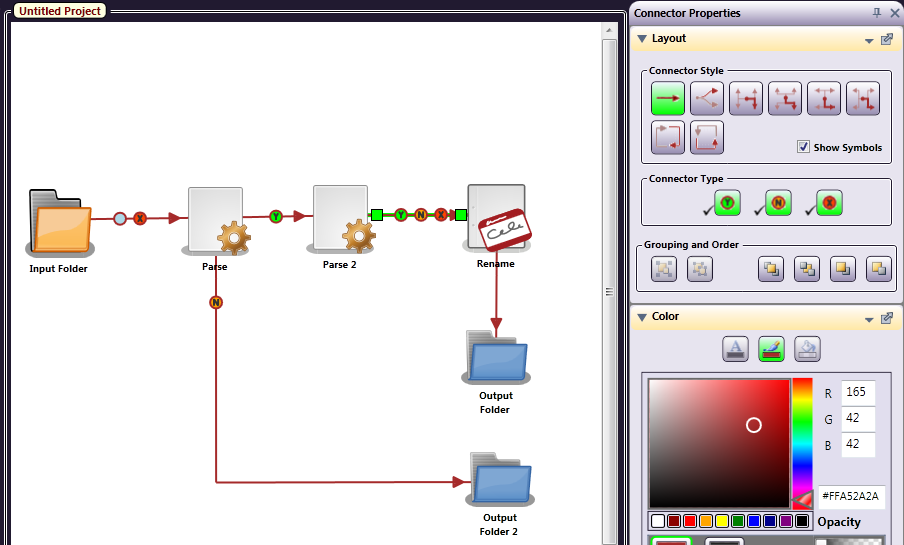
Note: A connector from a Parse node has more details than a regular routing connector, implying set conditions.
With the Parse node saved and a connector to a printer distribution point, conditions for the transition must be defined. A parse node can have up to 3 outbound connectors, Yes, No, or Error, as shown in the following illustration. Regular (non-parser) nodes, can have two outbound transitions. These can be manually changed under Layout Properties.
Add References as Metadata
When using regular expressions with named subgroups within your search operation, you can create metadata out of the subgroup(s) for use in other nodes in the workflow. Note that metadata is not created for numbered references.
For example, to capture the value in the beginning of a file named “25-file.pdf,” you could do the following:
-
Check the Search for File Name box.
-
Click the Regular Expression radio button.
-
In the File Name field, enter: ^(?<Count>.+)-
To reference the named subgroup, you would use the class of “parser” with the subgroup’s friendly name, separated by a colon (:). In the example above, to reference the subgroup, you would use {parser:Count} to capture the value of “25.”