DocuSign Connector

Use the DocuSign Connector node to distribute documents to DocuSign, an online file sharing and Cloud content management service for businesses. The connector allows you to send documents to DocuSign via an automated workflow, or you can access DocuSign directly at the MFP panel.
Note: To use the DocuSign Connector node, you must have a DocuSign account.
To open the DocuSign Connector node’s configuration window, add a Distribution node for DocuSign to your workflow and double-click on it.
Adding Your DocuSign Account
To utilize the DocuSign Connector, the user must first add the DocuSign Account to Dispatcher Phoenix Web. For more information, see the Dispatcher Phoenix Web Accounts page.
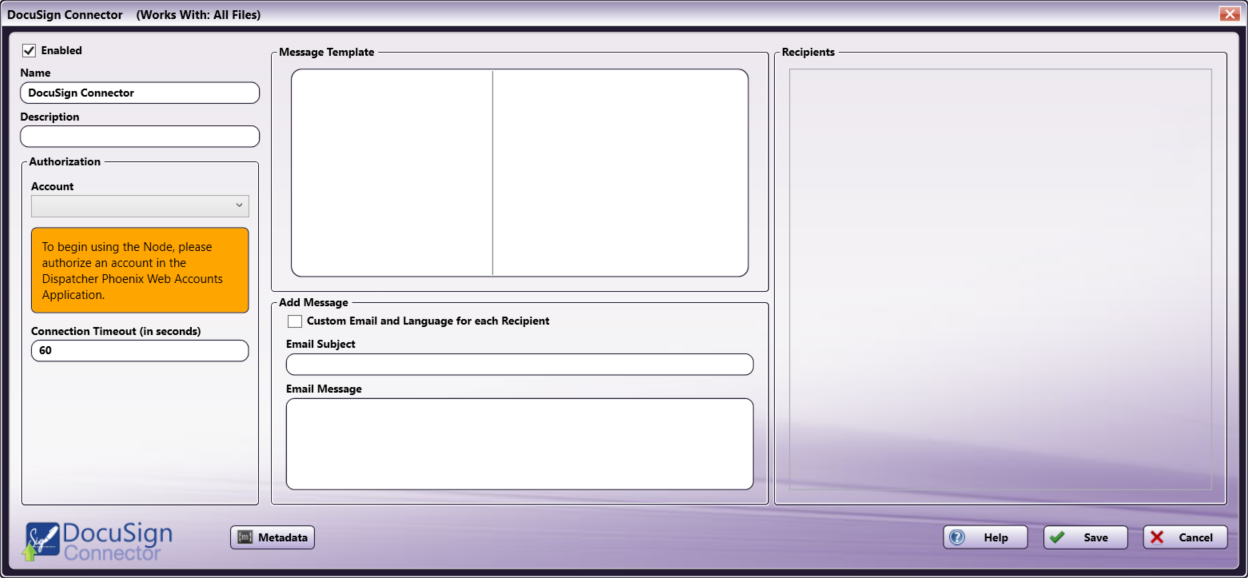
Configuring the DocuSign Connector
-
Enabled - To enable this node in the current workflow, ensure the Enabled box is checked. By default, nodes are enabled upon creation. If you disable the node, the workflow will ignore it. While the workflow will still validate, documents will not be output and may be lost. Note that a disabled node does not check for logic or error conditions.
-
Node Name - The node name defaults to this field. This name appears in the workflow below the node icon. Use this field to specify a meaningful name for the node that indicates its use in the workflow.
-
Node Description - Enter an optional description for this node. A description can help you remember the purpose of the node in the workflow or distinguish nodes from each other. If the description is long, you can hover the mouse over the field to read its entire contents.
Buttons
- Help - To access Dispatcher Phoenix Online Help, click this button.
- Metadata - To access the Metadata Browser window, click this button.
- Cancel - To exit the window without saving any changes, click this button.
- Save - To preserve your node configuration and exit the window, click this button.
Connecting to DocuSign
To connect to DocuSign, do the following:
- In the Authorization area, select a DocuSign account from the dropdown.

Note: If you have not already set up a DocuSign account through Dispatcher Phoenix Web, you must do this before it will appear in the dropdown.
To modify the default Connection Timeout (the seconds allotted for the time without communication, after initial connection to the server, before a timeout occurs), enter a value in the Connection Timeout field.
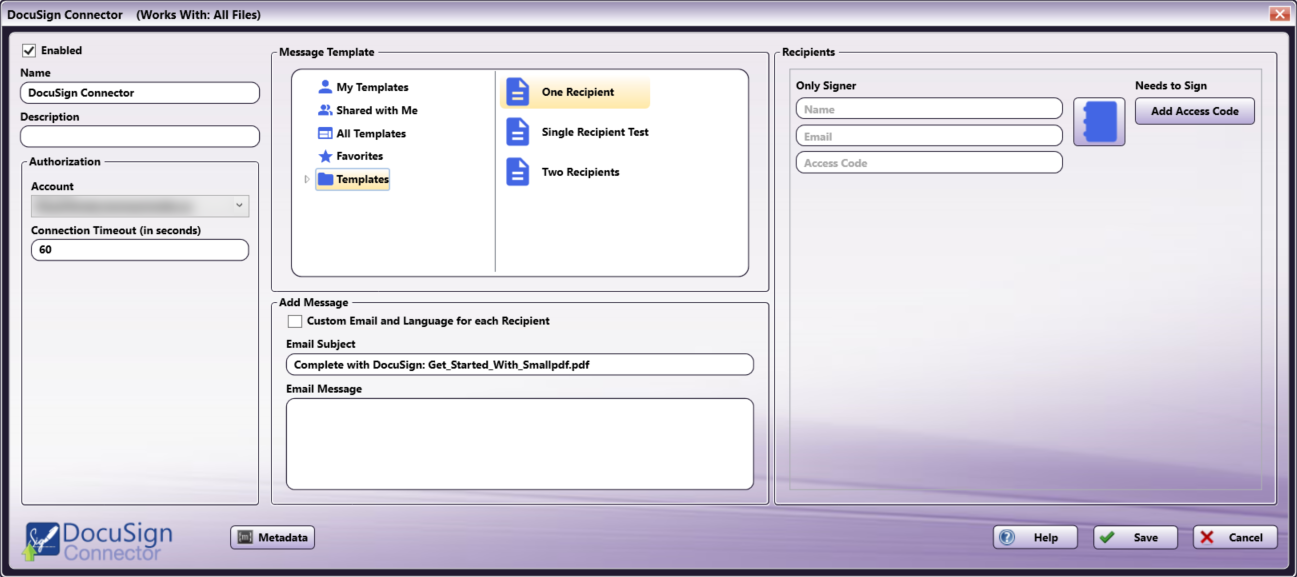
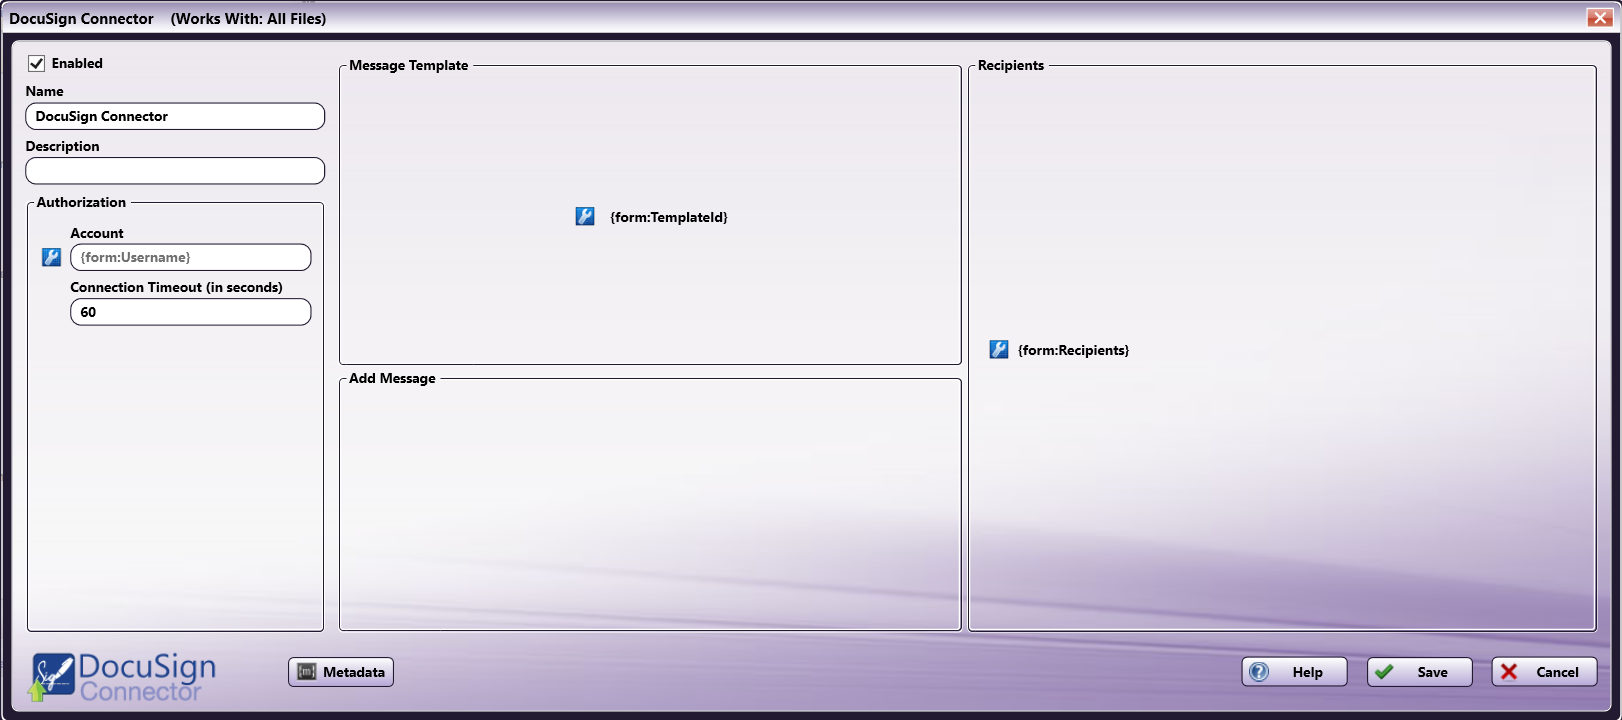
Message Template
The Message Template area displays the available Message Templates for the selected account, as well as four common queries: My Templates, Shared with Me, All Templates, and Favorites. To select a Message Template, do the following:
-
Select a folder or query in the left-hand column.
-
After selecting a folder or query, the templates associated with it will appear in the right-hand column. Select the template you would like to use.

- After selecting a Template, the Recipients area will populate with any of the preconfigured recipients associated with that Template.
Recipients
The Recipients area shows all of the preconfigured Recipients associated with the document template. Field options include:
- Name - The name of the recipient
- Host - The host name of the email service
- Email or Host Email - The email address of the recipient or email host
- Access Code - A security code associated with opening the document
- Notary Name - The name of the notary associated with the recipient
- Notary Email - The email address of the notary associated with the recipient
For templates that don’t have preconfigured Recipient contact information, the fields are blank. All blank Recipient fields are editable. Additionally, Recipient contact information can be entered using the Address Book and User Directory described below.
For templates that do have preconfigured Recipient contact information, text in those fields is greyed out, and those fields are not editable.
Clicking the Add Access Code button will cause the Access Code field to appear for that Recipient. If the Access Code field is present, the button will display Remove Access Code, which removes the field.
Note: The Access Code field can accept a blank access code (no characters).
Address Book
Clicking the blue Address Book button opens a window with the Address Book and User Directory options.
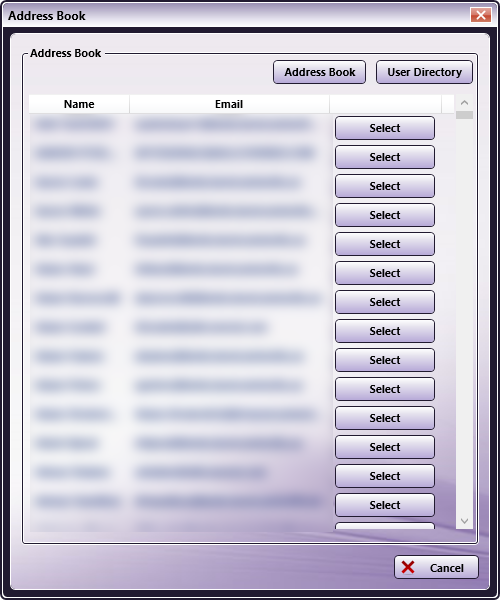
The Address Book is a list of manually added contacts, and the User Directory is a list of all of the users at your company with a DocuSign account. By default, the Address Book opens first. If there are no contacts in the Address Book, you will be directed to the User Directory.
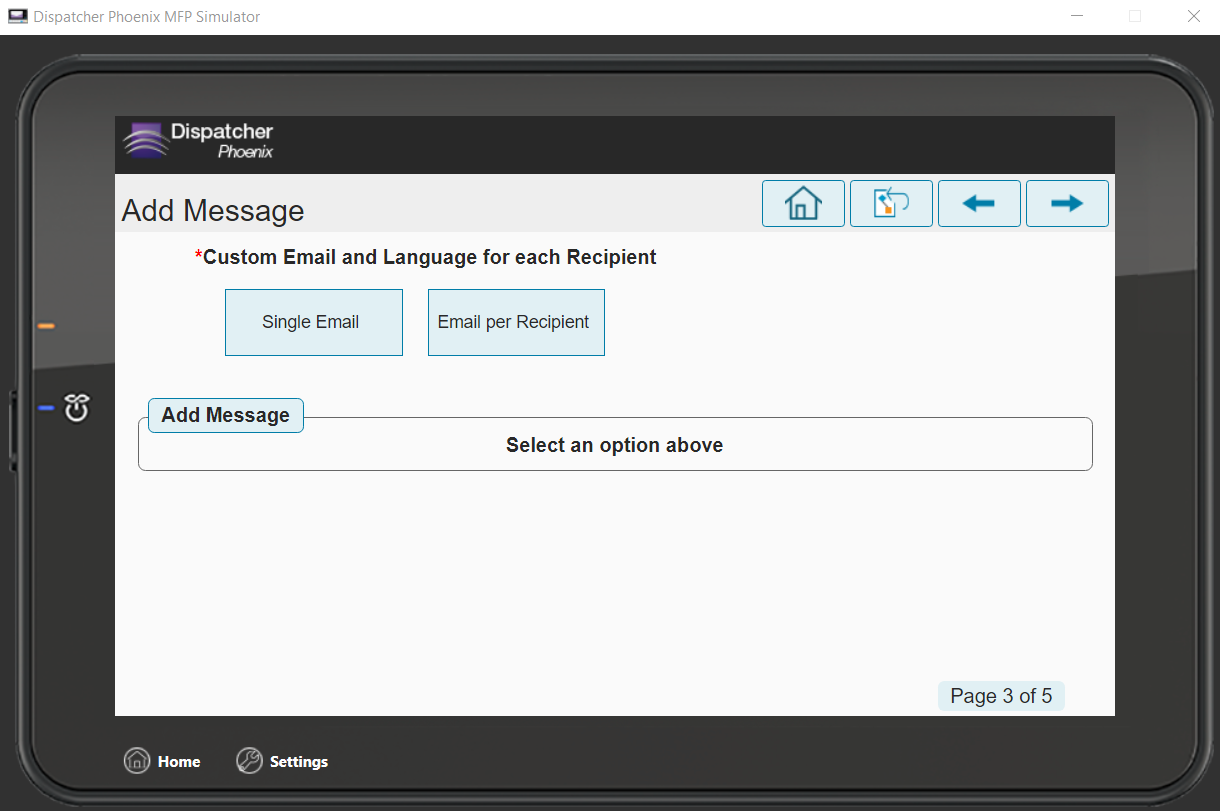
Add Message
The Add Message area allows you to add a message along with documents being uploaded to DocuSign. Options include:
-
Custom Email and Language for each Recipient - Selecting this checkbox enables a dropdown with the name of each Recipient, allowing you to enter a custom Email Subject and Email Message for each. Note that any Recipients who do not have preconfigured names will appear as blank options in the dropdown menu.

-
Email Subject - This field allows you to enter an email subject line for the email sent along with the document
-
Email Message - This field allows you to enter content for the body of an email for the email sent along with the document
Creating the DocuSign Index Form
A DocuSign Index Form allows you to enter Recipient information at the MFP panel. To create an Index Form that allows you to customize your DocuSign upload node at the MFP, do the following:
-
Make sure that your workflow includes a DocuSign Connector node.
-
Configure the DocuSign Connector as described above, including adding and selecting an account and selecting a Template.
Important! These fields are required for workflow validation and must be configured in the node before creating the Index Form.
-
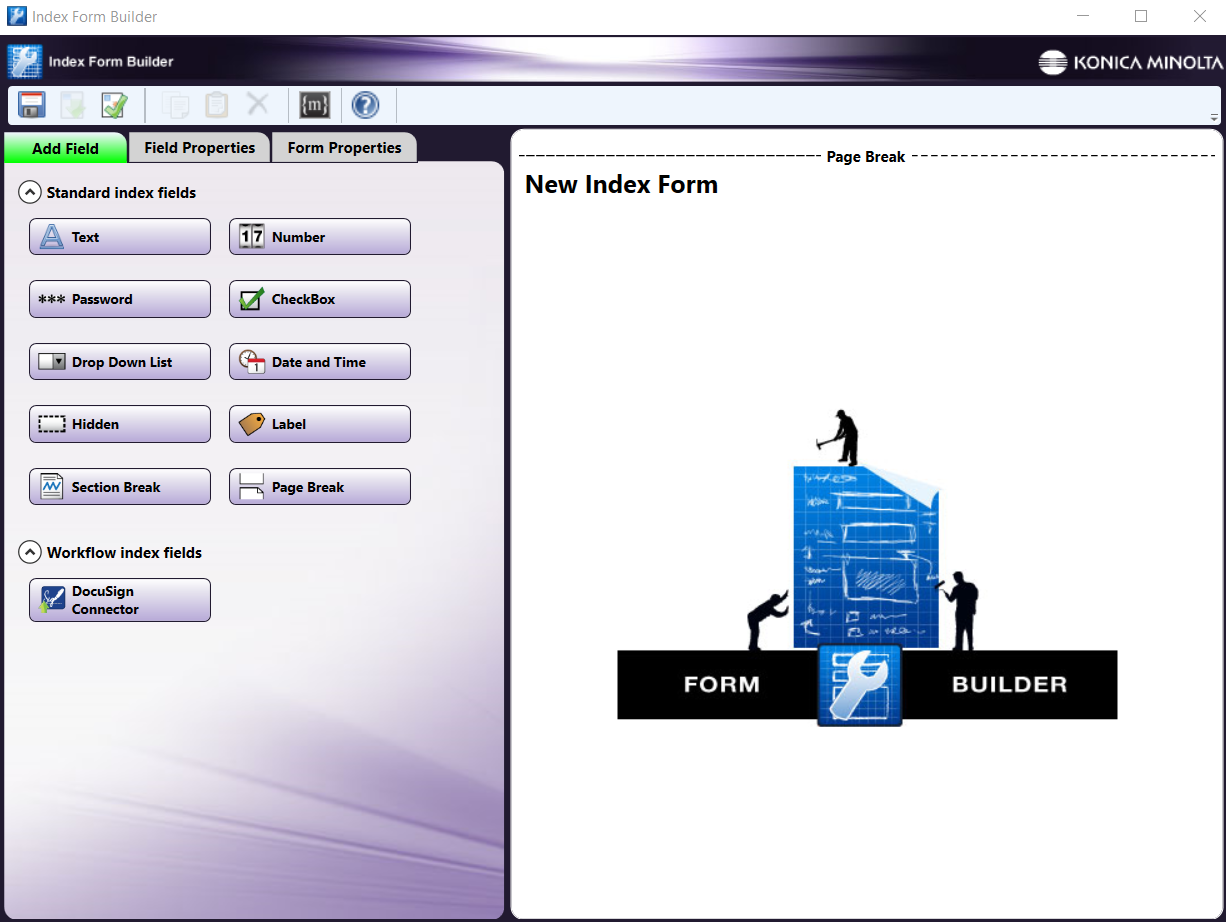
Click on the Forms dropdown in the toolbar and select Create New Index Form to open the Index Form Builder, as in the following illustration:
-
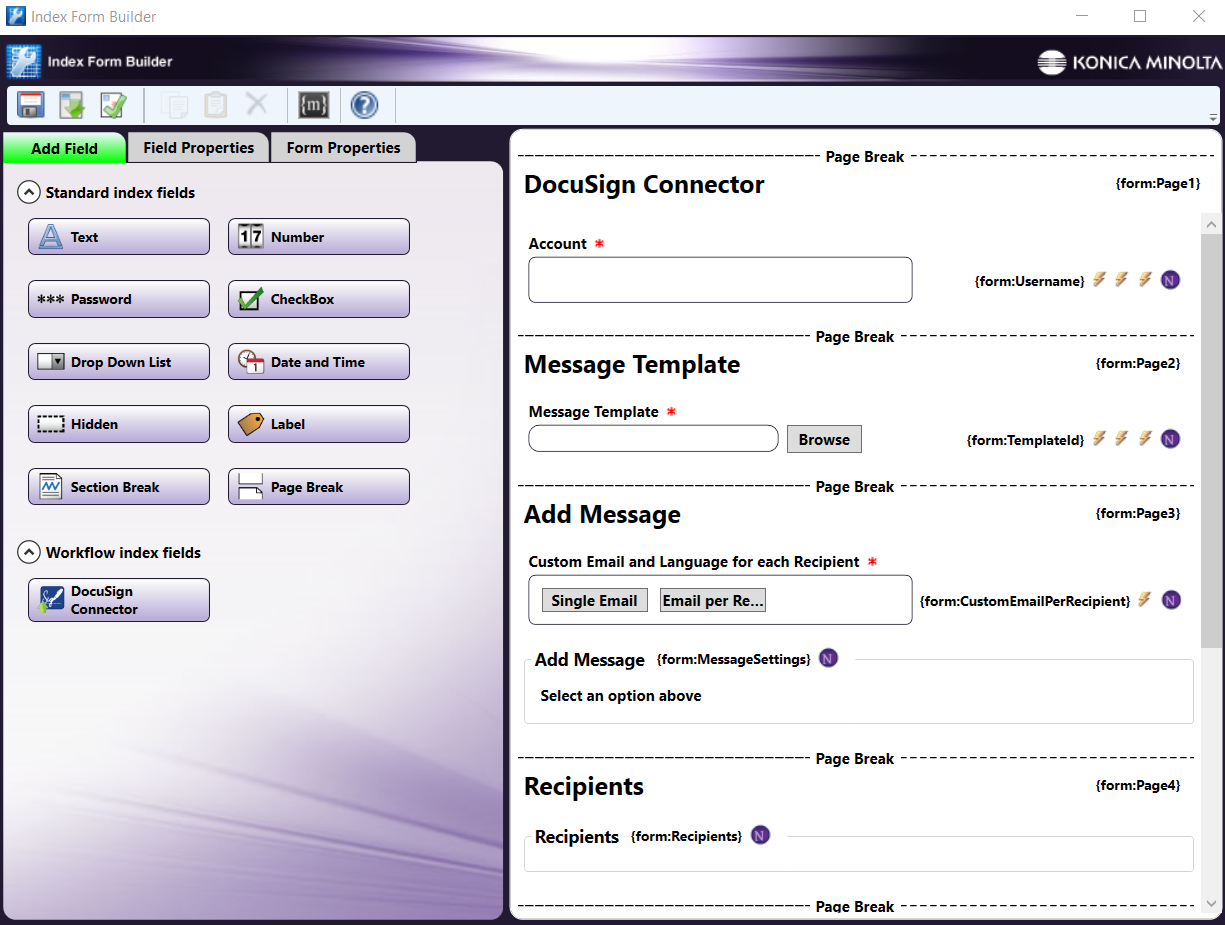
Select the Blank Index Form option in the pop-up. Then, drag the DocuSign Connector icon to the Index Form Builder working area. Several fields will populate, as in the following illustration:
-
Validate, Save, and close the Index Form Builder.
-
Attach the Index Form to a node that supports Index Forms, such as the MFP Panel node, Web Capture node, or Release2Me node.
-
The DocuSign Connector node properties window will automatically populate with the variable names of the fields on the Index Form. Although you cannot edit the fields on this window, you can click on the wrench tool button to go to that section or field in the Index Form Builder. See the following illustration:
DocuSign Connector at the MFP
At the MFP, take the following steps:
-
Select your workflow - If only one Dispatcher Phoenix workflow is currently running, that workflow appears. However, if multiple workflows are running, the Selection screen appears and you must select a workflow.
-
Select Add Message options - You will be prompted to select whether you would like a Single Email or an individual Email per Recipient. If you select Single Email, the area below the buttons will populate with field for Email Subject and Message for you to fill out. If you select Email per Recipient, the fields for Email Subject and Message will be on a new page for each Recipient.
-
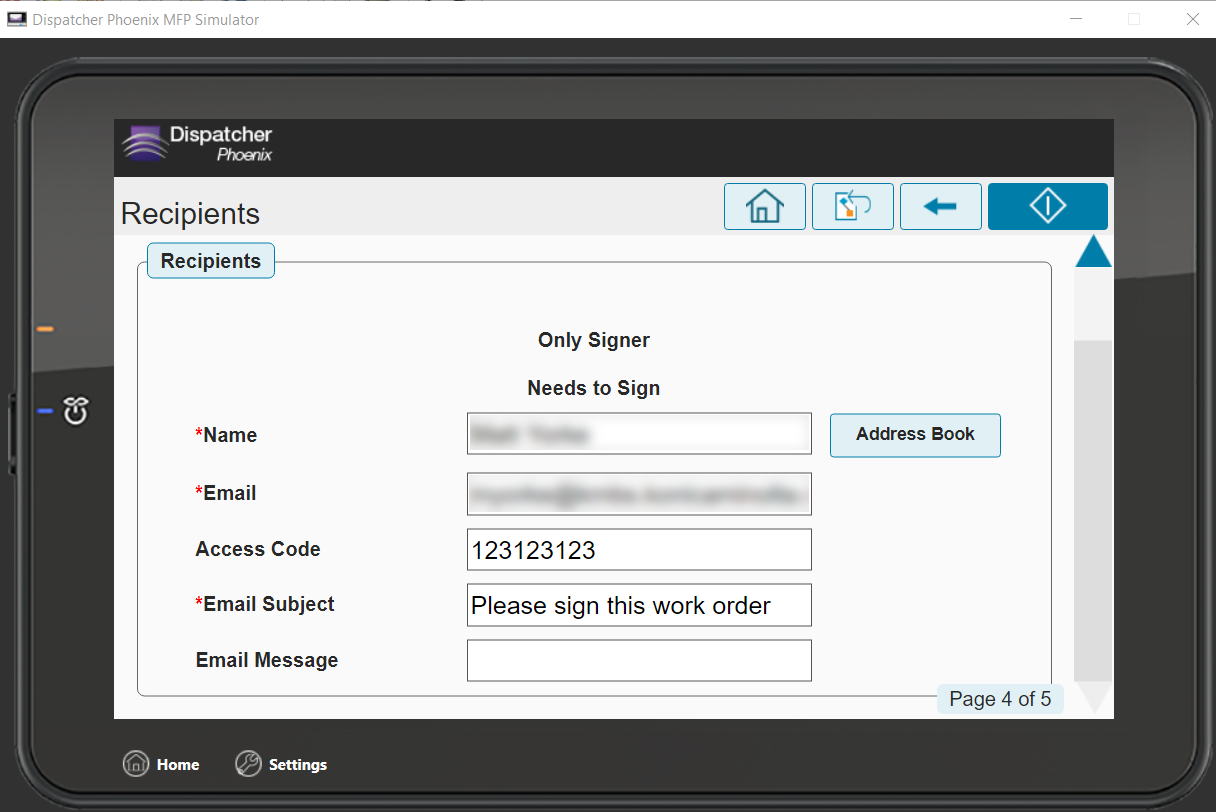
Enter recipient information - You will be prompted to enter the recipient information for each recipient. You can access the Address Book and Directory by tapping the Address Book button.
-
Select the “Scan” button - This will send the scanned document to the intended recipients via DocuSign.