Imposition

Note: This node works with PDF files (version 1.3 or later).
Smaller format jobs like business cards, booklets, and greeting cards may be sent to a printer that supports large format printing. By placing multiple copies of these smaller jobs onto a single page, production may be more efficient.
The Imposition Node takes the PDF files and then adds imposition settings to support large format digital printing.
Using the Imposition Node
Add the Imposition Node to the workflow by dragging the node’s icon onto the Workflow Builder canvas, and then double-clicking on the icon to open the Imposition Node’s window:
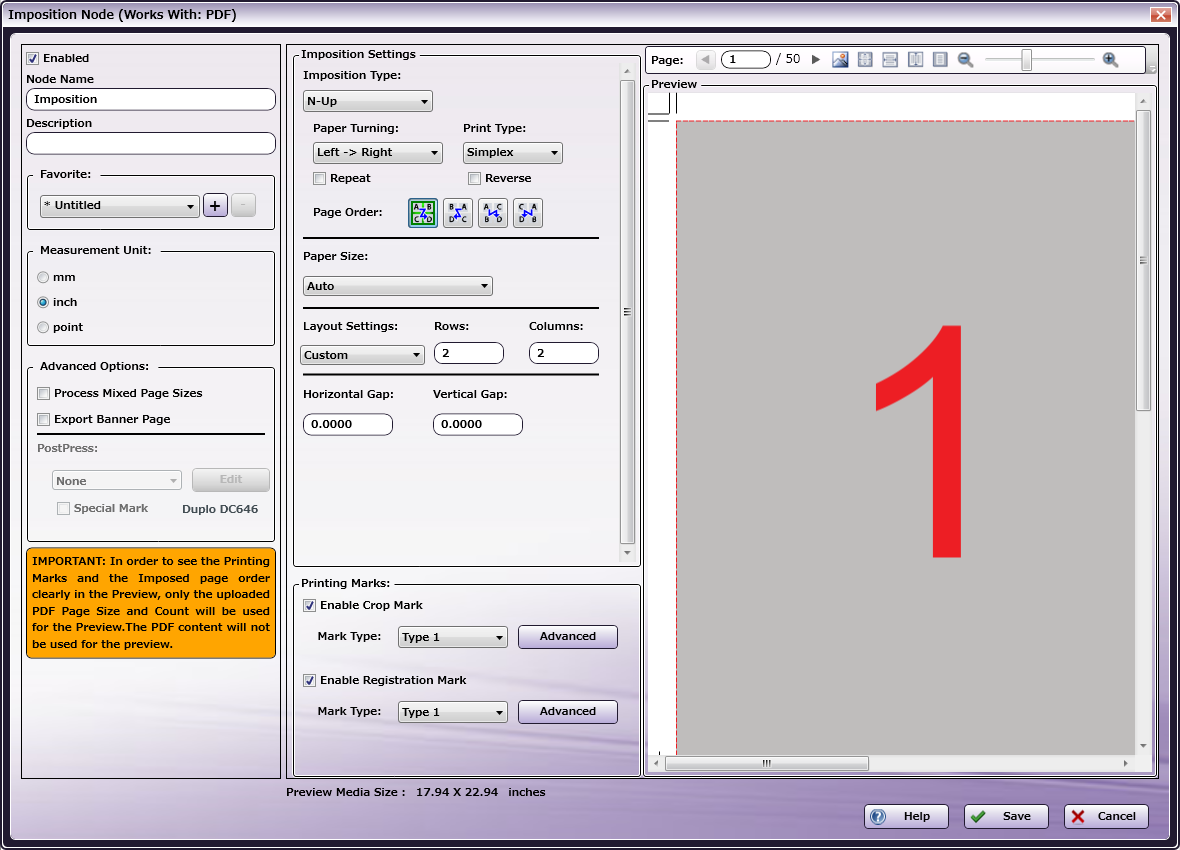
Use this window to specify the Imposition Node’s settings.
-
Select the Enabled checkbox so that the process will run. When unchecked, this process is ignored. Documents pass through as if the node were not present (i.e., continue along the default or positive path). Note that a disabled node will not check for logic or error conditions.
-
In the Node Name field, enter a meaningful name for the Imposition Node.
-
In the Description field, enter a description for the Imposition Node. This is not required, but can be helpful with multiple collection points. If the description is long, hover the mouse over the field to read its entire contents.
-
In the Measurement Unit panel, select a measurement unit radio button. Three types of measurement units are available: mm, inch, and point.
-
Click the Save button to save the changes. If Cancel is selected and the window is closed, the changes are not saved.
-
Click the Help button to access online help.
Favorite
In the Favorite area, create a template and save it. Saved templates may also be deleted.
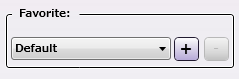
To save selected settings as a Favorite, add a Favorite Name after all settings are chosen.
-
Add a New Item: Click the [+] button and the Favorite pop-up opens. Enter a Favorite Name value. Click the Save button.
-
Delete an Existing item: Click the [-] button. A confirmation dialog opens. Click Yes to delete the Favorite Name.

-
Edit an Existing item: Click the [+] button. Modify the setting’s changes, as required. By default, the Favorite value will default to Untitled. To keep the original name, re-enter the old value by replacing Untitled. When finished, click the Save button. If the old name was re-entered, an overwrite verification pop-up opens. In it, click Yes to overwrite the old values.
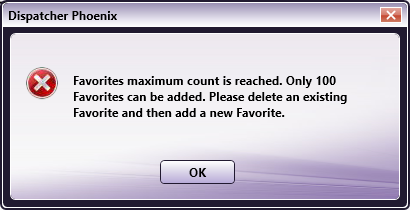
Note: A maximum of 100 Favorites may be saved. When the Favorite count reached 100, new addition to Favorite is not allowed and following error message will be displayed to user.
Note: If a Favorite value other than Default is selected when the node opens, the Favorite drop-down displays a value of saved Favorite name if the saved Favorite is not deleted/modified by other Imposition node in a workflow.
Note: If a Favorite value other than Default is selected and it is already deleted/modified when the node opens, the Favorite drop-down displays a value of [-].
Note: If a Favorite value is modified while the node is open, the Favorite drop-down displays a value of [*Untitled+].
Note: Favorite name can be a combination of any of the below characters.
- One byte characters [English characters etc.] (a to z & A to Z)
- Double byte characters [Japanese, Chinese Characters etc.]
- Spaces
- Numbers(0 to 9)
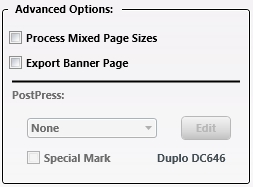
Advanced Options
-
Process Mixed Page Sizes: Select this checkbox if the job has multiple Page Sizes. When the value is selected, the following pop-up message opens:
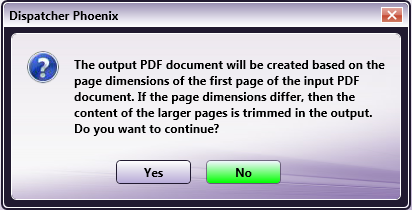
Click Yes to confirm or No to cancel the request.
-
Export Banner Page: If this checkbox is selected, both a Marked document and a Banner Page are created. The Banner Page shows the types of marks being applied to the job (Trim, for example). The Banner Page is generated and sent along with the main job but as an independent job.
Note: In the generated Banner Page, the value “banner” is set as the value for the metadata key “imposition:jobtype”.
-
PostPress: After printing, Imposition jobs are processed using a PostPress machine (Cutter, Folder, Booklet Maker, etc.) to separate the individual jobs. Use this option to specify the type of PostPress finisher to be used for the processing. The default value of the drop-down is None.
-
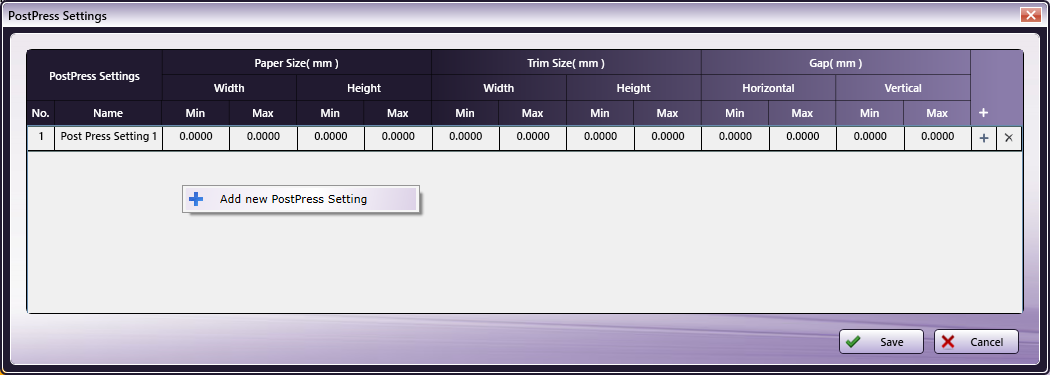
Edit: Click this button and the PostPress Settings window opens.
Note: The PostPress option is only available when a Paper Size other than Auto is selected.
-
Add New PostPress Setting: Add a New PostPress Setting by clicking the [+] button or by using the context menu option Add New PostPress Setting, accessed by right-clicking in the PostPress Setting’s window. Once saved, new settings are added to the table.
Note: PostPress Setting’s Name*** *can be a combination of any of the below characters.
- One byte characters [English characters etc.] (a to z & A to Z)
- Double byte characters [Japanese, Chinese Characters etc.]
- Spaces
- Numbers(0 to 9)
-
Delete PostPress Setting: To delete a saved setting, locate its row and then click the X at the far-right of the row. As an alternative method, right-click on the No. column of an item then select Delete from the menu. When either delete is initiated, a confirmation dialog opens:
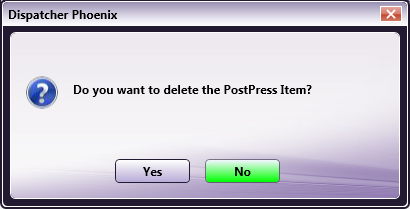
Click Yes to delete the setting or No to cancel the request.
-
Select the Save button to keep the PostPress definition. Click the Cancel button to exit the window without saving the changes.
-
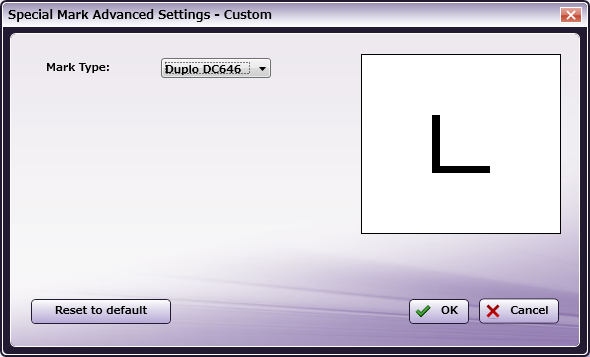
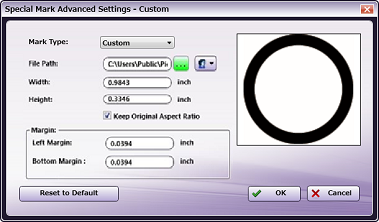
Special Mark: When this checkbox is selected, the hyperlink to the right of the checkbox is activated. To change the special mark, click on the hyperlink to open the Special Mark Advanced Settings - Custom dialog. Use that screen to select a new Special Mark.
Note: The Special Mark option is only available when a Paper Size other than Auto is selected.
-
Special Mark Advanced Settings - Custom: When Custom is selected as the Mark Type, the following UI opens. On it, specify the absolute dimension of the mark’s Width and Height as well as the absolute position of the mark in relationship to the Left Margin and Bottom Margin.
Imposition Settings
Use the Imposition Settings panel to specify the page Layout:
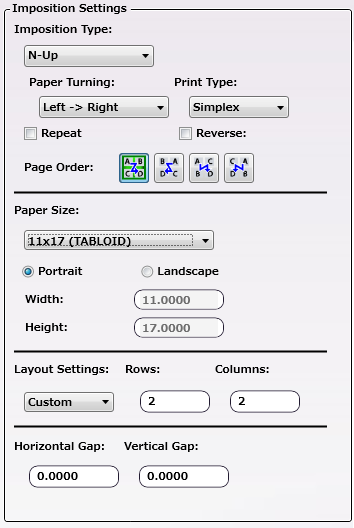
Imposition Type Drop-Down: Select one of the following options:
-
N-Up: Select the Repeat or the Reverse checkbox.
-
Cut and Stack: Offset. The Minimum value is 1.The Maximum value is 10,000. By default, the Offset checkbox it is enabled and has a value of 100. When the Offset checkbox is deselected, the drop-down option it is not enabled.
-
Booklet:
-
2-Up: Perfect Bound and Sheets per Section. The default value of Sheets per Section is 16.
-
4-Up: Repeat, Cross Fold, Perfect Bound, and Sheets per Section. In Booklet 4-Up, the Repeat and the Cross Fold checkboxes are not available at the same time. The default value of Sheets per Section is 8.
-
8-Up: Perfect Bound and Sheets per Section. The default value of Sheets per Section is 4.
-
16-Up: Perfect Bound and Sheets per Section. The default value of Sheets per Section is 2.
When a Booklet value is selected, the printed pages can contain blank sections. For example, if a document with 9 pages has an Imposition > Booklet setting of 2-UP, two pages will print on the front and two pages on the back of the first two sheets. The final sheet, however, will only have output printed in the top half of one side of the sheet. The bottom half and the back of the sheet will remain empty:
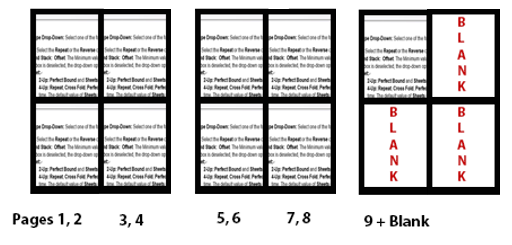
This same type of processing is applied regardless of the N-Up settings so that in many cases, the final printed page will have blank sections. When PostPress cutting is applied, these blank sections are usually discarded.
-
-
Perfect Bound: When selected, Sheets per Section also displays. The default value of Sheets per Section varies depending on the Imposition type (2-Up, 4-Up, 8-Up, or 16-Up). The minimum value of Sheets per Section is 1. The maximum value is 1,000.
Note: The Repeat checkbox of Booklet 4-Up is different from the Repeat checkbox of N-Up.
Note: Perfect Bound and Sheets per Section of Booklet 4-Up are different from Perfect Bound and Sheets per Section of Booklet 2-Up.
-
Paper Turning Drop-Down: Select a value from the drop-down to indicate the turn direction used when reading the document. There are three of options: Left->Right (Default), Right->Left (Japanese style), Top->Bottom (Calendar style).
-
Print Type Drop-Down: Simplex or Duplex. When the Imposition type is N-Up or Cut and Stack, the value defaults to Simplex. When the Imposition Type is Booklet, the value defaults to Duplex.
-
Page Order Icons: This option is applied when the Imposition Type is N-Up or Cut and Stack. Specify the output order of pages. There are four options: Horizontal, Horizontal Reversed, Vertical, or Vertical Reversed.
Paper Size Settings:
-
Paper Size Drop-Down: The size of output paper used for printing (the Imposition sheet size). The default value of Paper Size is Auto. When a Paper Size other than Auto is selected, the following options are available:
-
Portrait/Landscape: Select the Orientation of the output paper.
-
Width: The Width of the output paper (or the Imposition sheet).
-
Height: The Height of the output paper (or Imposition sheet).
Note: For B paper sizes(e.g. B0, B1) supported in Imposition node, based on the Dispatcher Language, the Paper Size dimensions will be displayed either in JIS(Japanese Industrial Standard) or ISO (International Standard Organization) dimensions.
Note: For Dispatcher Language other than Japanese, B paper size dimension will be displayed in ISO dimensions. Otherwise it will be displayed in JIS dimensions.
Note: For workflow execution the dimensions displayed in UI will be used.
-
Layout Settings: Select Custom or Auto. When Custom is selected, the number of Imposition blocks will be produced based on the Column and Row values specified here. When Auto is selected, the Rows and Columns fields are disabled and are updated based on the Preview Image. If a Preview is not uploaded, the Preview Media Size noted at the bottom of the screen will display a value of “ - “.
Horizontal Gap Setting: The horizontal interval between two Imposition blocks. The default value is 0.
Vertical Gap Setting: The vertical interval between two Imposition blocks. The default value is 0.
Spread Setting: This option is available when Booklet is selected as the Imposition Type. Spread is the space between two pages, printed on the same sheet to form a booklet. The minimum value of Spread is 0 mm. The maximum value of Spread is 10 mm.
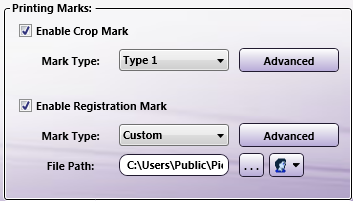
Printing Marks
-
Enable Crop Mark: Select the checkbox to add Crop Marks.
-
Mark Type: Select the type of Crop Mark from three options: Type 1, Type 2, and Type 3.
-
Advanced: Click the Advanced option to open a dialog where Custom Crop Mark values may be specified. When the Reset to Default button is clicked, all values are reset to their defaults.

-
-
Enable Registration Mark: Select the checkbox to add Registration Marks.
-
Mark Type: Select the type of registration mark from four options: Type 1, Type 2, Type 3, and Custom. If Custom is selected, the path to the image must be specified. Credentials need to be set up to support file access via the network. If the Custom Registration Mark File path is blank. Then an X-mark image will be shown in the Preview and the Registration Mark Advanced Setting Custom window.
-
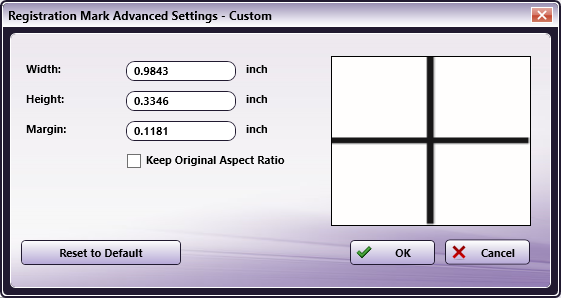
Mark Type Custom Settings: When Custom is selected, the setting screen opens:
-
Custom Registration Mark Width, Height, and Margin settings are available to specify.
-
If the Keep Original Aspect Ratio checkbox is selected, any change in one of the values will be automatically applied to the other values so that the Registration Mark maintains its original appearance. When the Reset to Default button is clicked, all values are reset to their defaults.
-
Preview Settings
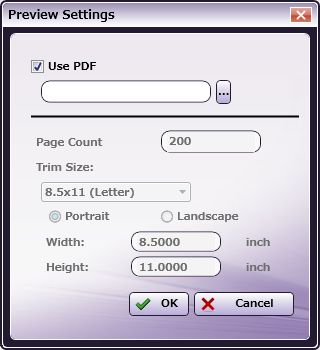
Click the Preview icon  to open the Preview Settings window:
-
Use PDF: Select the checkbox to use the PDF file to generate the Preview. When the option is checked, more than 5,000 pages and up to a 500 MB file can be supported by Import.
-
Page Count: This is the total number of pages the Preview will support. This option is available only when the Use PDF checkbox is unselected. Enter a value. The default value is 200 but up to 5,000 pages can be supported.
-
Trim Size: The Page Size after all excess material is trimmed off.
-
Portrait/Landscape: Click a radio button to select the document’s Orientation.
-
Width and Height: These values reflect the trim Width and the trim Height. When a Custom Size is selected in the Trim Size Combo Box, then the Width and Height text boxes are enabled and values may be modified.
While the Preview Settings are being generated, a progress screen displays:
If additional changes are made while the Preview is loading, they will be applied and the Preview that is loaded will be based on the last configured settings.
Notes:
- The Preview panel only supports PDF files.
- Only a file from the local drive is supported. Files from a network path are not supported.
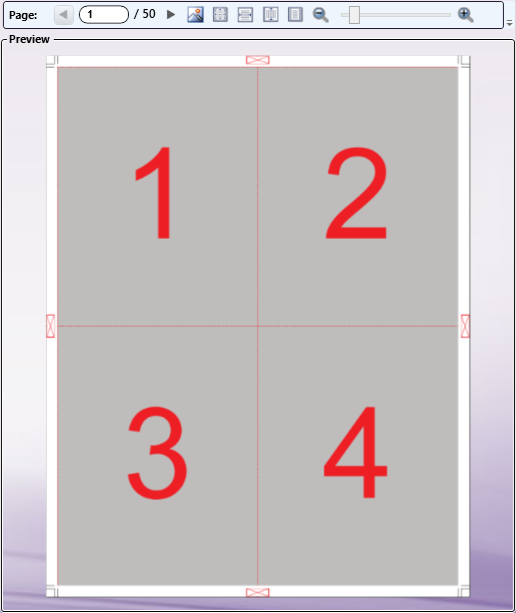
- To see the Printing marks clearly in the Preview panel, only the uploaded PDF Page size is used to display the Preview. PDF content is displayed as a gray box in the Preview panel.
Tool Bar
The Toolbar is at the top of the window. Use it to customize the Preview.
| Tool Bar Icons | Description |
|---|---|
|
Upload Preview icon. Click on this icon to upload a sample preview image. Only PDF preview is supported. 5,000 pages and up to 500 MB file can be supported by Preview if the OS has at least 16 GB RAM. |
 |
Actual Size icon. Click on this icon to revert the preview sample document to its original size. |
 |
Fit to Width icon. Click on this icon to stretch the sample document to fit the width of the Preview area. |
 |
Fit to Height icon. Click on this icon to stretch the sample document to fit the height of the Preview area. |
 |
Fit to Page icon. Click on this icon to fit the sample document completely in the Preview area. |
 |
Zoom controls. Use either the magnifying glass icon or the sliding bar to zoom in and out of the Preview area. |
 |
Page Navigation. (when available) Click on the arrows to navigate through multiple pages of the sample document. |
Handling metadata
This node outputs the following metadata group categories.
Imposition, Job, Post Press.
Limitations
Important!
-
The Imposition Node does not work well with mixed page sizes. The recommended paper tolerance for optimum performance is ± 5 points.
-
The Imposition Node can support 5,000 PDF pages and 500 MB in the Preview panel if the OS has a minimum of 16 GB RAM.
-
The Imposition Node can support up to 20,000 PDF pages during workflow execution if the OS has a minimum of 16 GB RAM.
-
Network Credentials
- Credentials are passed/written as is to Workflow/config XML.
- When a workflow is EXPORTED and IMPORTED from a different machine, the Network credential may not work as expected. Credentials may need to be set/provided manually after importing the workflow.
- There might be a performance issue/degrade when opening the workflow when the image is loaded from a Network path.
-
Only public shared network paths are supported for the Use PDF options in the Preview panel. Network paths that require credentials are not supported.