Metadata Route

The Metadata Route Node routes documents according to metadata-based search rules defined by the user. With this process, you can create routing conditions using any metadata that is associated with documents in the workflow. For example, if a Barcode Processing node has been added to the workflow, you can search for any barcode zones that were defined. Similarly, if an Advanced Bates Stamp node was included in the workflow, you can search for a specific Bates stamp that was defined. You can also search for any system defined variable. Once rules have been set up, the node routes documents based on whether or not they meet the conditions that you have specified.
This node can have the following outbound connectors:
-
Yes - If the metadata condition has been met.
-
No - If the metadata condition has not been met.
-
Error - If the document type is not supported.
To open the Metadata Route Node window, add a process node for Metadata Route to the Workflow Builder canvas,; then double-click on the node. The Metadata Route Node window will open, as shown in the following illustration:
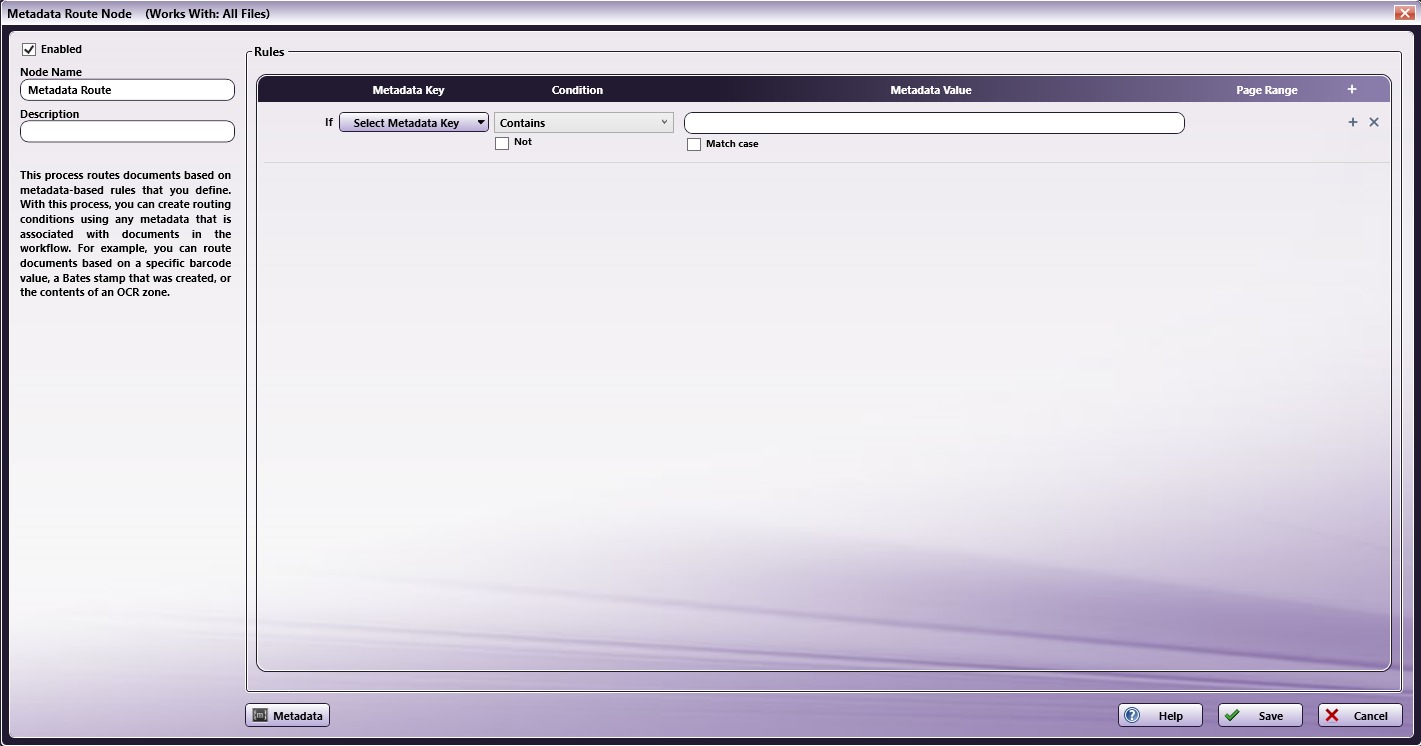
Using the Metadata Route Node Window
-
Check the Enabled box so that the process will be run. If unchecked, this process will be ignored. Documents will pass through as if the node was not present. Note that a disabled node will not check for logic or error conditions.
-
In the Node Name field, enter a meaningful name for the Metadata Route node.
-
In the Description field, enter a description for the Metadata Route node. Although this is not required, it can be helpful to distinguish multiple processes from each other. If the description is long, you can hover the mouse over the field to read its entire contents.
-
Select the Save button to keep your Metadata Route definition. Select the Help button to access online help. Select the Cancel button to exit the window without saving any changes.
Setting Up Metadata Rules

To set up a metadata rule, do the following:
Step 1: Selecting Metadata
You can choose to use any metadata associated with documents in the workflow. When you click on the Select Metadata Key button, the Metadata Browser will appear, listing all of the metadata available, categorized by metadata type. For example, if you have created a zone in an Advanced OCR node, that zone would be listed in the pop-up window, under the OCR heading. In addition, you can choose system-defined variables to use as conditions on this window. Note that no metadata key will appear unless you have set up a metadata key in another process node in the workflow. On the Metadata Browser, you can do the following:
- Expand the list by clicking on the + sign next to the metadata that you are interested in. For example, if you are interested in LPR metadata, click on the + sign next to LPR and the following expandable list will appear:
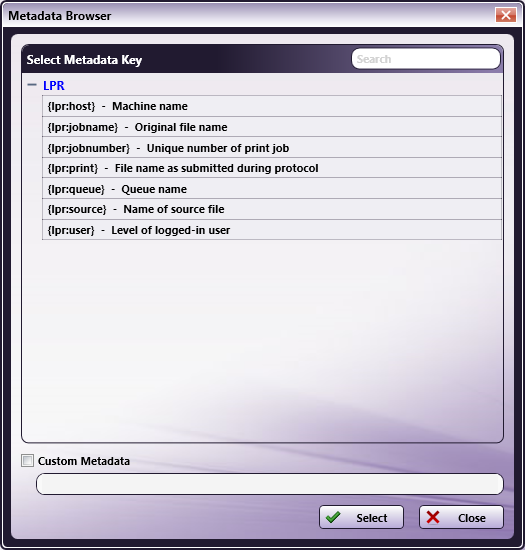
-
Collapse the list by clicking on the - sign next to the appropriate metadata.
-
Choose metadata to add to the rule by clicking on the metadata and clicking on the Select button. At this point, the Metadata Browser will close and you will return to the Metadata Route window.
-
Specify a page-level and/or occurrence number for the metadata reference by checking the Custom Metadata box and entering the correct syntax in the empty field provided.
-
Search for metadata by entering the appropriate text string in the empty Search field on the right-hand side of the window.
Step 2: Specifying Conditions
Next, do the following:
-
Specify a Condition from the dropdown. Options are:
Condition Description Allows Match Case Requires Metadata Value Is The Metadata Key matches the Metadata Value exactly. Yes Yes Contains The Metadata Key contains the Metadata Value anywhere. Yes Yes Is Less Than The value of the Metadata Key is lower than the value entered in the Metadata Value. No Yes Is Less Than or Equal To The value of the Metadata Key is lower than or is the same as the value entered in the Metadata Value. No Yes Is Greater Than The value of the Metadata Key is higher than the value entered in the Metadata Value. No Yes Is Greater Than or Equal To The value of the Metadata Key is higher than or is the same as the value entered in the Metadata Value. No Yes Is Between The value of the Metadata Key is between the values entered in the two Metadata Value areas. The order of the two entries does not matter. No Yes Is Equal to Or Between The value of the Metadata Key is the same as either value or is between the values entered in the two Metadata Value areas. The order of the two entries does not matter. No Yes Regular Expression The value of the Metadata Key fits within the parameters described by the expression or selected pattern. Yes Yes Exists There is a Metadata Key for the file. No No Has Value The metadata extracted from the Metadata Key contains any value. No No -
Check the Not checkbox to search for the opposite of the selected Condition.
-
Check the Match Case checkbox to search for the exact case of the Metadata Value entered.
-
Add more conditions using the + icon, or click on the X icon to delete a condition.
In the following illustration, a rule has been set up to direct all documents that have an invoice number containing “195” to a certain folder:

In the following illustration, a rule has been set up to direct all documents that have an invoice number NOT containing “195” to a certain folder:

Note:
- The Metadata Route node rounds numbers at 16 digits when using numerical comparisons, which can impact document routing in certain circumstances.
- For example, 21.000000000000001 (17 significant digits) will round to 21.00000000000000 (16 significant digits) and 21.000000000000009 (17 significant digits) will round to 21.00000000000001 (16 significant digits).
Step 3: Specifying Metadata Value from Metadata Browser
You can choose to use any metadata associated with documents in the workflow. When you click on the Metadata button, the Metadata Browser will appear, listing all of the metadata available, categorized by metadata type. On the Metadata Browser, you can do the following:
-
Expand the list by clicking on the + sign next to the metadata that you are interested in. For example, if you would like Date, click on the + sign next to Date and the following expandable list will appear:
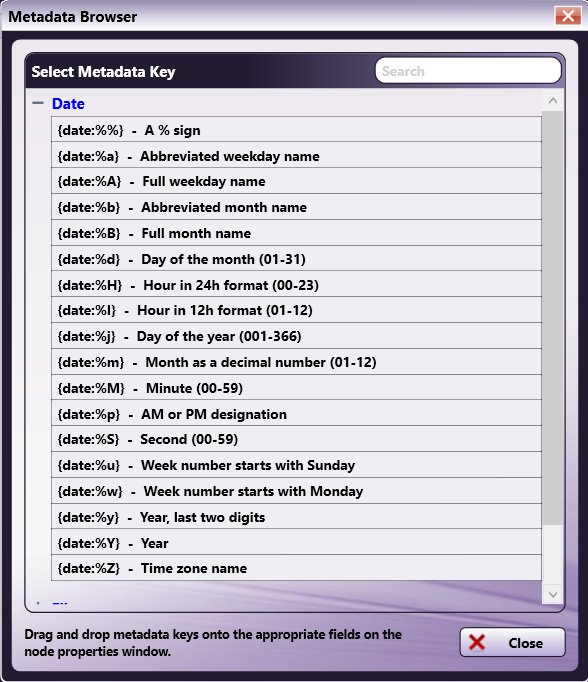
-
Search for metadata by entering the appropriate text string in the empty Search field on the right-hand side of the window.
-
Drag-drop metadata keys from the Metadata Browser window to the Metadata Value field.
-
Specify a page-level and/or occurrence number for the metadata reference by entering the correct syntax in the Metadata Value field.
Using Pattern Matching with Regular Expression Condition
If you choose the Regular Expression condition, you can use the Pattern Matching Tool to define your regular expression.
Do the following:
-
Choose Regular Expression as a Condition. A Browse Patterns button will appear next to the Metadata Value field, as in the following illustration:

-
Click on the Browse Patterns button to open the Pattern Matching Tool.
-
Use the Pattern Matching Tool to select or create a pattern; then select the Save button. The Pattern Matching Tool will close.
-
In the Metadata Value field, you will see the regular expression for the Pattern that you chose, as in the following illustration:

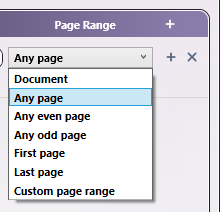
Step 4: Specifying Page Ranges For Processing
The Page Range Process area allows you to specify the range for the metadata rule. Options include:
-
Document - Metadata associated with the file.
-
Any page - Metadata associated with any page within the file.
-
Any even page - Metadata associated with any even pages within the file.
-
Any odd page - Metadata associated with any odd pages within the file.
-
First page - Metadata associated with the first page of the file.
-
Last page - Metadata associated with the last page of the file.
-
Define your own page range - Apply rule to a custom page range. Once you choose this option, an empty field will appear to enter the page range. Do the following:
-
Specify a page range by using commas and/or dash signs counting from the start of the document. For example, enter 1, 2, 5-7 to specify pages 1, 2, 5, 6, and 7.
-
Specify a specific stamping sequence within a range of pages by using parentheses. For example, enter 1-10(3) to specify every third page from pages 1 to 10.
-
Specify the last page by using ‘end.’ For example, enter end(-5) - end to specify pages 15-20 of a 20-page document.
-
Other examples include:
To specify pages 1, 2, 5,6,7, and 19 of a 20-page document, enter: 1,2,5-7, end(-1).
To specify pages 10-15 of a 20-page document, enter: 10-end(-5).
To specify every other page from pages 10-15 of a 20-page document, enter: 10-end(-5)(2).
To specify pages 15-20 of a 25-page document, enter: end(-10)-end(-5).
To specify pages 10-20 of a 20-page document, enter: end(-10)-end.
Note: If you specify a page range that does not correspond to the number of pages in the incoming document (e.g., processing pages 10-20 for a three-page document), then the file will go out on error.
Setting Up Multiple Rules
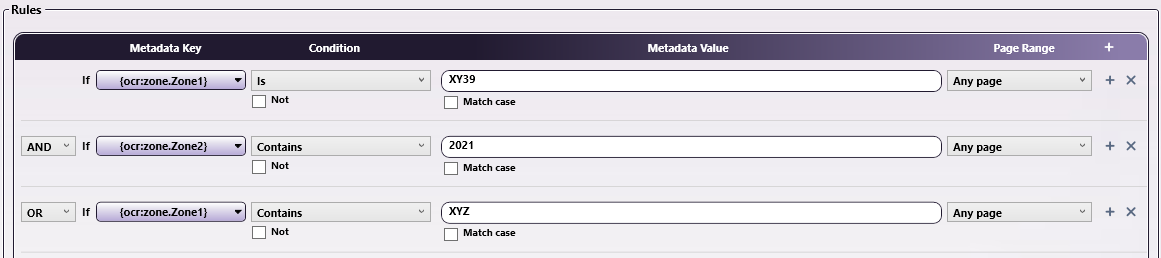
The Metadata Route node supports multiple rules. When using multiple rules, they can be combined by selecting the AND and/or OR from the dropdown, as in the following illustration:
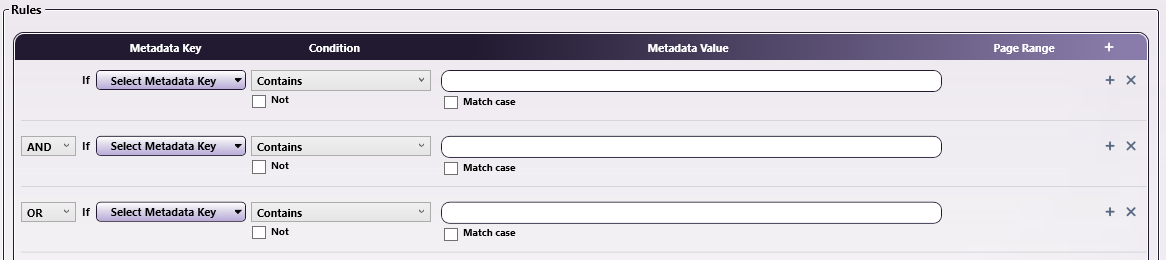
Note: When using multiple rules, the node processes AND rules before processing OR rules. Any rule with AND selected will combine with the row above to form a single validation event. For example, in the following illustration, the node will check to see if the metadata for zone 1 is “XY39” and if the metadata for zone 2 contains “2021”. If both are true, the document will be routed along the “Yes” workflow. If either of those conditions is not true, the node will check to see if the metadata for zone 1 contains “XYZ”. If it does, the document will be routed along the “Yes” workflow. If either of the AND rules and the OR rule is false, the document will be routed along the “No” workflow.