Advanced Bates Stamping at the Panel
Dispatcher Phoenix Bates stamps can be created and modified at the MFP panel. Any changes made to an existing Bates stamp at the panel will be automatically reflected in Dispatcher Phoenix as well.
Note: Accessing the Advanced Bates Stamp feature is ONLY supported on MFPs running a Graphical User Interface.
Getting Started
To work with Bates stamps at the device panel, do the following:
-
Configure your workflow to include a MFP Panel node and at least one Advanced Bates Stamp node. Make sure that the Advanced Bates Stamp node has the Enable editing on MFP panel option enabled.
-
Make sure that your workflow is running.
When you log into Dispatcher Phoenix and access the running workflow at the panel, you will see the Workflow Details screen, as in the following illustration:
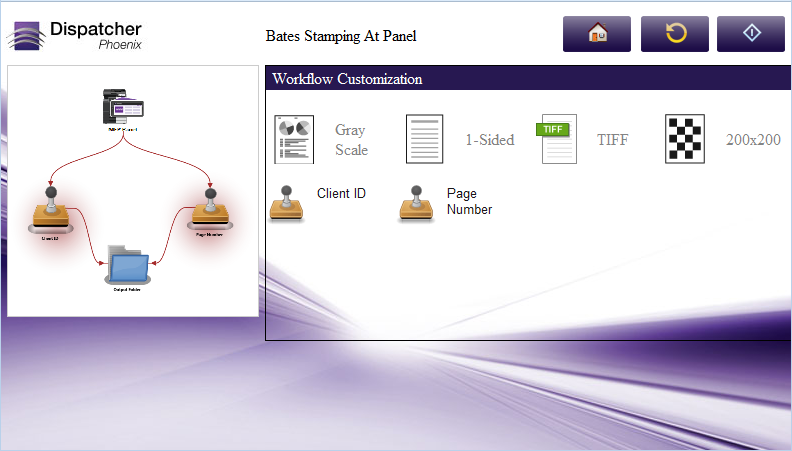
To view, edit, and create new Bates stamps, tap on the icon of the Advanced Bates Stamp node that you are interested in. The Node Configuration screen will appear, as in the following illustration:
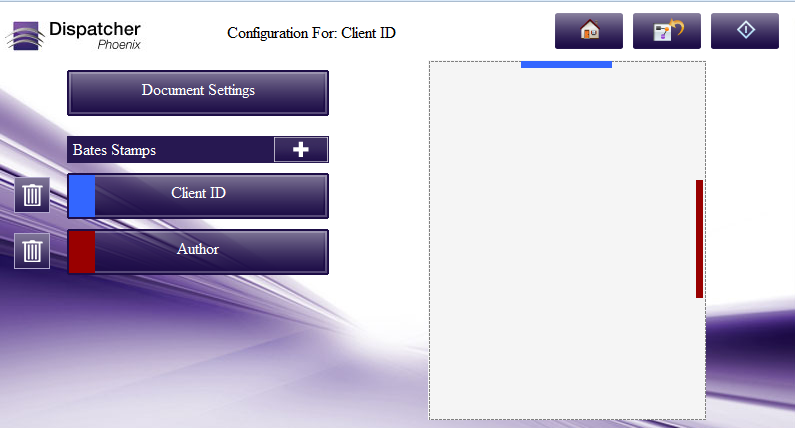
This screen displays the Bates stamps that have already been defined in the Advanced Bates Stamp node. A maximum of three Bates stamps are displayed on the screen. Up and down arrows are provided to navigate to additional Bates stamps.
On this screen, you can do the following:
-
Tap the Document Settings button to modify the properties of the document and other stamping options.
-
Tap the + button to add another stamp to the node.
-
Tap on a specific Bates stamp to edit the components of an existing stamp.
Using Buttons
Most of the Advanced Bates Stamping screens on the MFP panel include buttons that will allow you to save or discard your changes, as well as navigate through the Stamping screens.
| Icon | Click On To… |
|---|---|
 |
Return to the list of workflows that are currently running on the MFP. If only one workflow is running, the Workflow Details screen will appear for that workflow. |
 |
Return to the Workflow Details screen. |
 |
Start the scan. |
| Keep your changes. | |
| Return to the previous screen. | |
| Discard your changes. | |
| Return to the list of workflows or Workflow Details screen. |
Changing Document Settings
When you tap on the Document Settings button, the Document Settings screen will appear, as in the following illustration:
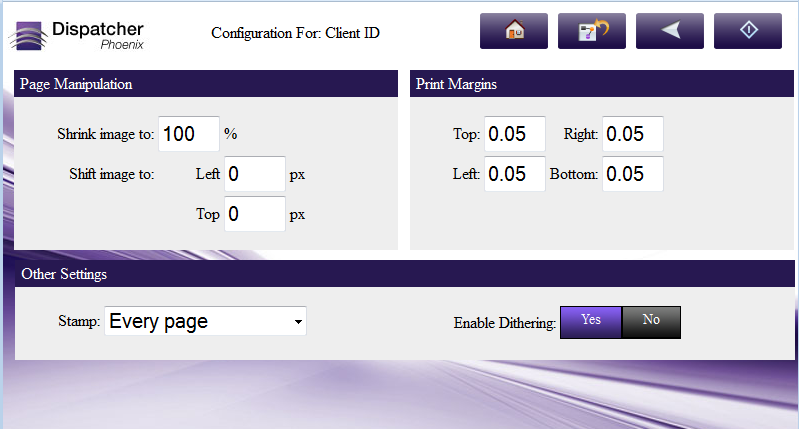
Do the following:
-
To shrink the content of the page, enter the percentage that the contents should shrink to in the Shrink Image to box.
-
To shift the position of the content, enter an amount, in pixels, for the positions in the Left and Top fields.
-
To change the print margins of your documents, enter new values in the Print Margins Top, Bottom, Left, Right fields.
-
Specify the pages that should be stamped using the Stamp pull-down menu. Options include:
-
Every page - Stamp on every page.
-
Every even page - Stamp on even pages.
-
Every odd page - Stamp on odd pages.
-
First page - Stamp on the first page only.
-
Last page - Stamp on the last page only.
-
Define your own page range - Define a custom page range for the stamps. Once you choose this option, an empty field will appear to enter the page range. See the “Advanced Bates Stamp” section for more information.
-
-
Tap Dithering Yes or No buttons to enable or disable dithering.
Configuring a Bates Stamp
You can add a new Bates stamp or edit an existing Bates stamp in the node.
Adding a New Bates Stamp
To configure a new Bates stamp, tap on the + button. The New Bates Stamp screen will appear, as in the following illustration:
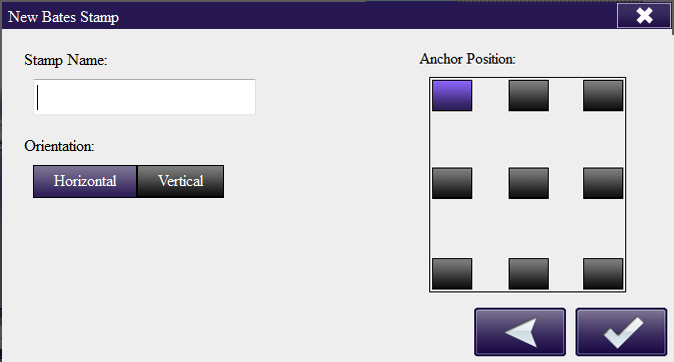
Do the following:
-
In the Stamp Name field, enter a meaningful, identifying name for the Bates stamp.
-
Specify the Bates stamp orientation using the Horizontal or Vertical buttons.
-
In the Anchor Position box, tap on a button to specify a default anchor position for the newly added Bates stamp.
When done, a blank Stamp Configuration screen will appear. See the following section for more information on how to use that screen.
Editing an Existing Bates Stamp
To edit an existing Bates stamp, tap on a stamp listed under the Bates Stamp area on the Node Configuration screen.
The Stamp Configuration screen will appear. A maximum of five stamping components are displayed on the screen. Up and down arrows are provided to navigate to additional stamping components.
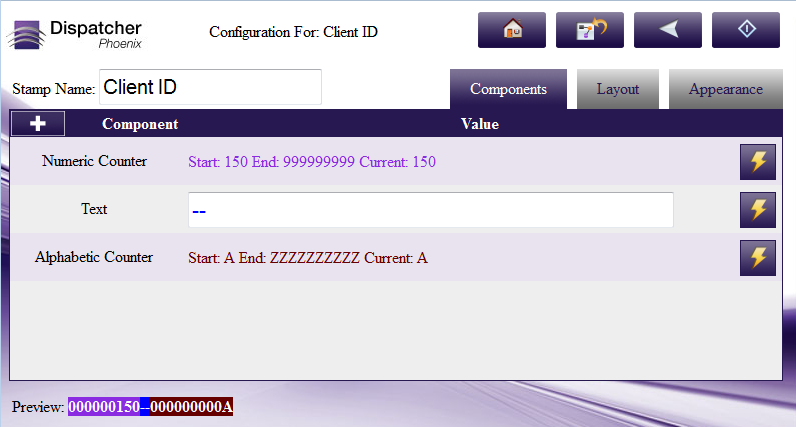
On this screen, you can either modify existing stamp components or add a new stamping component to the stamp.
On this screen, you can do the following:
- Edit the name of the stamp in the Stamp Name field.
- Select the Layout tab to modify the dimensions of the Bates Stamp.
- Select the Appearance tab to modify the appearance of the Bates stamp.
- Select the Action item icons next to each field to edit the component.
- View a sample of what the defined Bates stamp would look like using the Preview area at the bottom of the screen.
Edit Existing Stamp Components
To edit an existing stamp component, do one of the following:
-
Tap on the component,
or
-
Tap on the Action button.
When you tap on the Action button, a toolbar will appear, as in the following illustration:

Edit Existing Stamp Components
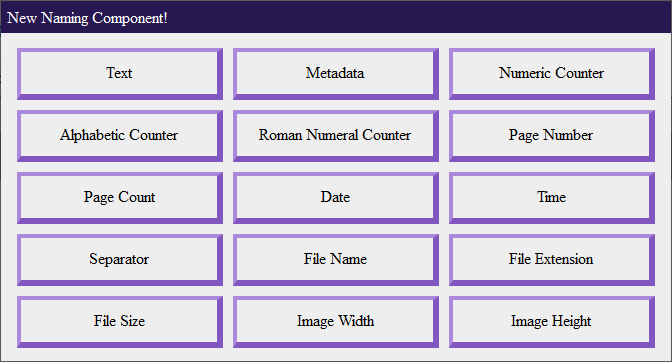
To add a new Bates stamp to the node, tap on the + icon. The New Naming Component screen will appear, listing all of the available stamp components that can be added to the Bates stamp, as in the following illustration:
Adding Text
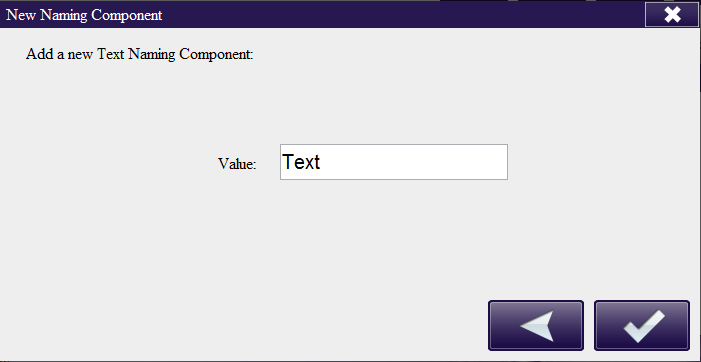
To add text to the Bates stamp, do the following:
-
Tap on the Text button.
-
On the Text Component window, enter new text in the Value field.
Adding Metadata
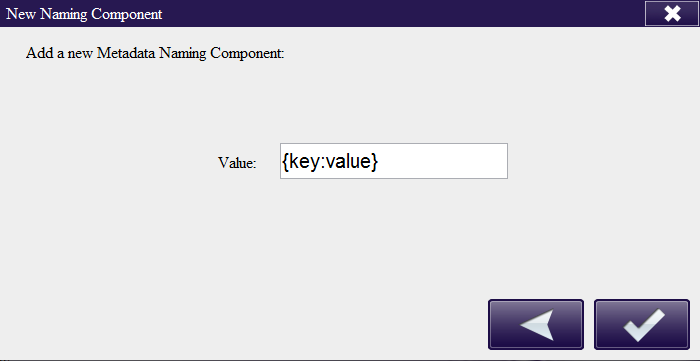
To add metadata to the Bates stamp, do the following:
-
Tap on the Metadata button.
-
On the Metadata Component window, enter a variable in the Value field.
Adding a Numeric Counter
To add a new numeric counter to the Bates stamp, do the following:
-
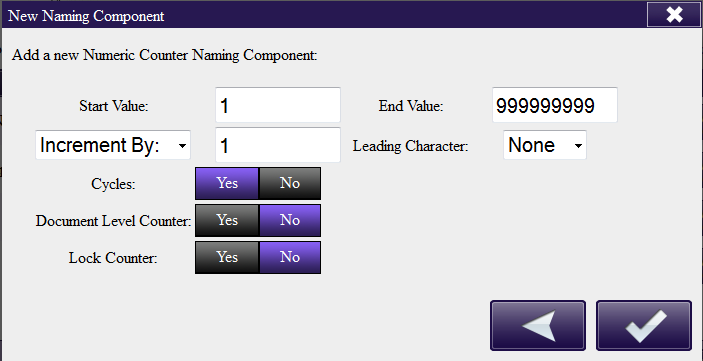
Tap on the Numeric Counter button.
-
On the Numeric Counter window, do the following:
-
Enter an appropriate starting value for the counter in the Start Value field.
-
Enter an appropriate ending value for the counter in the End Value field.
-
Choose to either Increment By or Decrement By using the drop-down list provided; then enter the appropriate value by which the counter should increment or decrement.
-
Pad a counter with leading characters by choosing from the Leading Character drop-down list.
-
Choose whether or not the numeric counter should cycle automatically once the specified End Value has been reached by tapping on the Cycles Yes/No buttons.
-
Choose whether or not the counter should continue with each successive document or with each page by tapping on the Document Level Counter Yes/No buttons.
-
Choose whether or not to lock a counter so that it cannot be reset by tapping on the Lock Counter Yes/No buttons.
-
Adding an Alphabetic Counter
To add a new alphabetic counter to the Bates stamp, do the following:
-
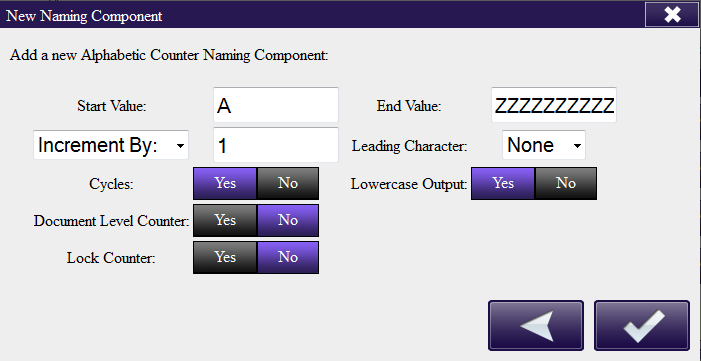
Tap on the Alphabetic Counter button.
-
On the Alphabetic Counter window, do the following:
-
Enter an appropriate starting value for the counter in the Start Value field.
-
Enter an appropriate ending value for the counter in the End Value field.
-
Choose to either Increment By or Decrement By using the drop-down list provided; then enter the appropriate value by which the counter should increment or decrement.
-
Pad a counter with leading characters by choosing from the Leading Character drop-down list.
-
Choose whether or not the alphabetic counter is displayed in upper or lowercase letters by tapping on the Lowercase Output Yes/No buttons.
-
Choose whether or not the numeric counter should cycle automatically once the specified End Value has been reached by tapping on the Cycles Yes/No buttons.
-
Choose whether or not the counter should continue with each successive document or with each page by tapping on the Document Level Counter Yes/No buttons.
-
Choose whether or not to lock a counter so that it cannot be reset by tapping on the Lock Counter Yes/No buttons.
-
Adding a Roman Numeral Counter
To add a new Roman numeral counter to the Bates stamp, do the following:
-
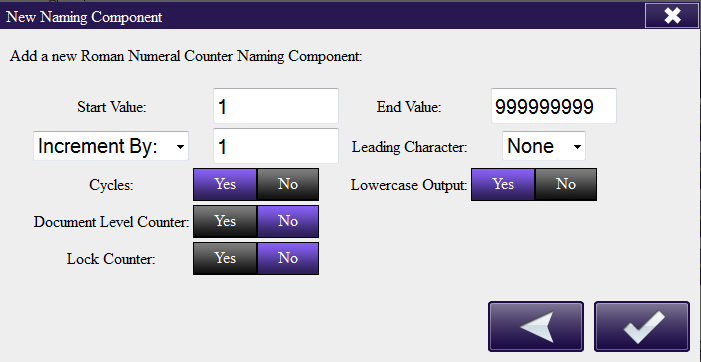
Tap on the Roman Numeral Counter button.
-
On the Roman Numeral Counter window, do the following:
-
Enter an appropriate starting value for the counter in the Start Value field.
-
Enter an appropriate ending value for the counter in the End Value field.
-
Choose to either Increment By or Decrement By using the drop-down list provided; then enter the appropriate value by which the counter should increment or decrement.
-
Pad a counter with leading characters by choosing from the Leading Character drop-down list.
-
Choose whether or not the Roman numeral counter is displayed in upper or lowercase letters by tapping on the Lowercase Output Yes/No buttons.
-
Choose whether or not the numeric counter should cycle automatically once the specified End Value has been reached by tapping on the Cycles Yes/No buttons.
-
Choose whether or not the counter should continue with each successive document or with each page by tapping on the Document Level Counter Yes/No buttons.
-
Choose whether or not to lock a counter so that it cannot be reset by tapping on the Lock Counter Yes/No buttons.
-
Adding a Page Number
To add a page number to the Bates stamp, do the following:
-
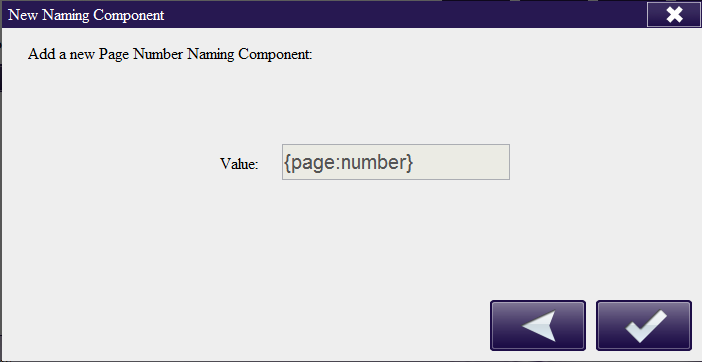
Tap on the Page Number button.
-
On the Page Number Component window, the {page:number} variable will be read-only.
-
Tap on the Save button to add a Page Number to the Bates stamp.
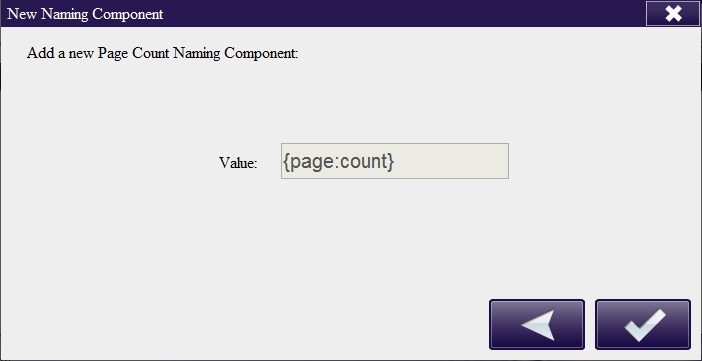
Adding a Page Count
To add the page count to the Bates stamp, do the following:
-
Tap on the Page Count button.
-
On the Page Count Component window, the {page:count} variable will be read-only.
-
Tap on the Save button to add the Page Count to the Bates stamp.
Adding the Date
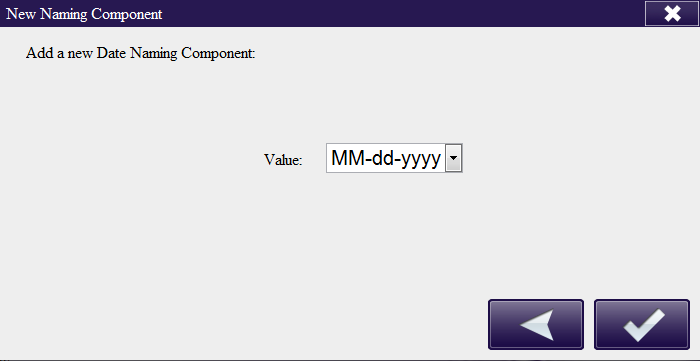
To add the date to the Bates stamp, do the following:
-
Tap on the Date button.
-
On the Date Component window, choose the appropriate format for the date from the Value drop-down list.
Adding the Time
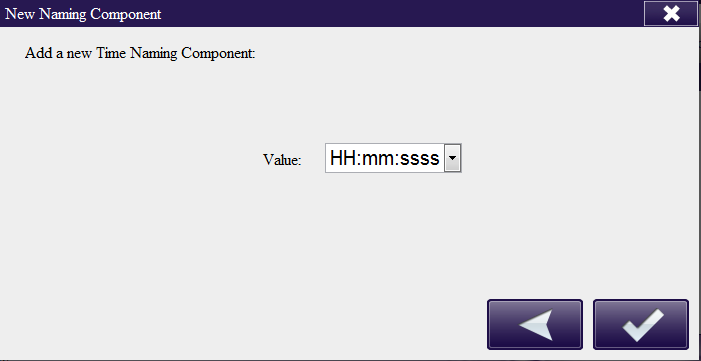
To add the time to the Bates stamp, do the following:
-
Tap on the Time button.
-
On the Time Component window, choose the appropriate time format from the Value drop-down list.
Adding a Separator
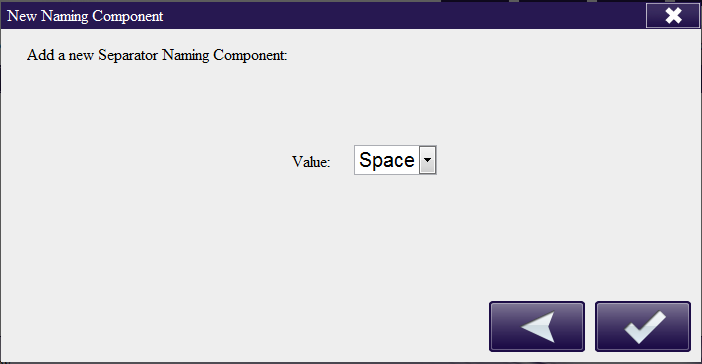
To add a separator to the Bates stamp, do the following:
-
Tap on the Separator button.
-
On the Separator Component window, choose the appropriate separator from the Value drop-down list.
Adding File Name
To add a file name to the Bates stamp, do the following:
-
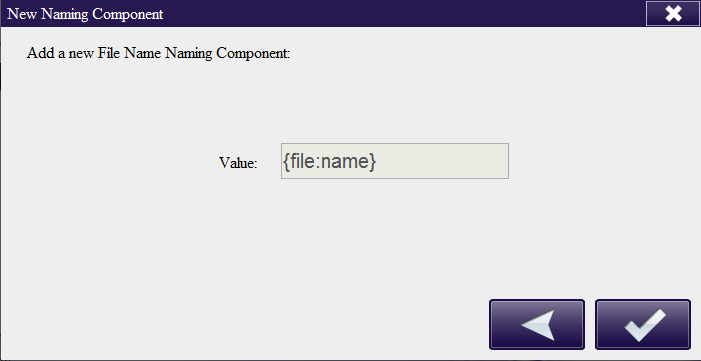
Tap on the File Name button.
-
On the File Name Component window, the {file:name} variable will be read-only.
-
Tap on the Save button to add the file name to the Bates stamp.
Adding File Extension
To add a file extension to the Bates stamp, do the following:
-
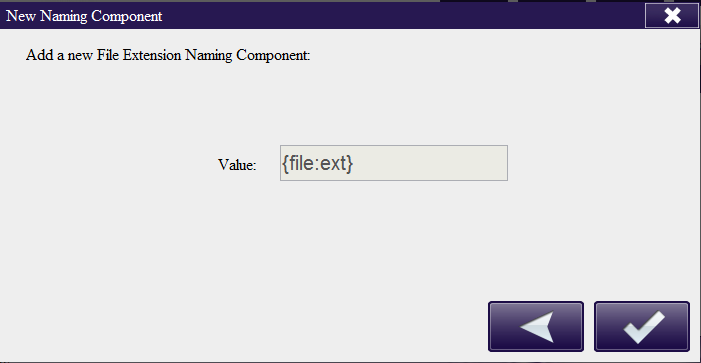
Tap on the File Extension button.
-
On the File Extension Component window, the {file:ext} variable will be read-only.
-
Tap on the Save button to add the file extension to the Bates stamp.
Adding File Size
To add a file size to the Bates stamp, do the following:
-
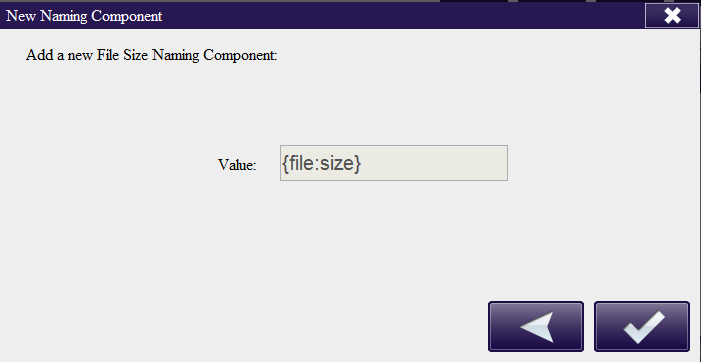
Tap on the File Size button.
-
On the File Size Component window, the {file:size} variable will be read-only.
-
Tap on the Save button to add the file size to the Bates stamp.
Adding Image Width
To add the image width to the Bates stamp, do the following:
-
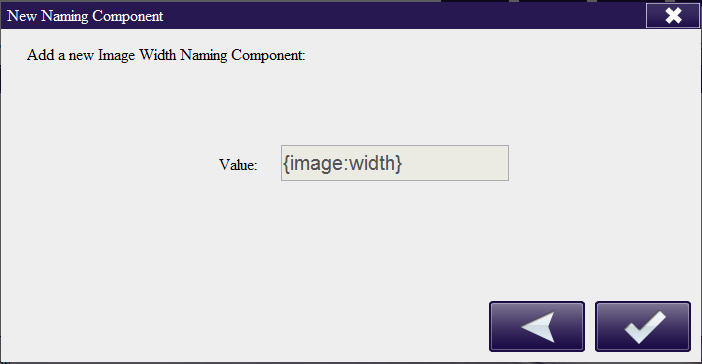
Tap on the Image Width button.
-
On the Image Width Component window, the {image:width} variable will be read-only.
-
Tap on the Save button to add the image width to the Bates stamp.
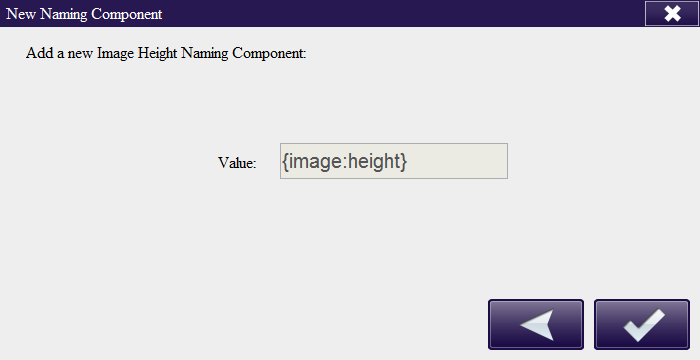
Adding Image Height
To add the image height to the Bates stamp, do the following:
-
Tap on the Image Height button.
-
On the Image Height Component window, the {image:height} variable will be read-only.
-
Tap on the Save button to add the image height to the Bates stamp.
Modifying the Layout of the Bates Stamp
To modify the layout of the Bates stamp, tap on the Layout tab on the Node Configuration screen. The following screen will appear:
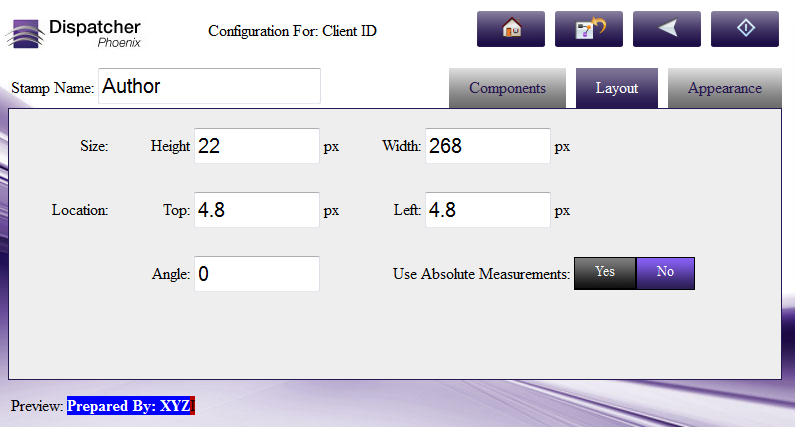
Do the following:
-
In the Height and Width fields, enter an appropriate value (in pixels) for the stamp’s bounding box.
-
In the Location Top and Left fields, enter an appropriate value (in pixels) for the stamp’s bounding box on the document.
-
In the Angle field, enter a rotating angle for the stamp’s bounding box.
-
To ensure that the bounding box is the same size and position regardless of the document being processed, check the Use Absolute Measurements Yes/No buttons. Once this option is enabled, the stamp will not scale but will remain the same. Note that this may mean that if a document with a different layout orientation or size is processed, the stamp may be positioned off the page.
Modifying the Appearance of the Bates Stamp
To modify the appearance of the Bates stamp, tap on the Appearance tab on the Node Configuration screen. The following screen will appear:
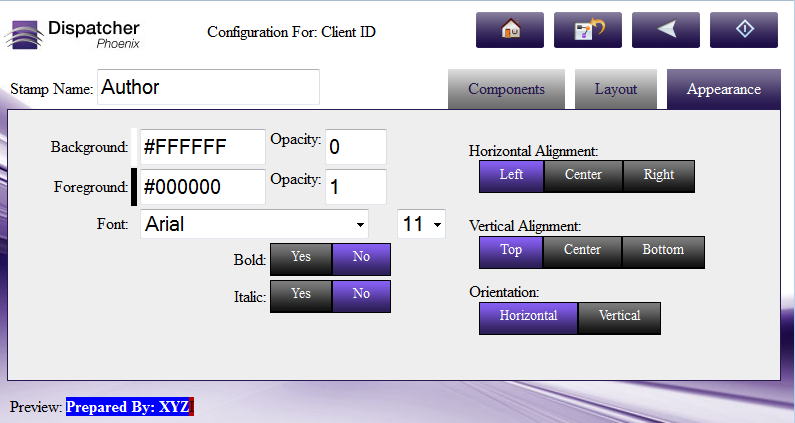
Do the following:
-
Specify color:
-
In the Background Color field, enter the value of the color that you’d like to see in the background of the stamp’s bounding box.
-
In the Foreground Color field, enter the value of the color that you want for the content of the stamp.
-
For both Background and Foreground, enter its opacity (decimal value between 0-1) in their respective Opacity fields.
-
You can type any HTML color name into the field and it will be automatically converted to the appropriate HTML color code. Basic color names are aqua, black, blue, fuchsia, gray, green, lime, maroon, navy, olive, purple, red, silver, teal, white, and yellow.
-
-
Using the Horizontal Alignment and Vertical Alignment buttons, choose the stamp content’s horizontal and vertical alignments (Left/Center/Right or Top/Center/Bottom).
-
In the Font drop-down lists, choose a font family and font size for the content of the stamp.
-
Using the Orientation buttons, choose an orientation for the stamp (Horizontal or Vertical).
-
Using the Bold and Italic Yes/No buttons, choose whether you’d like to bold or italicize the stamp’s content.

