DSP Web In
![]()
The DSP Web In node is designed for use with applications/features that have been developed by members of the Dispatcher Phoenix Developer Support Program (DSP). For more information about the DSP, please contact your Konica Minolta representative.
Using the DSP Web In Node
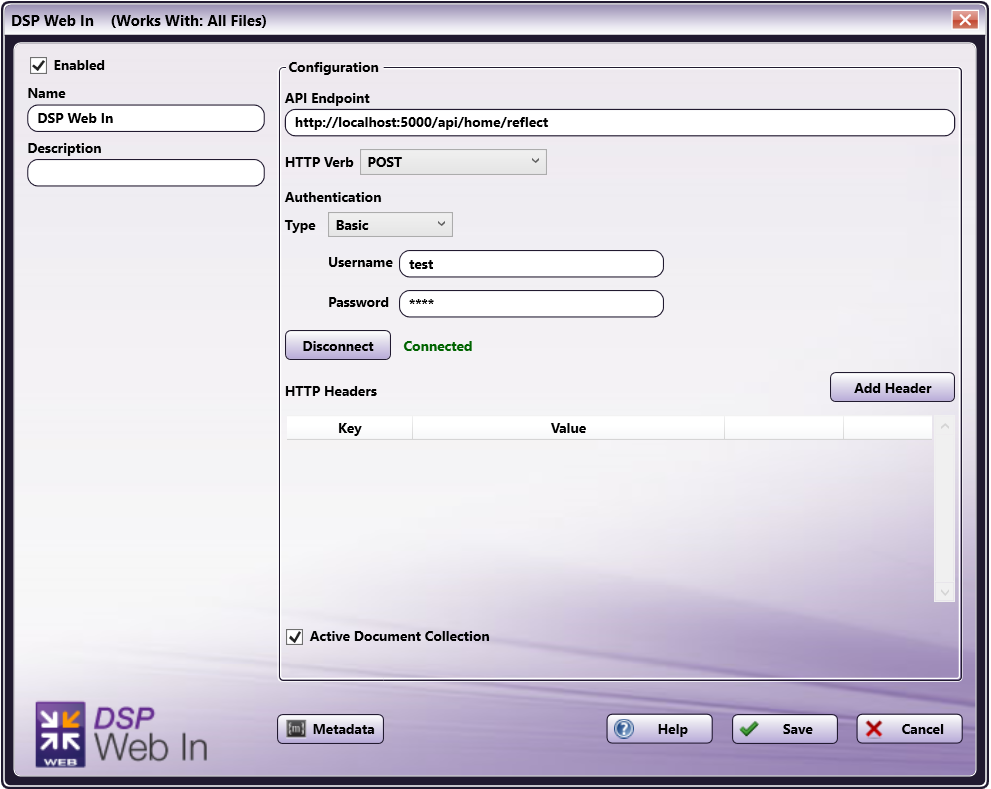
To open the DSP Web In node window, add a distribution node for DSP Web In node and double-click on it.
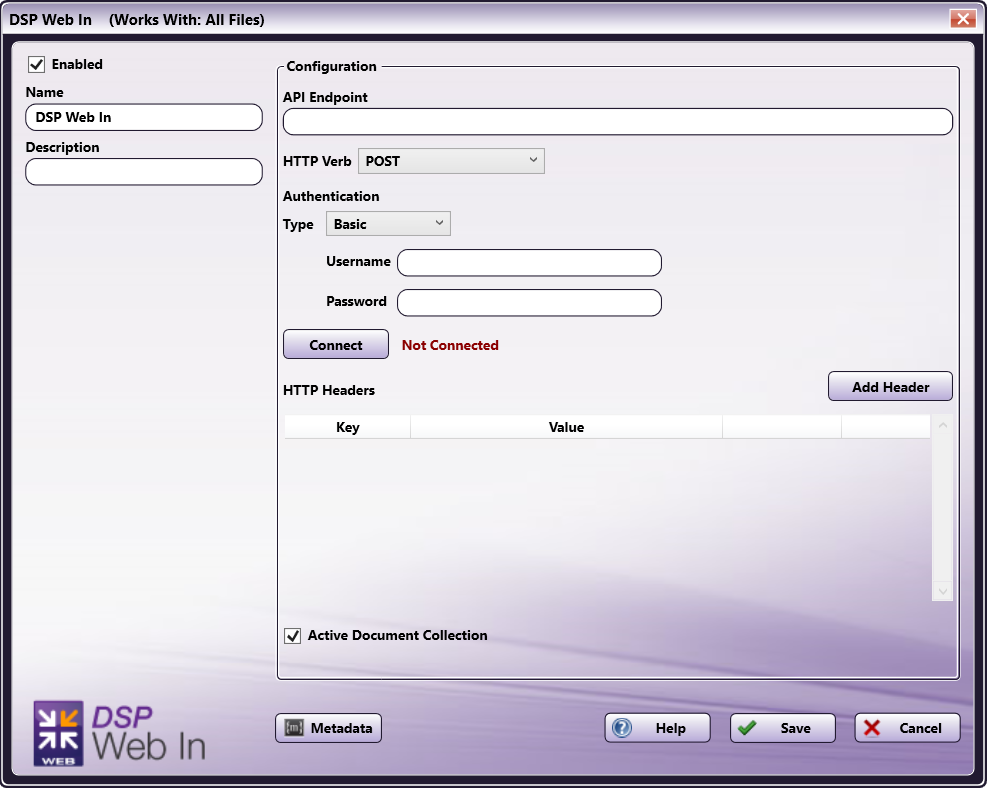
There are several buttons and fields that appear, including:
-
Enabled - To enable this node in the current workflow, check the box at this field. When unchecked, this input will be ignored. While the workflow will still validate if there is at least one enabled collection node, documents will not be collected by the DSP Web In node if the Enabled box is unchecked.
-
Node Name - The node name defaults into this field. This name appears in the workflow under the node icon. Use this field to specify a meaningful name for the node that indicates its use in the workflow.
-
Description - Enter an optional description for this node. A description can help you remember the purpose of the node in the workflow or distinguish nodes from each other. If the description is long, you can hover the mouse over the field to read its entire contents.
-
Metadata - To access the Metadata Browser window, click this button.
-
Help - To access Dispatcher Phoenix Online Help, click this button.
-
Save - To preserve your node definition and exit the window, click this button.
-
Cancel - To exit the window without saving any changes, click this button.
Application Setup
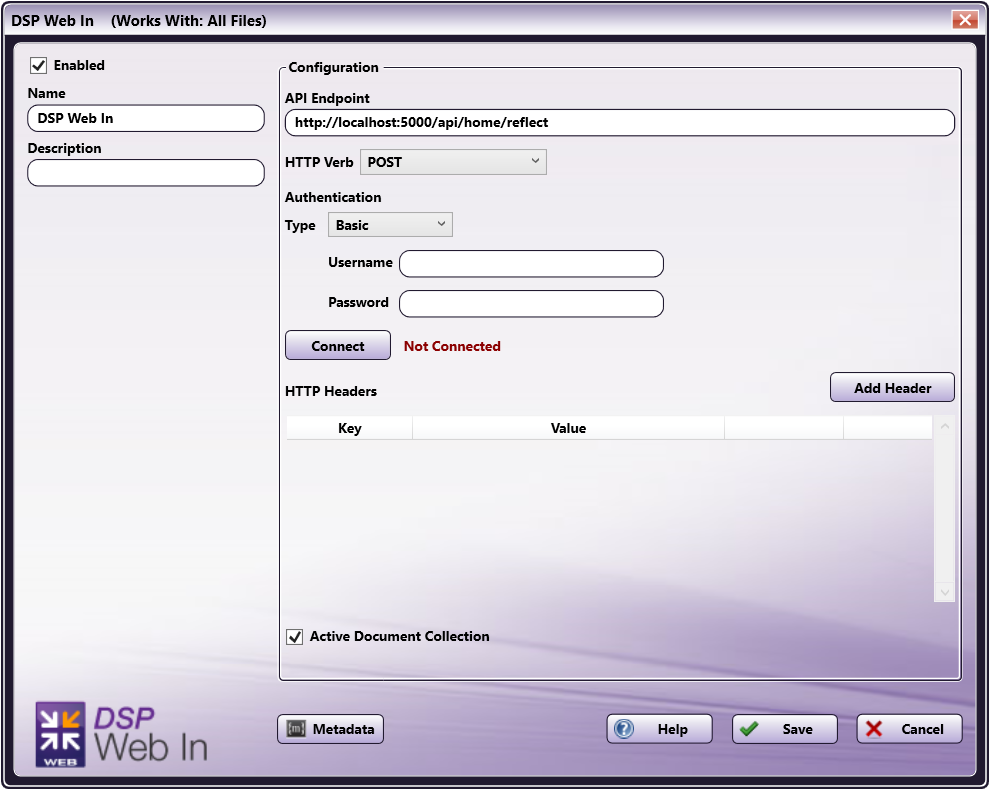
To use this with a DSP-developed web service, you must configure the node to point to the web-based application or API’s location (e.g., a URL). To configure the node, do the following:
-
Double-click the DSP Web In node to open it.
-
Enter the API Endpoint to the application.
-
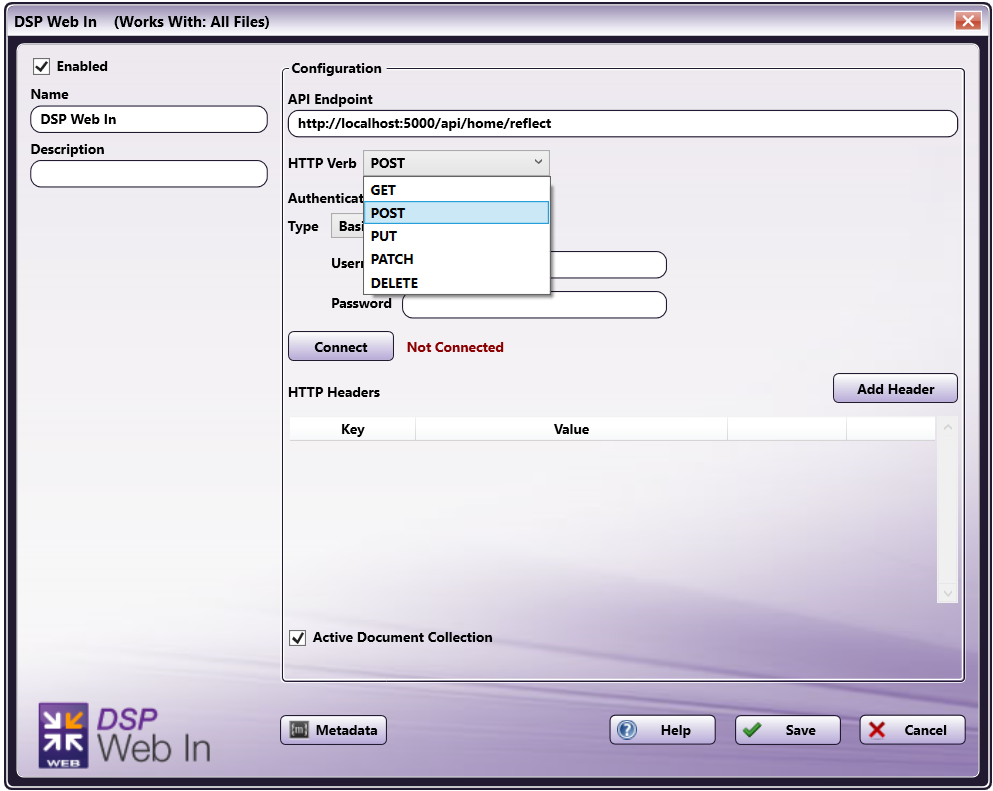
Select the HTTP Verb. Options include
-
Get
-
Post
-
Put
-
Patch
-
Delete
-
-
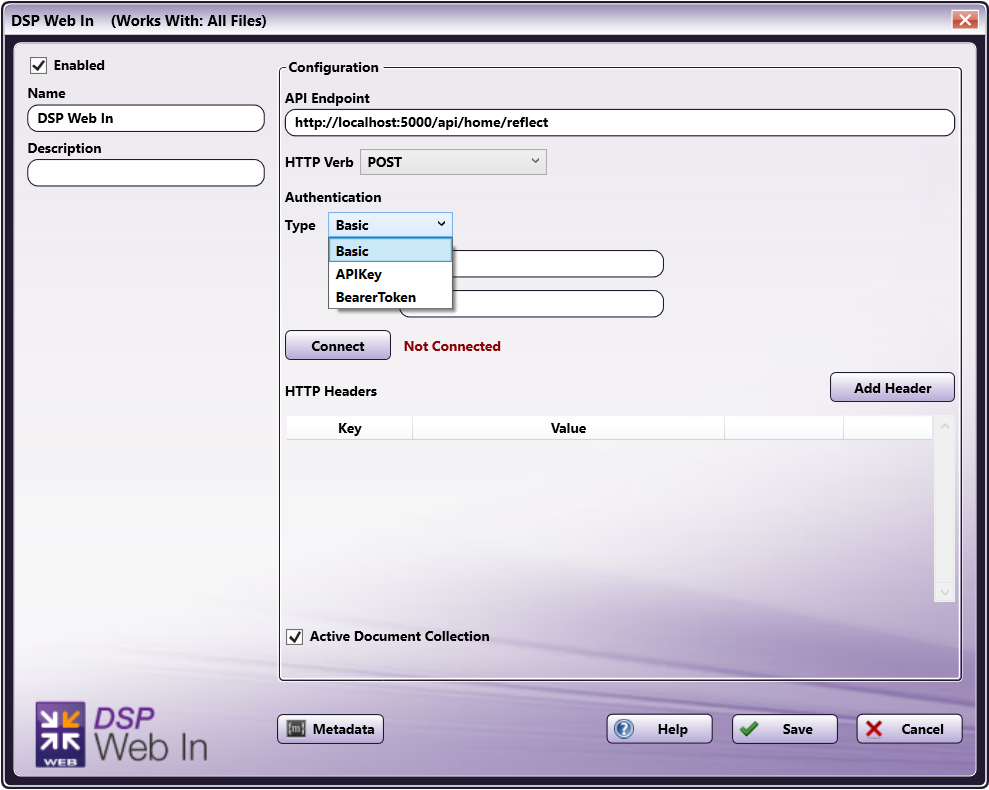
Select your Authentication type. Options include:
-
Basic - This will prompt you to enter your Username and Password.
-
APIKey - This will prompt you to enter your Key Name and Key Value.
-
Bearer Token - This will prompt you to enter your Token.
-
-
Select the Connect button. This will establish a connection between the DSP Web In node and the application and connect any metadata keys or value pairs provided from the application so the metadata can be used by subsequent nodes in the workflow. This will also confirm that the application is properly registered with a valid DSP license key.
Important! If you have not successfully connected, the workflow cannot be properly validated.
Note: Any changes made to the API field will require you to select the Connect button to reestablish the connection.
-
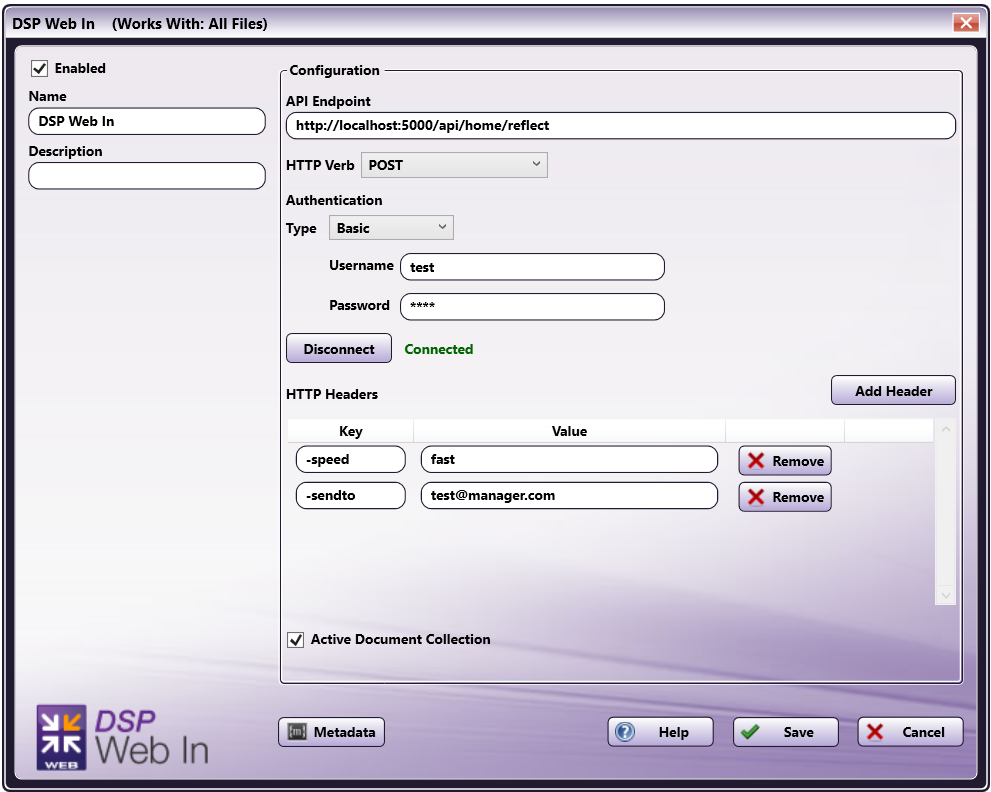
If needed, add any Headers necessary for the application. To add a Header, select the Add Header button. This will allow you to enter a Key and Value for the Header. Headers are additional coding commands outside the application, which can alter how the application performs. Any necessary Header Keys and Values will likely be provided in the installation instructions along with the application; otherwise, this field can be left blank. You may add more than one Header. To delete a Header you’ve added, select the Remove button next to the Header. Headers are also metadata compatible. To add metadata to a Header, click the Metadata button and drag-drop the metadata key into the Header Key or Value field.
-
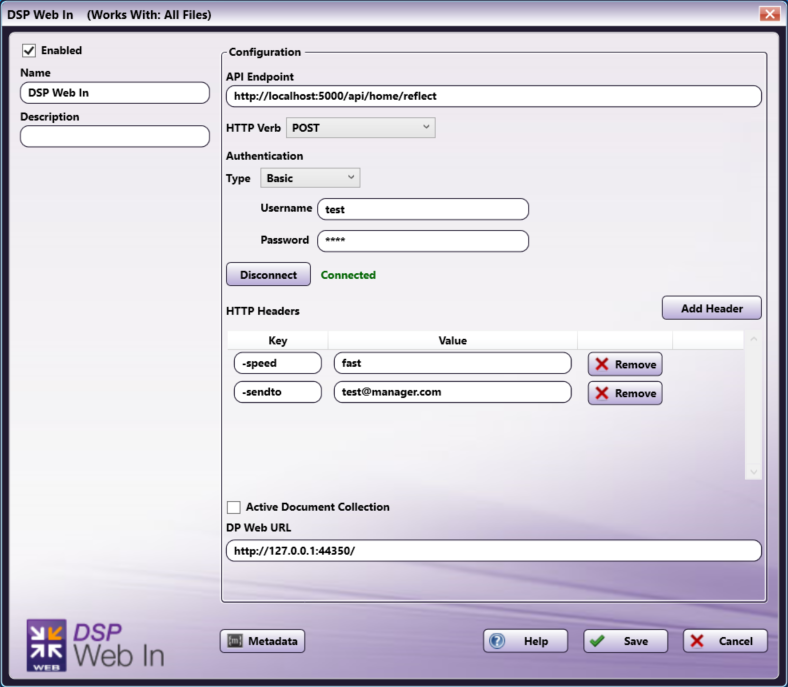
For Active Document Collection, leave this box checked. This configuration allows the DSP Web In node to continually check for new documents. By unchecking the box, the node will no longer actively check for documents, but will wait for the web API to tell it there is a file waiting to be collected. If you uncheck the box, you must enter your Dispatcher Phoenix Web URL to ensure communication between the node and the web API.
Note: If the Dispatcher Phoenix installation and web API are hosted on devices with different IP addresses, you must configure the DSP Web In node with the full explicit DP Web URL in order for the third party application to reach your DP Web.
-
Save and close the node.
Note: The DSP Web In node will collect documents whenever possible, according to the specifications of the connected application. In the event that the node or application generates an error during processing, you will need to consult the application logs for specific details about the error.