Workshare Connector
Important! As of the 9.15.1 release on October 2, 2025, Workshare is no longer supported by Dispatcher Phoenix. As of this date, no new installations, upgraded installations, or transferred installations will include the Workshare Connector. Workflows containing the Workshare Connector will need to be reconfigured with a different distribution node.

The Workshare Connector node allows you to distribute documents to Workshare, a file sharing and collaboration application. Documents can be sent to Workshare via an automated workflow, or you can access Workshare directly at the MFP panel.
Note: To use this Connector, you must have an account with Workshare.
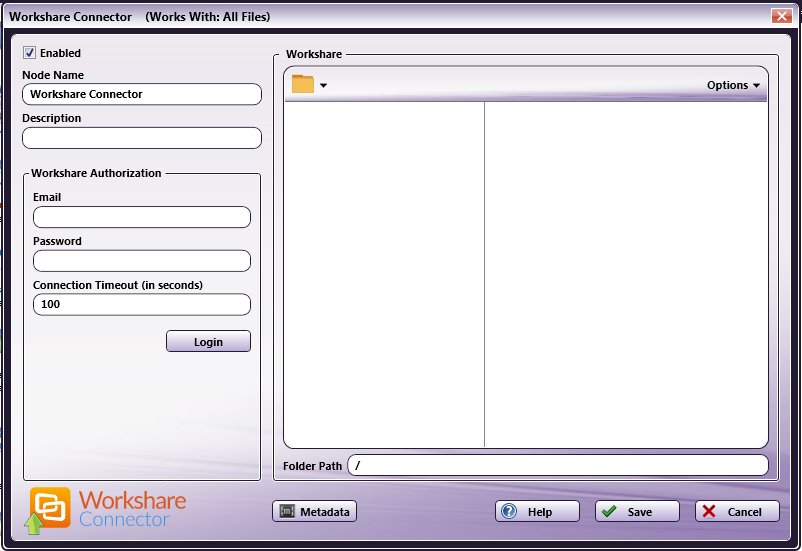
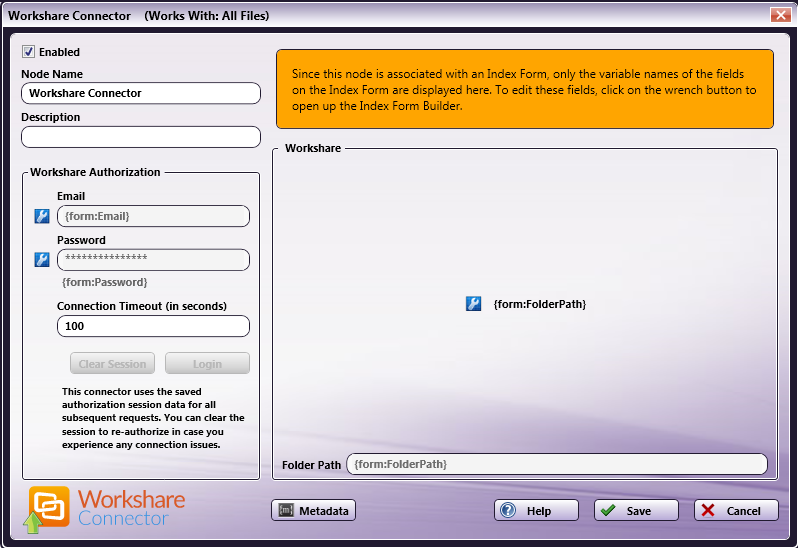
To open the Workshare Connector node’s properties window, add an output node for Workshare to your workflow and double-click on it.
-
Check the Enabled box when there are multiple output locations. When unchecked, this output will be ignored. While the workflow will still validate, documents will not be output and may be lost.
-
In the Node Name field, enter a meaningful name for the Workshare Connector node.
-
In the Description field, enter a description for the Workshare Connector node. Although this is not required, it can be helpful to distinguish multiple destination nodes from each other. If the description is long, you can hover the mouse over the field to read its entire contents.
Configuring the Workshare Connector
To configure the Workshare Connector, you must first receive an authorization token from Workshare to connect to your account; this is done by entering your Workshare credentials in the node properties window.
Connecting To Workshare
To begin, you must first enter Workshare credentials. Do the following:
-
In the Workshare Authorization area’s Email and Password fields, enter your Workshare credentials (the email address used when setting up the account and your Workshare password). If your authorization request is successful and a token has been received from Workshare, you do not need to re-enter credentials again to perform folder operations, such as folder browsing or creating new folders, until the token is no longer valid (e.g., it has expired).
When creating an automated workflow (e.g., uploading files from Input Folder to Workshare automatically), you must log into Workshare at least once from the Workshare node properties window in order to receive a valid token from Workshare.
-
Change the seconds allotted for the time without communication (after the initial connection to the server) before a timeout occurs using the Connection Timeout field, if necessary. The default timeout value is 100 seconds.
-
When you are done, select the Login button. Once authorization is successful, a new Clear Session button will appear, as in the following illustration:
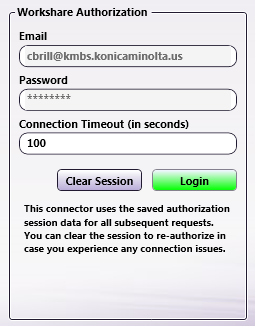
The Clear Session button can be used when the authorization data is no longer valid. In this case, do the following:
-
Select the Clear Session button.
-
Enter Workshare credentials again using the Email and Password fields.
-
Select the Login button when you are done.
-
Selecting A Folder
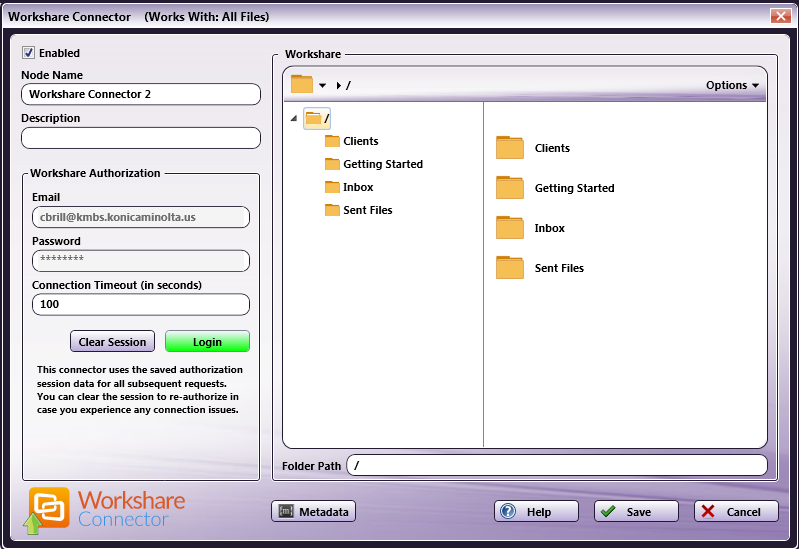
Once connected, the right hand side of the Workshare node properties window displays a tree-view of your folders, sub-folders, and files in Workshare. You can use this area to browse through the folder structure and choose a folder to store your documents in.
See the following illustration for an example:
Sending Documents To A New Folder
You can also choose to create a new folder in Workshare to send documents to. Do one of the following:
-
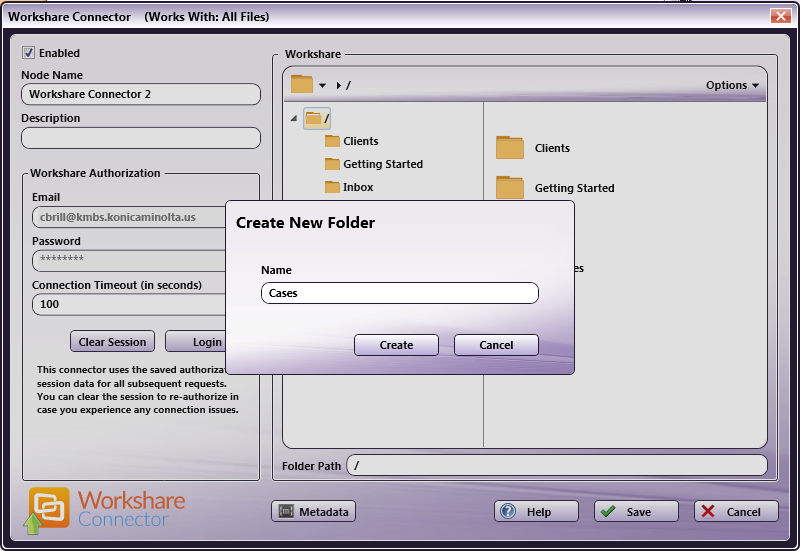
Select the New folder option from the Options drop-down menu or press Ctrl + Shift + N.
In the Create New Folder window that appears, enter the name for the new folder in the Name field; then select the Create button. The newly created folder will now appear in the Folder view. In the following illustration, a new folder called “Cases” is being created:
-
Enter a new folder name in the Folder Path field.
-
Use metadata to specify a folder path at run time.
For example, you could use zonal OCR to extract client names from incoming documents and then use that OCR metadata in the Folder Path field. In this case, a folder name with the client name will be created in Workshare and documents will be automatically uploaded to that new folder at run time.
Note: You cannot create a folder within a folder that does not already exist. For example, you cannot use two different metadata variables to create a folder within a folder (e.g., {bates:Counter}/{file:name}).
To use metadata, do the following:
-
Select the Metadata button to open up the Metadata Browser window.
-
On the Metadata Browser window, select the metadata variable you are interested in; then drag-drop it to the Folder Path field.
You may have to manually add the metadata’s page number to the variable. For example: {ocr:zone.Name[1]} would find the metadata on the 1st page. Or, you could add empty brackets (e.g., {ocr:zone.Name[]}) to find the first document-level occurrence of the metadata.
-
Select the Close button on the Metadata Browser window.
-
File Name Restrictions
The following restrictions apply to file names:
-
File names cannot start with a space or end with a space.
-
You cannot start a file name with two period characters (..).
-
Non-printable characters cannot be included in a file name (tabs, newlines, etc.)
-
Do not use < > : " / \ | ? *
View Options
You can adjust the default view of your Workshare folders in the node properties window by using the Options button on the top right hand side of the window. Do the following:
-
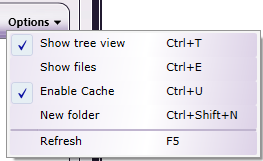
Click on the Options button. The following drop-down menu will appear:
-
To turn off the default view, uncheck the Show tree view option or press Ctrl + T.
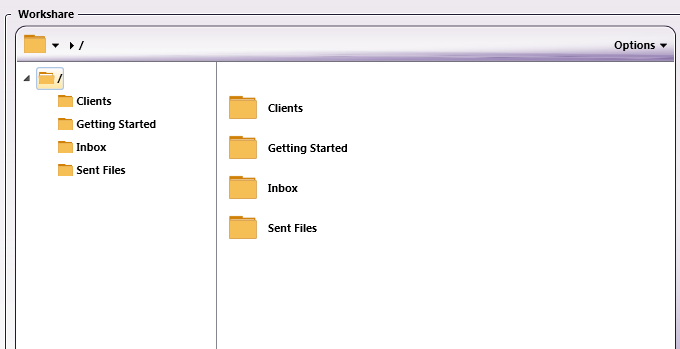
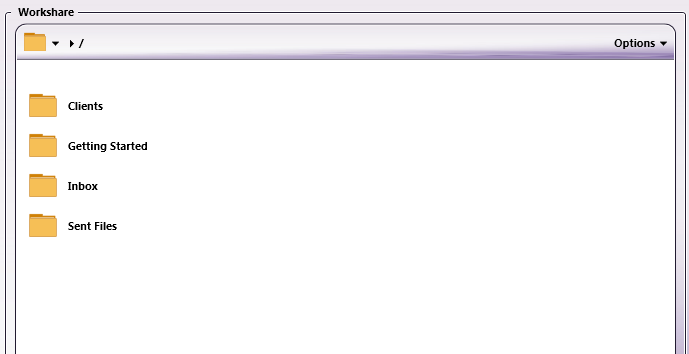
See the following illustrations for comparison on the different folder views available:
Tree View ON
Tree View OFF
-
To hide the files stored in Workshare folders, uncheck the Show files option or press Ctrl + E.
-
By default, the Enable Cache option is enabled, allowing the Workshare Connector to cache folders for 30 minutes before requesting new data from Workshare. If you disable this option, Workshare will be queried each time an operation is performed (i.e., selecting a folder at the MFP), which may result in slower performance.
-
To refresh the current view with the most up-to-date folders/files, select the Refresh option or press F5.
Creating a Workshare Connector Index Form
You can create an index form that allows you to log into Workshare at the MFP (with different accounts) and upload scanned documents to Workshare. Do the following:
-
Make sure that your workflow includes a MFP Panel node and Workshare Connector node.
-
Open up the Index Form Builder from the MFP Panel node. You should see a Workshare Connector button under the Workflow Index Fields area.
-
Drag and drop the Workshare Connector button to the Index Form work area. A Scan to Workshare index form will automatically appear, as in the following illustration:
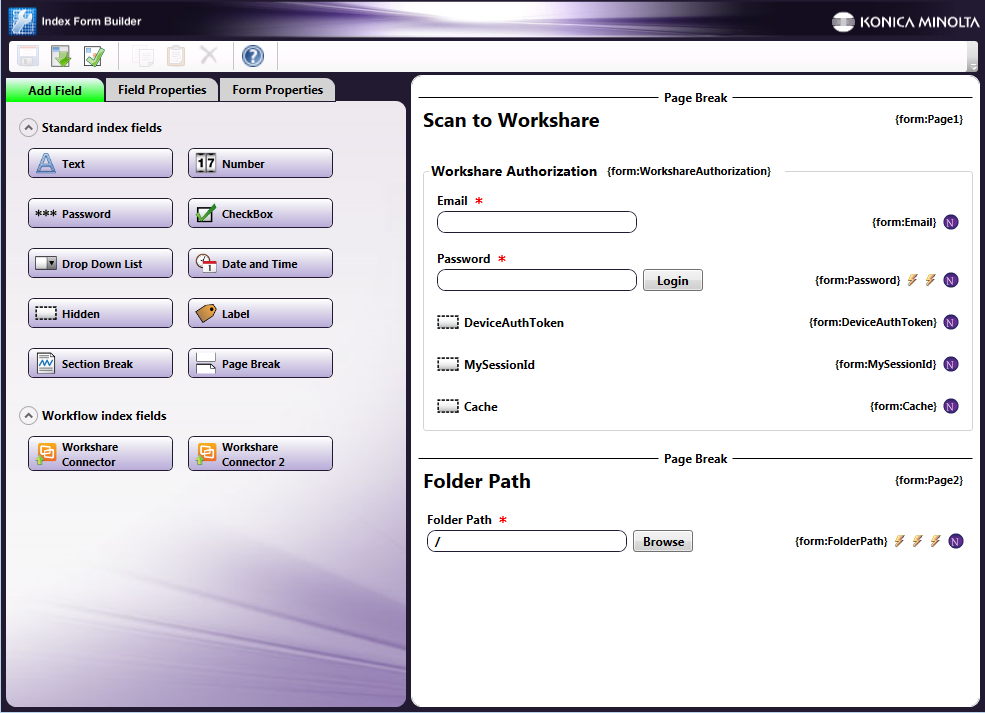
-
Save and close the Index Form Builder.
-
The Workshare Connector node properties window will be automatically populated with the variable names of the fields on the Index Form. Although you cannot edit the fields on this window, you can click on the wrench tool button to go to that section or field in the Index Form Builder. See the following illustration:
Using Workshare Connector Index Form With Multiple Inputs
Once you associate your Workshare Connector node with a MFP Panel node’s index form, all the information necessary to connect and route to Workshare is entered at the MFP. Because of this, you cannot connect any other types of collection nodes (Input Folder, MFP User Box, etc.) to that indexed Workshare Connector node in your workflow. In this case, if you need to add other collection nodes to your workflow, you must add a new Workshare node that is not connected to an Index Form.
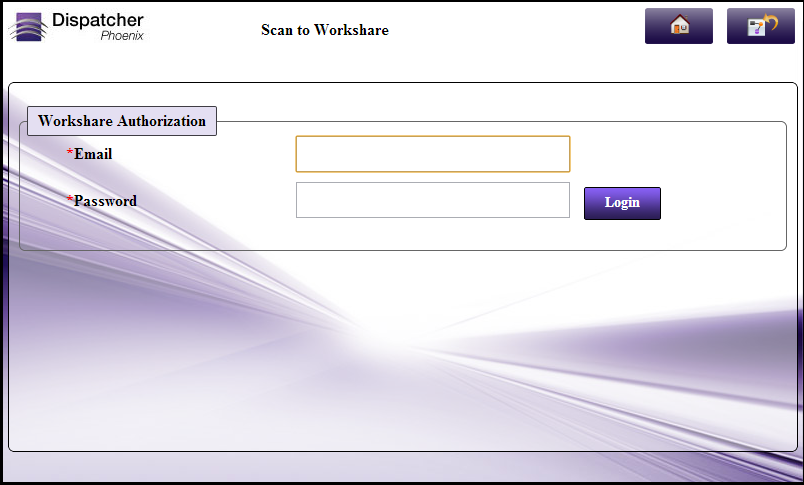
Workshare Index Form On MFP
At the MFP, the Workshare Index Form will be separated into two separate screens, as follows (if login is required):
1st Screen: Workshare Login
2nd screen: Choosing A Workshare Folder / Creating a new Workshare Folder
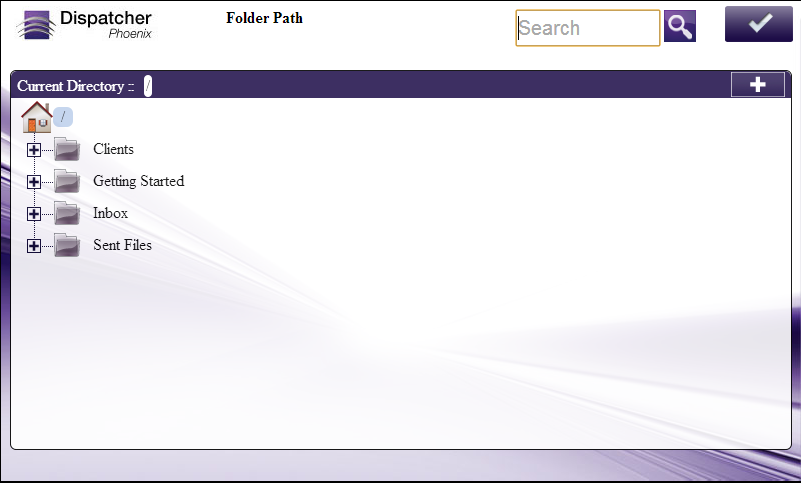
A Search field is provided for you to use to narrow the list of folders. This field features type-ahead functionality to help you quickly filter the folders displayed on the screen. You can begin entering characters into the field and the folders will be filtered accordingly. The search operation will be conducted on any folders and sub-folders within the root directory.
-
A wildcard asterisk (*) can be used to represent more characters in a string of characters. For example, if entering inv* in the Search field, the folder results would display any folders that begin with those three letters (e.g., inv01, inv02, invoice, etc.). Or, if entering *inv in the Search field, the folder results would display any folders that end with those three letters (e.g., 01inv, 02inv, etc.)
-
A wildcard question mark (?) can be used to represent an arbitrary character. For example, if entering INV0? in the Search field, the folder results would display INV01, INV02, INV03, etc.
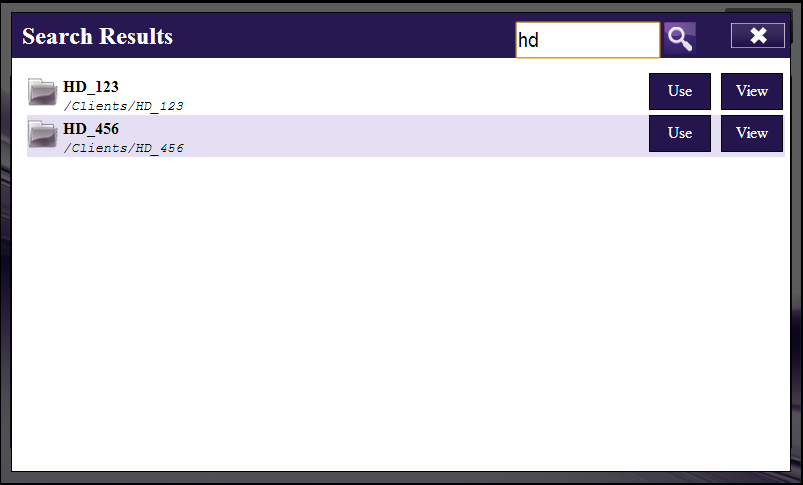
Once the folder list is filtered per your search, you can do the following:
-
Tap on the Use button to select that particular folder.
-
Tap on the View button to return to a directory structure view of that particular folder.
-
Release the filter by tapping on the X button next to the Search field.
-
Tap on the Search icon next to the field to submit the search criteria again.
Database Browsing - Workshare Configuration
You can also manually configure a query to retrieve data (e.g., list of folders, validation, etc.) from Workshare.
Using the Index Form Builder, do the following:
-
Add a new field, such as a drop-down list.
-
Define an On Load event for the field; then add a Query.
-
Choose Workshare Data Source from the Query drop-down list.
-
The Workshare Data Source Configuration window appears, which allows you to perform specific actions in order to retrieve data from Workshare.
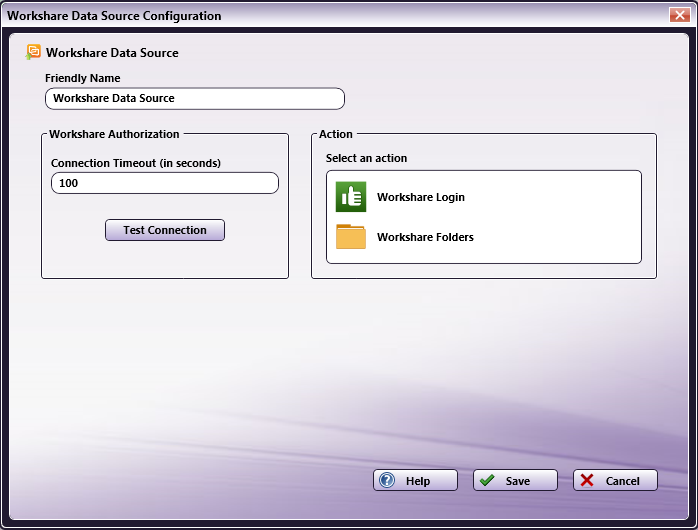
Do the following:
-
In the Friendly Name field, enter an identifying name for the Workshare data source configuration.
-
In the Action area, you can choose what kind of action to perform on the Workshare data source. Options include:
- Workshare Login – Once you click on this option, you will see Email and Password fields appear under the Workshare Authorization area. This option is designed to validate the login credentials that are entered at the MFP (email and password) against the Workshare data source. This action returns the following records:
-
[result] - The result of the login: true or false
-
[message] - Text regarding a successful or unsuccessful login.
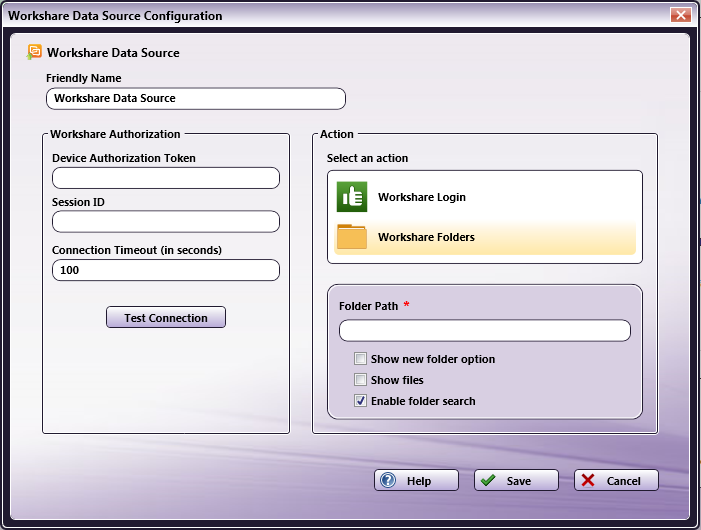
- Get Workshare Folders - Use this action to display a list of folders within a specific Workshare Folder Path. When you select the Get Workshare Folders item, new fields will appear for configuration, as in the following illustration:
-
Folder Path – Enter the name of the Workshare root folder that you want displayed at the MFP panel.
-
Show new folder option – Check this option to allow the user to create a new Workshare folder at the MFP.
-
Show files - Check this option to display files in Workshare folders at the MFP.
-
Enable folder search – Check this option to display a Search field that can be used to filter the list of Workshare folders displayed on the panel. Note that the Search field includes type ahead functionality. This option is enabled by default.
-
You can select the Test Connection button to make sure that you are connected properly to Workshare.