Output Printer
To distribute to an MFP for printing and open up the Printer Node window, add a node for Printer and double-click on it. The setup to output to a printer will vary based on installed applications and printers available on the network. Files can be sent for Windows, LPR, or Raw File printing.
Note: If you are having problems printing a specific file (of any supported document format), try using the PageScope Web Connector Direct Print feature to print the file. If the problem persists, contact your Konica Minolta representative with the file at issue.
Windows Printing
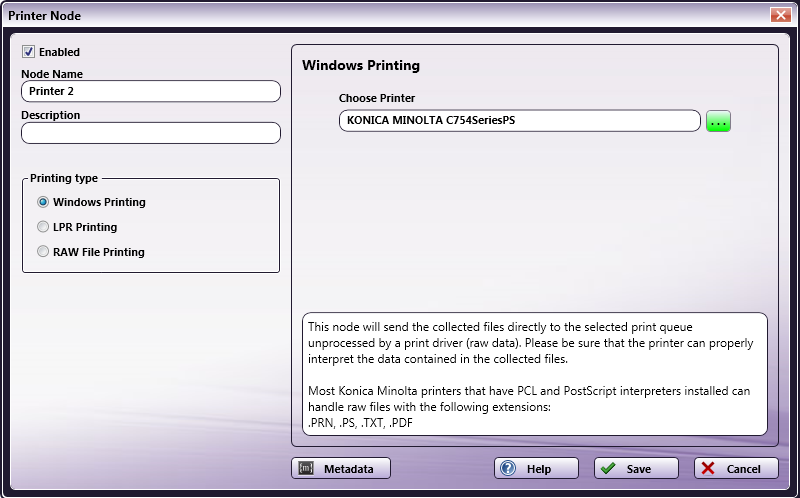
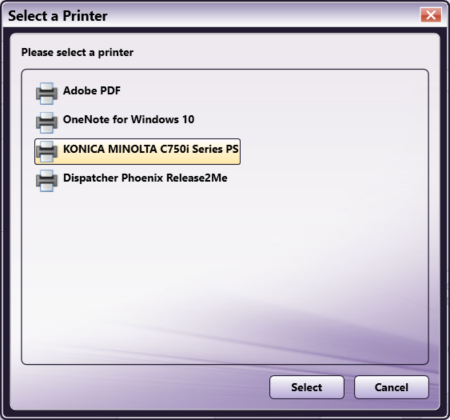
For Windows Printing, you choose an available printer, but an application is not necessary, as raw data is sent and a print driver is not used. Click on the ellipsis icon ( ) to select the desired printer. The Select a Printer window will appear, as in the following illustration:
You can also use metadata in that field by clicking on the Metadata button to launch the Metadata Browser window. From the Metadata Browser window, you can drag-drop metadata into the empty field provided.
Note: Not all printers have the ability to print all native file types. Please check that your target printer can natively print your intended file type before running your workflow.
LPR Printing
For LPR Printing, you need to enter the LPR Host/IP Address and identify the LPR Queue.
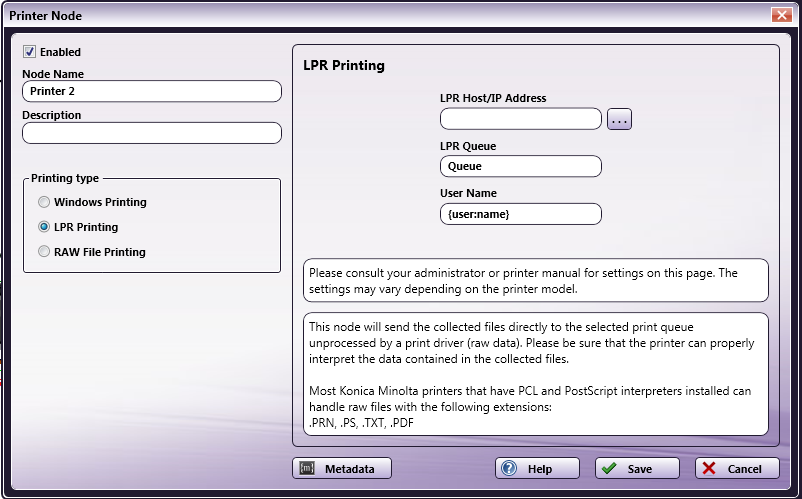
Enter either a valid host name (i.e., mysubdomain.domain.com) or numeric IP address (i.e., 10.10.220.110) in the LPR Host/IP Address field or click the ellipsis button () to open the MFP Explorer tool.
For logging purposes, the default user name used is the name of the Windows logged-in user (as signified by the {user:name} metadata listed in the User Name field). To change the default user name set via LPR, click on the Metadata Browser button next to the User Name field. This will launch the Metadata Browser window, which will allow you to browse through and choose/specify other metadata to use for the User Name.
Note: The User Name field will be validated. Special characters, such as {} or [ must be escaped with a backslash ( \).
The MFP Explorer will search the currently configured network for any MFP devices and then, once a device is selected, auto-populate the fields on the Printer node properties window with the correct information; in this case, any existing settings on the Printer node window will be overridden.
You can also use metadata in the LPR fields by clicking on the Metadata button to launch the Metadata Browser window. From the Metadata Browser window, you can drag-drop metadata into the fields provided.
RAW File Printing
For RAW File Printing, as shown below, you need to enter the Host/IP Address and the Port number.
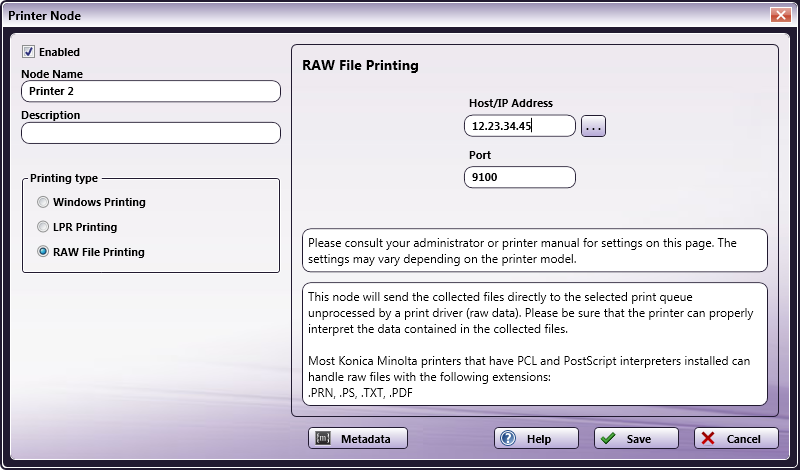
Enter either a valid host name (i.e., mysubdomain.domain.com) or numeric IP address (i.e., 10.10.220.110) in the Host/IP Address field or click the ellipsis button ( ) to open the MFP Explorer tool.
The MFP Explorer will search the currently configured network for any MFP devices and then, once a device is selected, auto-populate the fields on the Printer node properties window with the correct information; in this case, any existing settings on the Printer node window will be overridden.
You can also use metadata in the fields by clicking on the Metadata button to launch the Metadata Browser window. From the Metadata Browser window, you can drag-drop metadata into the fields provided.
 Firewall Note Third-party firewall applications, including some anti-virus software, may block ports used by Dispatcher Phoenix printing nodes. By default, LPR printing uses port 515 and RAW printing uses port 9100. While the LPR port number is not configurable, the RAW port may differ if the number has been changed. If files fail to print, check the workflow log for the following message:
LPR: “ Failed to connect to ’lpr://printer.com:515/Queue’ “
or
RAW: “ Failed to connect to ‘raw://printer.com:9100’ “
To allow printing to function properly, please consult your firewall application documentation to either stop blocking ports 515 and/or 9100 or to allow access by the workflow engine process, blox-erl.exe. |