

NetDocuments Connector
Use the NetDocuments Connector node to distribute documents to NetDocuments, an online file sharing and Cloud content management service for the legal vertical. The connector allows you to send documents to NetDocuments via an automated workflow, or you can access NetDocuments directly at the MFP panel. NetDocuments’ architecture includes cabinets, which have their own access settings, and cabinet subfolders, which are accessible to any user who has access to the cabinet that contains the folders. For more information, see the NetDocuments Online Help.
Note: To use the NetDocuments Connector node, you must have a NetDocuments account.
To open the NetDocuments Connector node’s configuration window, add a Distribution node for NetDocuments to your workflow and double-click on it.
Adding Your NetDocuments Account
To utilize the NetDocuments Connector, the user must first add the NetDocuments Account to Dispatcher Phoenix Web. For more information, see the Dispatcher Phoenix Web Accounts page.
Configuring the NetDocuments Connector
-
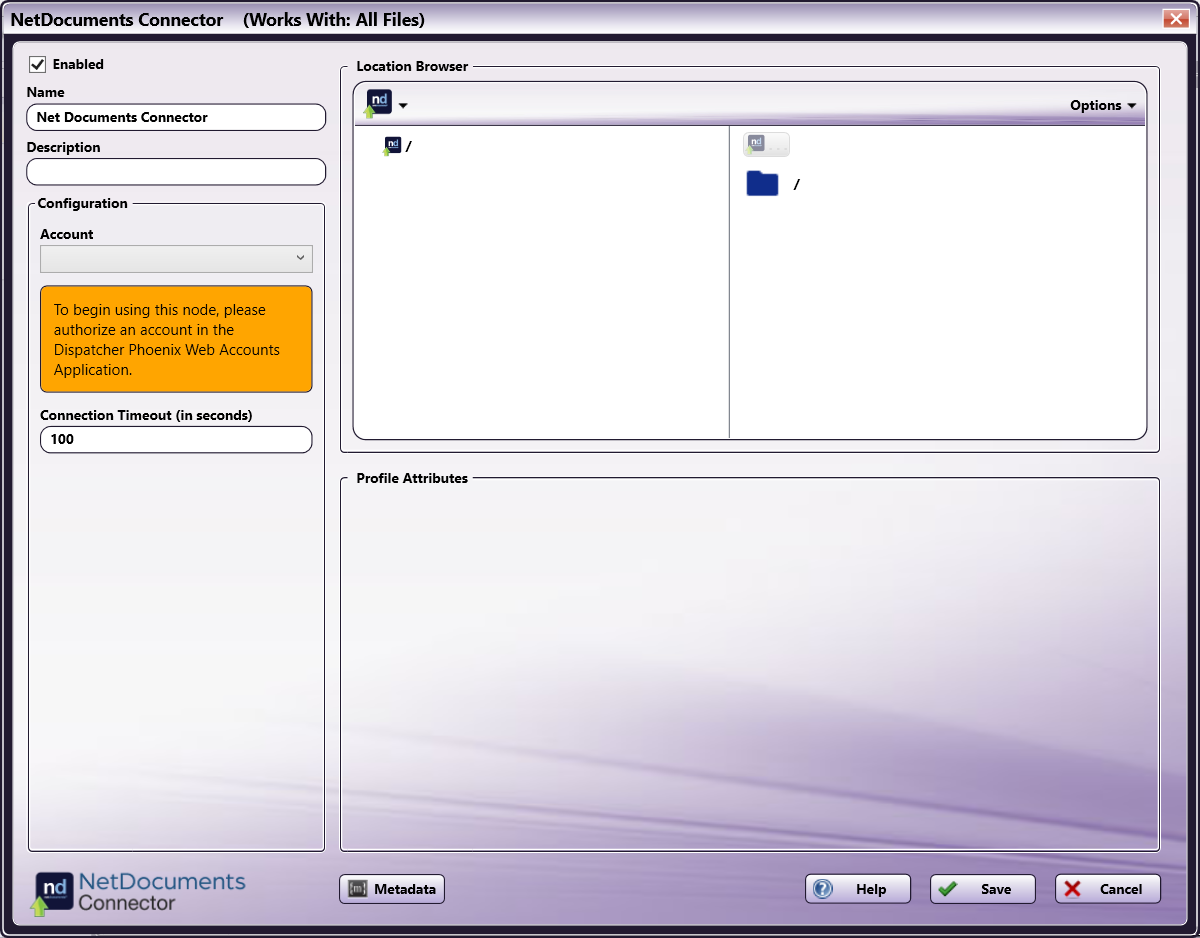
Enabled - To enable this node in the current workflow, ensure the Enabled box is checked. By default, nodes are enabled upon creation. If you disable the node, the workflow will ignore it. While the workflow will still validate, documents will not be output and may be lost. Note that a disabled node does not check for logic or error conditions.
-
Node Name - The node name defaults to this field. This name appears in the workflow below the node icon. Use this field to specify a meaningful name for the node that indicates its use in the workflow.
-
Node Description - Enter an optional description for this node. A description can help you remember the purpose of the node in the workflow or distinguish nodes from each other. If the description is long, you can hover the mouse over the field to read its entire contents.
Buttons
- Help - To access Dispatcher Phoenix Online Help, click this button.
- Metadata - To access the Metadata Browser window, click this button.
- Cancel - To exit the window without saving any changes, click this button.
- Save - To preserve your node configuration and exit the window, click this button.
Connection Setup
In the Connection area:
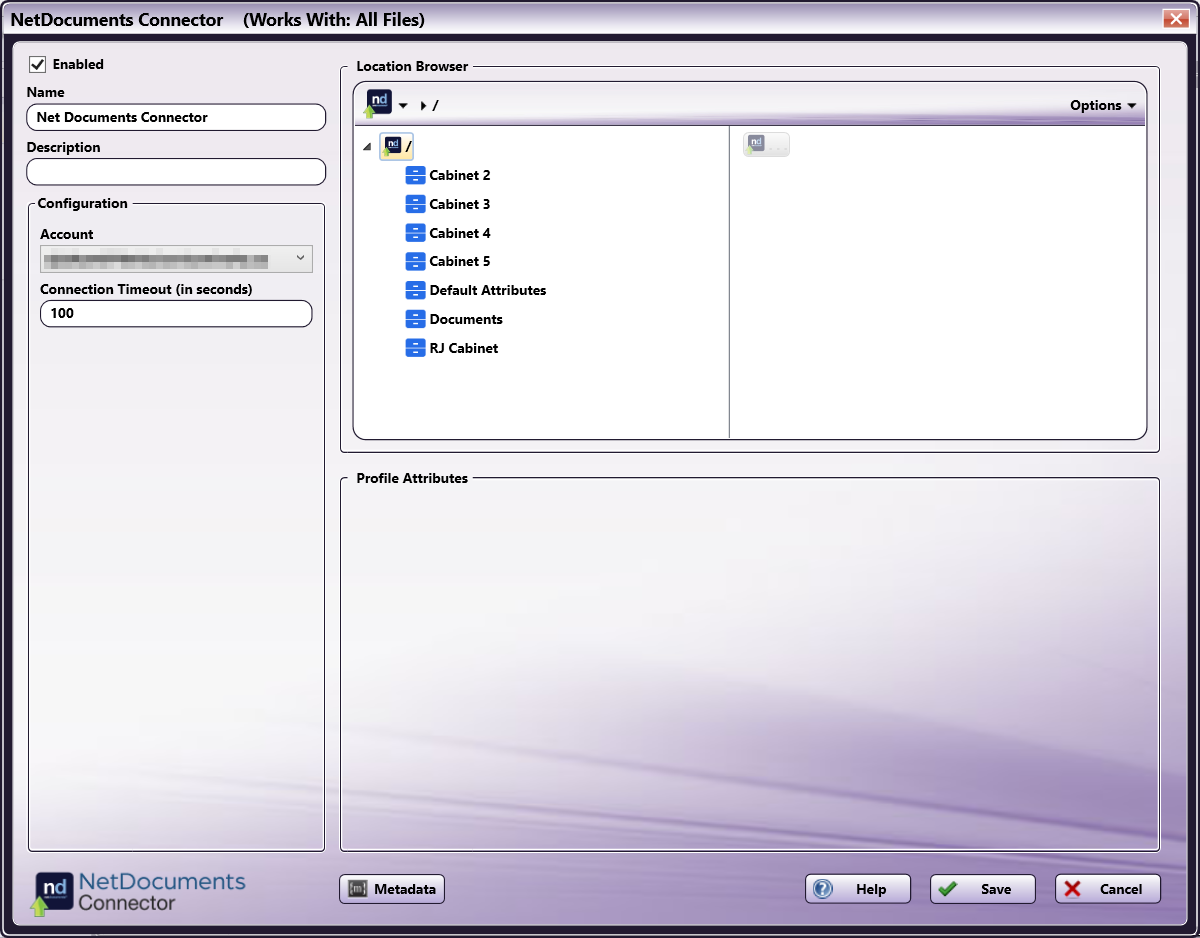
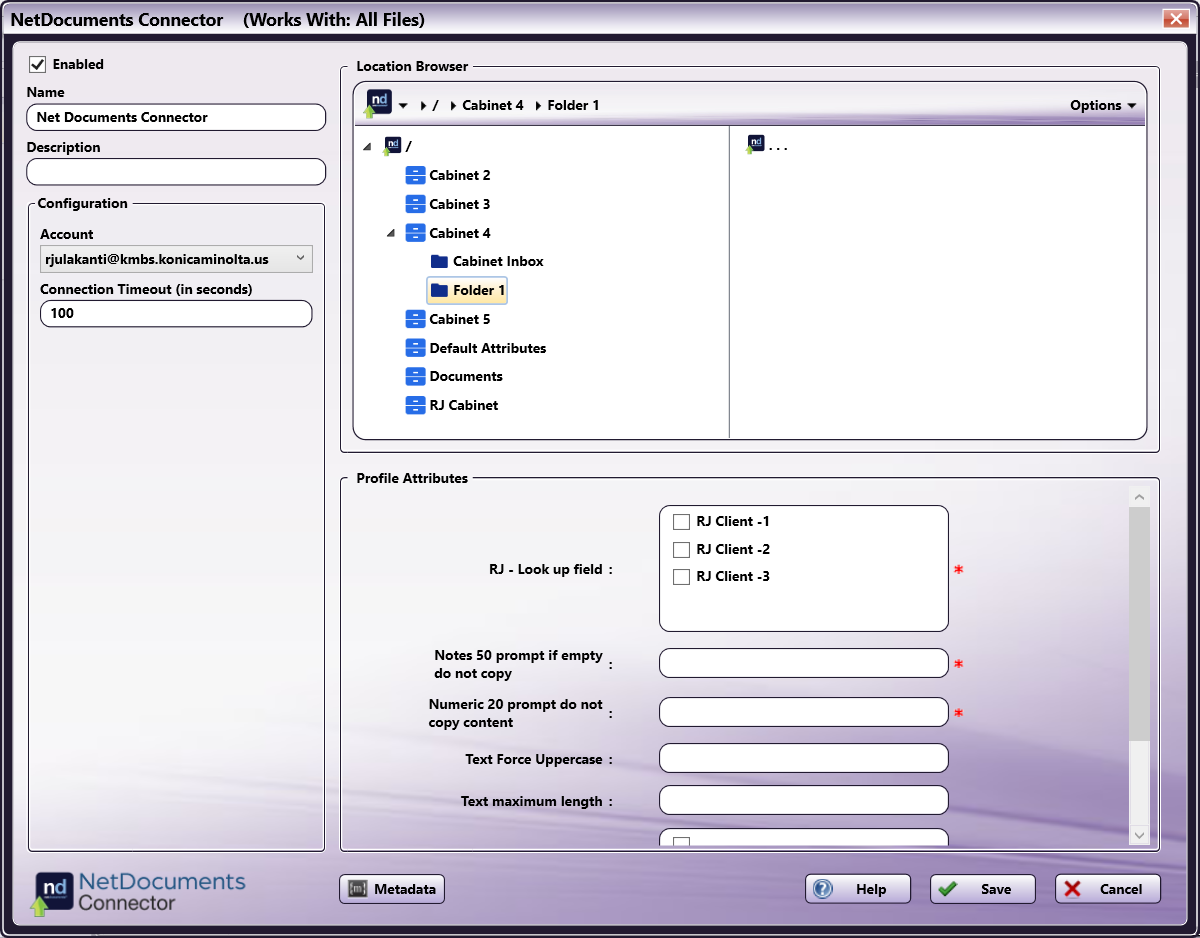
- Account - Click the drop-down to see a list of authorized NetDocuments accounts. If no accounts appear, be sure the logon user accounts for Dispatcher Phoenix Web and NetDocuments must match.
- Connection timeout (in seconds) - Specify the number of seconds you want to elapse before a network connection times out (i.e., for login or logout operations).
Connecting to NetDocuments
To connect to NetDocuments, do the following:
-
In the Connection area, select a NetDocuments account from the dropdown.
Note: If you have not already set up a NetDocuments account through Dispatcher Phoenix Web, you must do this before it will appear in the dropdown.
To modify the default Connection Timeout (the seconds allotted for the time without communication, after initial connection to the server, before a timeout occurs), enter a value in the Connection Timeout field.
Node Configuration
To begin sending messages, do the following:
-
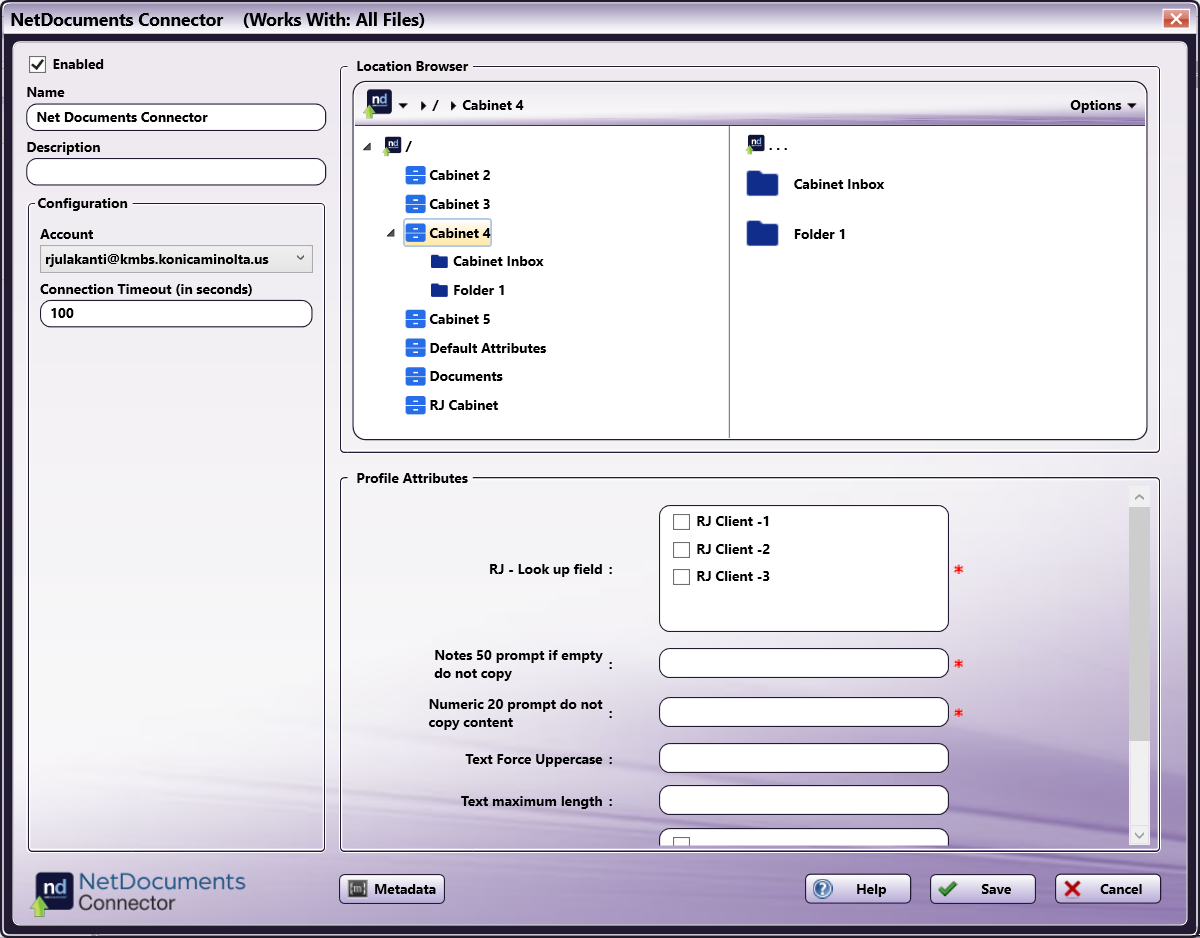
In the Location Browser area, select one of the available cabinets in the area on the left. This will show the available subfolders contained within that cabinet in the area on the right.
-
Select one of the available folders.
-
In the Profile Attributes area, enter any additional information needed. Fields marked with asterisks are required by NetDocuments.
-
Select the Save button to save the node configuration and close the node.
Options
Use the Options button in the upper-right corner of the Location Browser area to configure the folder view or add a new folder. The drop-down menu includes a shortcut key for each option:
- Show files - To show files within the folder browsing view, select this option.
- Show tree view - To view the complete folder structure in a tree view, select this option.
- Create New folder - To create a new folder in the currently selected folder path, select this option. The Create New Folder window appears.
- Refresh - To refresh the folder browser view (Show tree view or Show files) in the node, select this option.
Creating the NetDocuments Index Form
To set up the NetDocuments Connector with an attached Index Form, do the following:
-
Add a node that is capable of attaching an Index Form (e.g. MFP Panel) to your workflow by dragging and dropping it into the Workflow Builder area, and connect it to the NetDocuments Connector.
-
Configure the NetDocuments Connector node according to the Application Setup section.
-
Open the node associated with the Index Form.
-
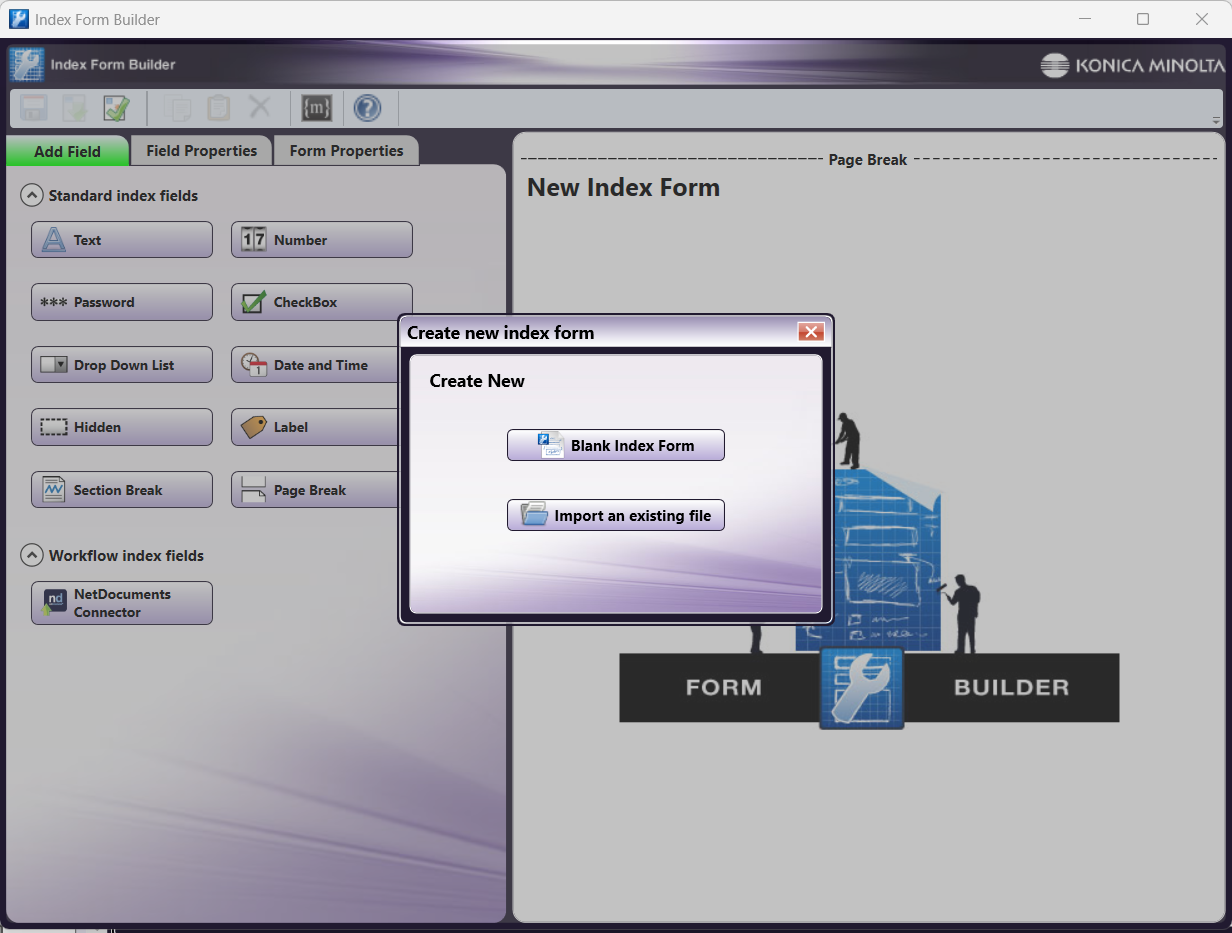
Click the checkbox next to Attach Index Form and then the + icon to open the Index Form Builder. Then, select the Blank Index Form option in the pop-up, as in the following illustration:
-
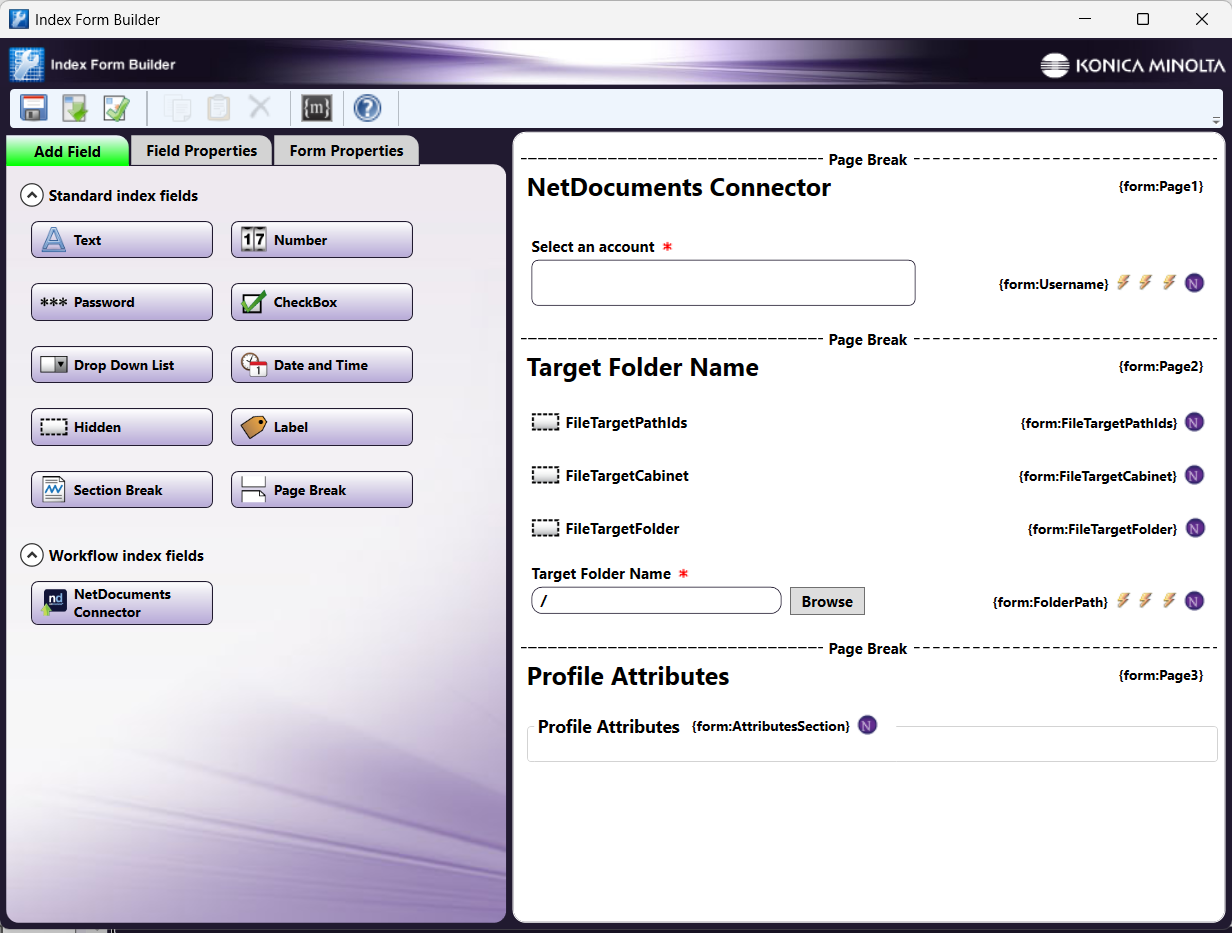
Drag the NetDocuments Connector icon to the Index Form Builder working area. Several fields will populate, as in the following illustration:
-
Validate, Save, and close the Index Form Builder.
Accessing NetDocuments on MFP
When the NetDocuments Connector is configured with an Index Form, the user will be automatically logged into the connected account when accessing the workflow from the MFP. To use the NetDocuments Connector at the MFP Panel, do the following:
-
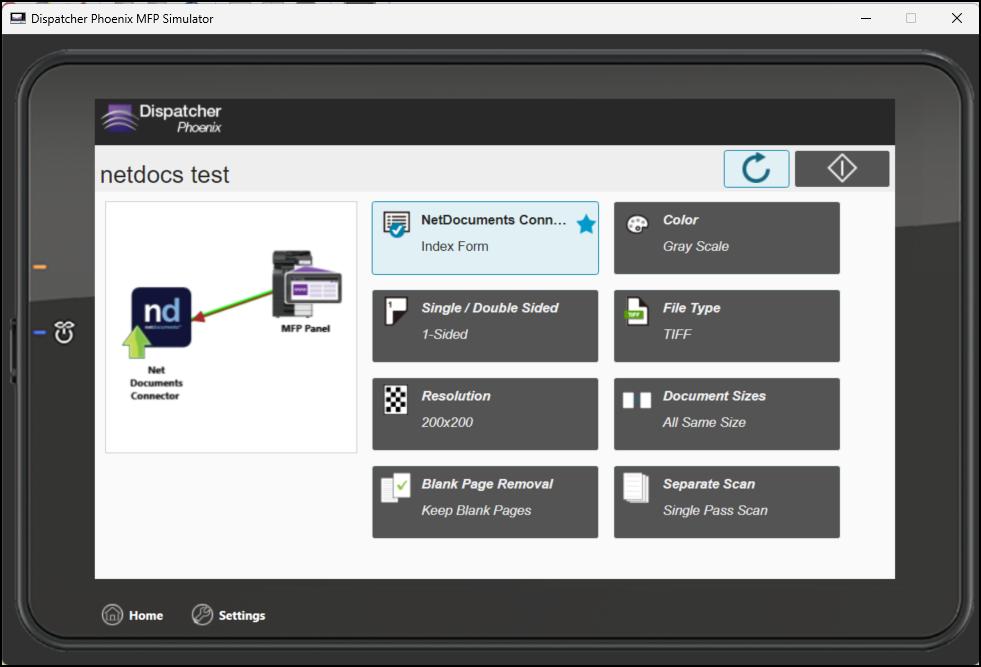
At the MFP, open the workflow containing the NetDocuments Connector and the node associated with the Index Form that you have already configured:
-
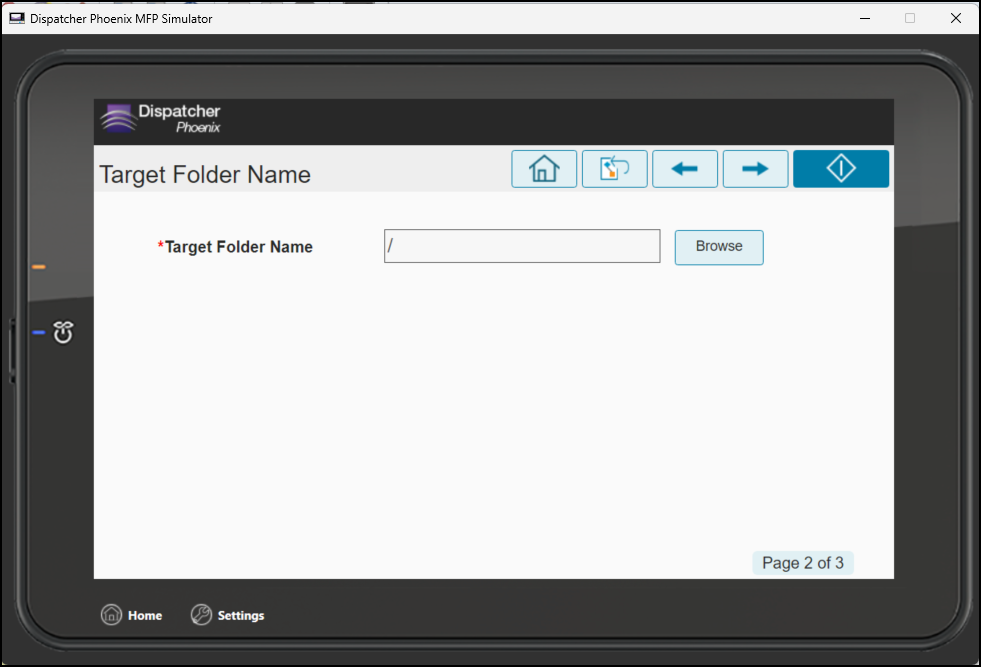
Enter the Target Folder Name or use the Browse button to open a directory, as in the following illustration:
-
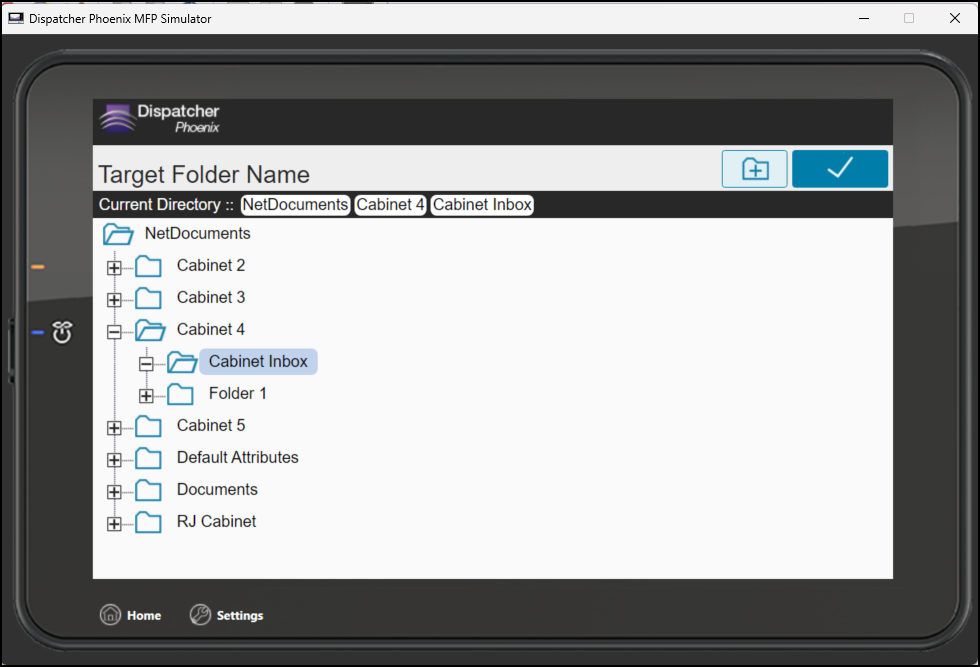
If you are browsing for a Target Folder, use the directory to select it, as in the following illustration:
-
Enter any additional information you need to, as in the following illustration:
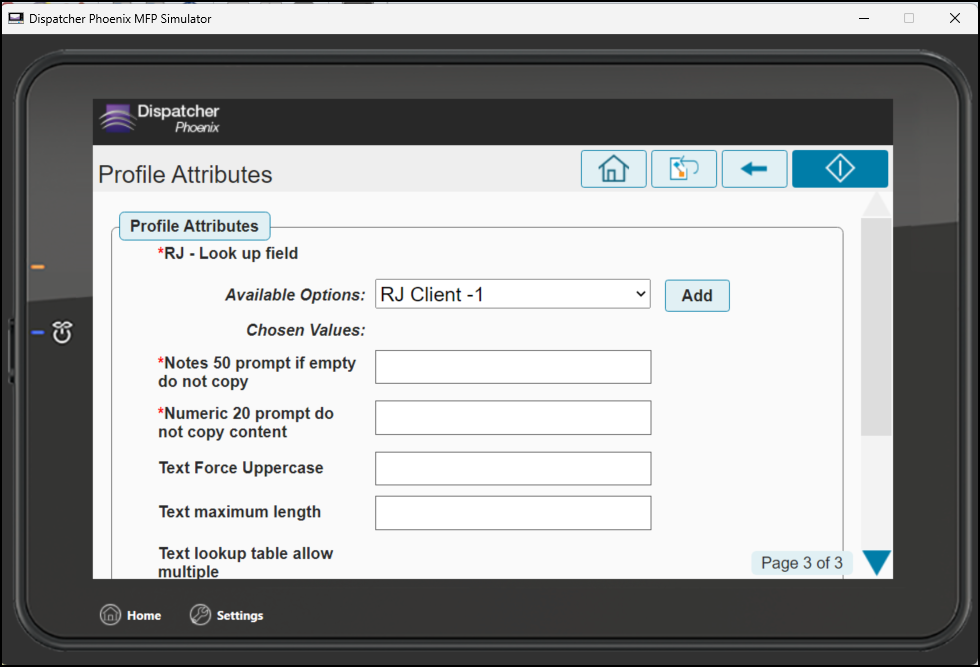
Note: Fields marked with asterisks are required by NetDocuments.
-
Select the Scan button to scan your document to the selected location.